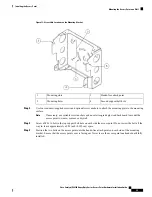
Metal mounting strap
3
Pole clamp bracket
1
Pole
4
Strap slot in strap bracket
2
Step 3
For pole diameters of 3.5 inch (8.9 cm) or less, mount the pole clamp bracket assembly to a pole using two
metal straps looped through the space between the pole clamp bracket and the strap brackets to provide
maximum holding strength for extreme environments. Following the instructions provided with the banding
strap tool (BAND IT) (AIR-BAND-INST-TL=), loop each metal strap twice.
Do not place the metal straps in the large open area between the pole clamp bracket and the strap
brackets because this does not properly secure the access point.
Caution
Step 4
Position the pole clamp bracket on the pole as needed before tightening the metal bands.
When the metal bands are tightened to the full tension, the pole clamp bracket cannot be adjusted
unless the metal bands are cut or disassembled.
Note
Step 5
Tighten the metal bands using the banding strap tool (BAND IT) (Cisco AIR-BAND-INST-TL=) by following
the operating instructions in the box with the tool. Ensure that the metal bands are as tight as possible.
Step 6
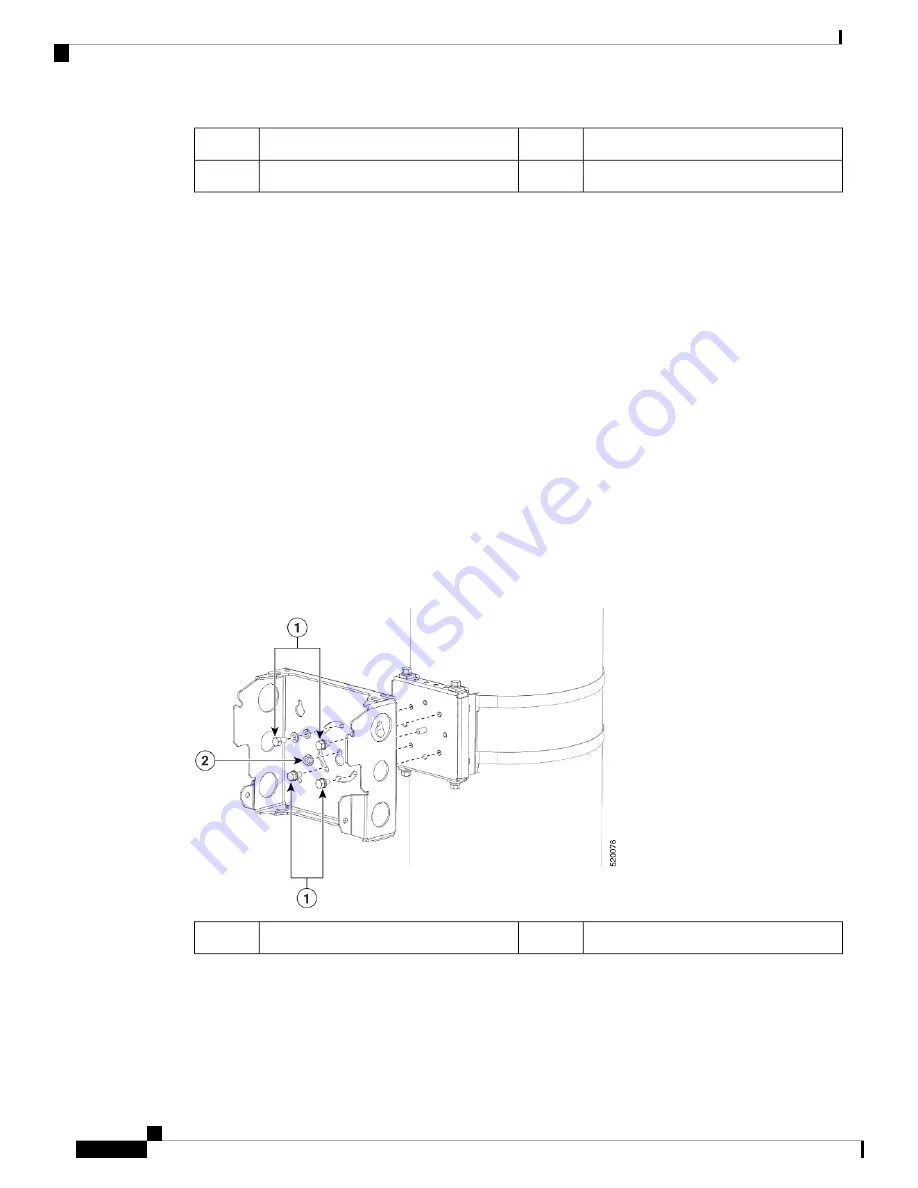
Place the mounting bracket onto the pole clamp bracket support bolt.
Step 7
Install four M8 x16 bolts (with flat and lock washers) into the bolt holes.
Step 8
Hand-tighten the bolts and the nut (do not overtighten).
Step 9
Adjust the top edge of the mounting bracket until it is horizontal and tighten the bolts and the flange nut to
13 to 15 ft lbs (17.6 to 20.3 Nm).
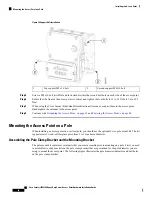
Figure 17: Attach the Mount Bracket
Flange nut
2
M8 x 16 bolts
1
Step 10
Screw a M8 x16 bolt (without a flat or lock washer) in the top support bolt hole on each side the access point.
Do not screw the bolt all the way in. Leave a gap of approximately 0.25 inch (0.635 cm).
Step 11
Position the two bolts on the access point onto the hands-free attach point of the mounting bracket.
Cisco Catalyst IW6300 Heavy Duty Series Access Point Hardware Installation Guide
30
Installing the Access Point
Pole Mounting


