25
Part 3: OPERATION
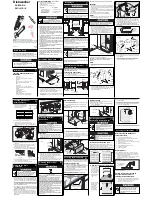
3.4 Safety and Operation Checks
Refer to Part 3.3, Start-up Procedure, on the previous page before performing the
steps listed below.
Perform the following steps to check the dishwasher safety devices and to
operate the dishwasher for the first time.
Safety Checks
WARNING:
Perform the following checks before placing the machine into service
for normal operation.
WARNING:
Never bypass a safety device in order to operate the dishwasher for normal operation.
NOTE:
Refer to the corresponding repair or adjustment procedure in Part 5, Basic Service,
if a safety device fails to function in the manner prescribed below.
Dishwasher Condition
The dishwasher is full of water, steam or electric heat energized, and dishwasher power is on.
Temperature gauges indicate proper temperatures. The pumps and conveyor are running.
Door Safety Switch Check
1. Slowly raise the wash tank lift-out door approximately 1 inch.
Dishwasher pumps and conveyor stop.
2. Lower wash tank door. Press green start button.
Pumps and conveyor run.
3. Slowly raise the power rinse tank lift-out door approximately 1 inch.
Dishwasher pumps and conveyor stop.
4. Lower power rinse tank door. Press green start button.
Pumps and conveyor run.
Table Limit Switch Check (if applicable)
1. Slide empty dishrack on unload table system until it contacts the installed table limit switch.
Dishwasher pumps and conveyor stop.
2. Remove the dishrack. Press green start button.
Pumps and conveyor run.
Summary of Contents for 135-USN-72
Page 1: ......
Page 3: ...TECHNICAL PUBLICATION SHEET i TECHNICAL PUBLICATION SHEET ...
Page 4: ...TECHNICAL MANUAL VALIDATION CERTIFICATE ii TECHNICAL MANUAL VALIDATION CERTIFICATE ...
Page 5: ...APPROVAL AND PROCUREMENT RECORD iii APPROVAL AND PROCUREMENT RECORD ...
Page 9: ...vii THIS PAGE INTENTIONALLY LEFT BLANK ...
Page 36: ...THIS PAGE INTENTIONALLY LEFT BLANK 18 ...
Page 74: ...56 Part 6 REPLACEMENT PARTS THIS PAGE INTENTIONALLY LEFT BLANK ...
Page 83: ...65 Part 6 REPLACEMENT PARTS THIS PAGE INTENTIONALLY LEFT BLANK ...
Page 96: ...74 Part 6 REPLACEMENT PARTS Figure 6 8 Rinse saver assembly 1 2 3 4 9 10 11 2 2 12 5 4 6 7 8 ...
Page 98: ...76 Part 6 REPLACEMENT PARTS Figure 6 9 Steam coil assembly Tank 4 8 9 10 7 6 5 4 1 2 3 ...
Page 126: ...94 Part 6 REPLACEMENT PARTS Figure 6 18 Dishracks and PRV 1 2 3 ...
Page 130: ...98 Part 6 REPLACEMENT PARTS 1 2 3 4 5 6 7 8 9 Figure 6 20 MRAN 90 Pawl Bar ...
Page 142: ...110 Part 6 REPLACEMENT P ARTS THIS PAGE INTENTIONALLY LEFT BLANK ...
Page 143: ...111 Part 6 REPLACEMENT P ARTS PART 7 ELECTRICAL SCHEMATICS Part 7 ELECTRICAL SCHEMA TICS ...
Page 159: ...112 THIS PAGE INTENTIONALLY LEFT BLANK ...
Page 160: ...112 THIS PAGE INTENTIONALLY LEFT BLANK ...
Page 163: ...115 Part 6 REPLACEMENT P ARTS ...