35
Manual Ref: xLCD400K
Transferring Files Over FTP
The LCD400K has a built in FTP server which is great
for sharing test images.
Users can access the test monitor’s internal storage to
retrieve test fi les from any PC on the same network as
the test monitor. To connect to the LCD400K as an FTP
server just follow the simple steps below:
1.
Connect the LCD400K to the network switch or
router using a patch lead from either network port.
2.
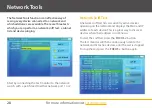
From the main menu enter the ONVIF Test and
press '
IRIS -
' to turn on DHCP. The server will then
assign the test monitor a new IP address. If the
network doesn't support DHCP you will have to
enter the network settings manually by pressing
the '
SET
' button. When complete take note of
the test monitor's new IP address.
3.
On a PC connected to the same network open
a new explorer window and enter '
ftp://
' followed
by the test monitors IP address into the address
bar and press '
Enter
' e.g. '
ftp://192.168.0.158
'.
4.
A log on box will then appear. Enter '
ftp
' (lower-case)
as the user name and password then click '
Log On
'.
5.
All the fi les stored on the test monitor will now be
displayed. Snapshots and recordings can be found
in the '
cctv
' folder. Recordings are organised into
folders named with dates on which the images
were captured.

