


34
For more information visit
cctvmate.com
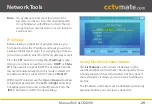
Upgrading Firmware
We sometimes add new features to the LCD400K in a
continued effort to make the test monitor as great
a tool as possible.
By upgrading the firmware you can add all these new
features to your existing device. To upgrade the systems
firmware follow the steps below:
Note:
To upgrade the firmware the battery level must be
at least 50% and you must be connected to a
network with direct internet access.
1.
Connect the LCD400K to the network switch or router.
2.
Enter the '
Settings
' menu and select '
System Upgrade
'.
3.
First you need to connect the test monitor to the
network. Press '
SET
' to enter the '
IP Settings
' screen.
4.
Select '
DHCP
' mode to automatically acquire the
network settings. If DHCP isn't supported you will
have to select '
Static IP
' and enter the settings
manually. Press '
IRIS +
' to confirm settings and exit.
5.
One of three messages will then be displayed:
A.
'
Found New Version Software
' - Press '
FOCUS +
'
to
download.
B.
'
Already Latest Version
' - Your firmware is up
to date already.
C.
'
Communication Error
' - Check your network
settings and try again.
6.
The firmware is split into two packages. Once
downloaded it will be checked and then '
New
Firmware Is Ready To Upgrade
' will be displayed.
7.
To install the upgrade press '
ZOOM +
'. The device
will restart and enter the '
System Upgrade
' screen.
Press '
SET
' to install the new firmware.
8.
When '
Upgrade Successful
' is displayed press '
Mode
' to
exit. The device will restart and show the main menu.
9.
Enter '
Settings
' and the new firmware version will be
displayed. To view a list of new features highlight
'
System Upgrade
' and press the '
SCR
' button.


