66
67
you want to make further settings.
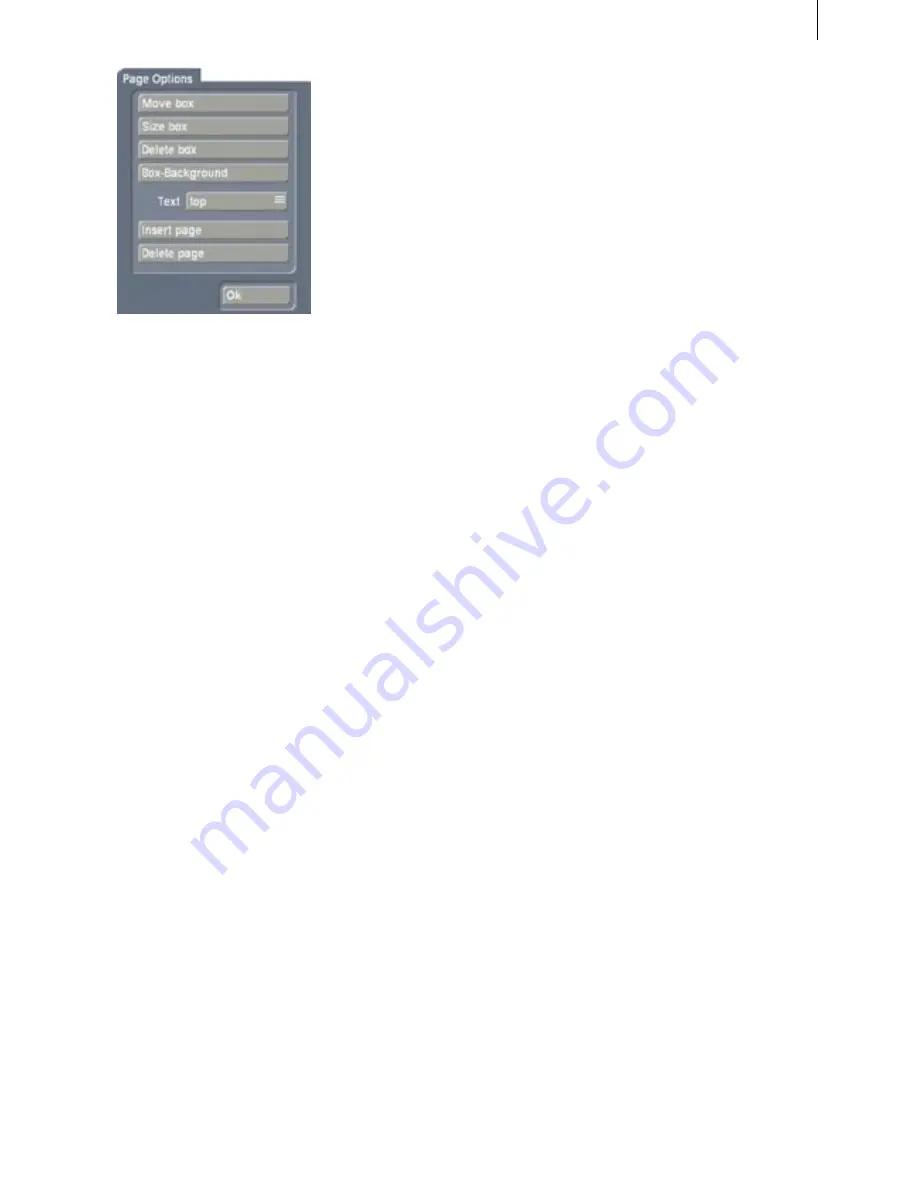
– Clicking on "
Insert Page
" causes a new text page
to be inserted before the active page. The "
Page
Options
" window closes automatically and you
now see the newly inserted page displayed over
your video. Clicking on "
Delete Page
" causes the
page being displayed (active page) to be deleted.
The "
Page Options
" screen closes and the follo-
wing page is displayed. If the very last page was
deleted, then the previous page is displayed.
(
12
) Clicking on "
Delete Line
" causes the line
containing the position marker to be deleted.
(
13
) A click on "
Archive
" opens a field displaying
four buttons: "
Load
", "
Save
", "
Delete
", and "
Can-
cel
".
Clicking on "
Load
" displays a list of the previous-
ly saved titles. In this list you select a title, either
directly or with the slider, and confirm ("
OK
").
Clicking on "
Save
" displays the same list. Now you
have two possibilities:
1. You can click the gray rectangle below the list so
that the keyboard is displayed and you can assign
a name to the previously created title, followed by
clicking on "
OK
" within the keyboard and in the
text archive field.
2. You can select a title from the list and then click
on the gray line which now contains the name of
the selected effect. Within the keyboard field you
now overwrite this name with another of your
choice. The difference to the first possibility is
that you overwrite not only the name, but also the
archived title, which is then irrevocably lost. Al-
ternatively, you can select a title without clicking
on the yellow line. If you then confirm with "
OK
",
the selected title is replaced by the previously
created title, but retains its name. With the help
of archiving you can save your frequently used
standard text independently of projects and reuse
them at any time.
If you click on "
Delete
", a list of saved titles is
displayed in which you can now select the title to
be deleted and confirm with "
OK
".
A click on "
Cancel
" closes the menu without ac-
cepting any settings.
(
14
) With the "
OK
" button you confirm again all
– With "
Move Box
" you can change the position
of the existing text box. You drag it with the track-
ball and confirm the new position with the left
trackball button, opening the "
Page options
" win-
dow again. If you don't want to change anything
else here, confirm with "
OK
".
– After clicking "
Size Box
" you use the trackball to
resize the panel at the upper and right edges. After
fixing the new size by clicking on the left track-
ball button, the "
Page Options
" window appears
again. If you don't want to change anything else
here, confirm with "
OK"
.
– Clicking on "
Delete Panel
" causes the active
(outlined) panel to be deleted. The previously in-
serted panel now becomes the active panel. After
deleting the panel you must activate the "
Page
Options
" window again if you want to make
further settings.
– The option "
Box Background
" displays ano-
ther screen in which under "
Pattern
" you have
the choice among "
transparent
", "
unicolor
", and
"
textured
". The "
transparent
" setting has no
further options. If you would like to have a "uni-
color" panel background, then you can call up the
color box under "
Color
". If you decide for "
textu-
red
", then you can choose a pattern under "
Textu-
re
". After confirming your settings with "
OK
", you
must activate the "
Page Options
" screen again if
you want to make further settings.
– With the selection button "
Text
" you have the
choice of placing your text (already entered or yet
to be entered) at the positions "
top
", "
center
", or
"
bottom
" in the text panel. After selection, you
must activate the "
Page Options
" screen again if
Summary of Contents for Prestige
Page 1: ...Casablanca Prestige User manual ...
Page 20: ...20 ...
Page 40: ...40 ...
Page 88: ......


