


74 Chapter 7 3D Object Acquisition
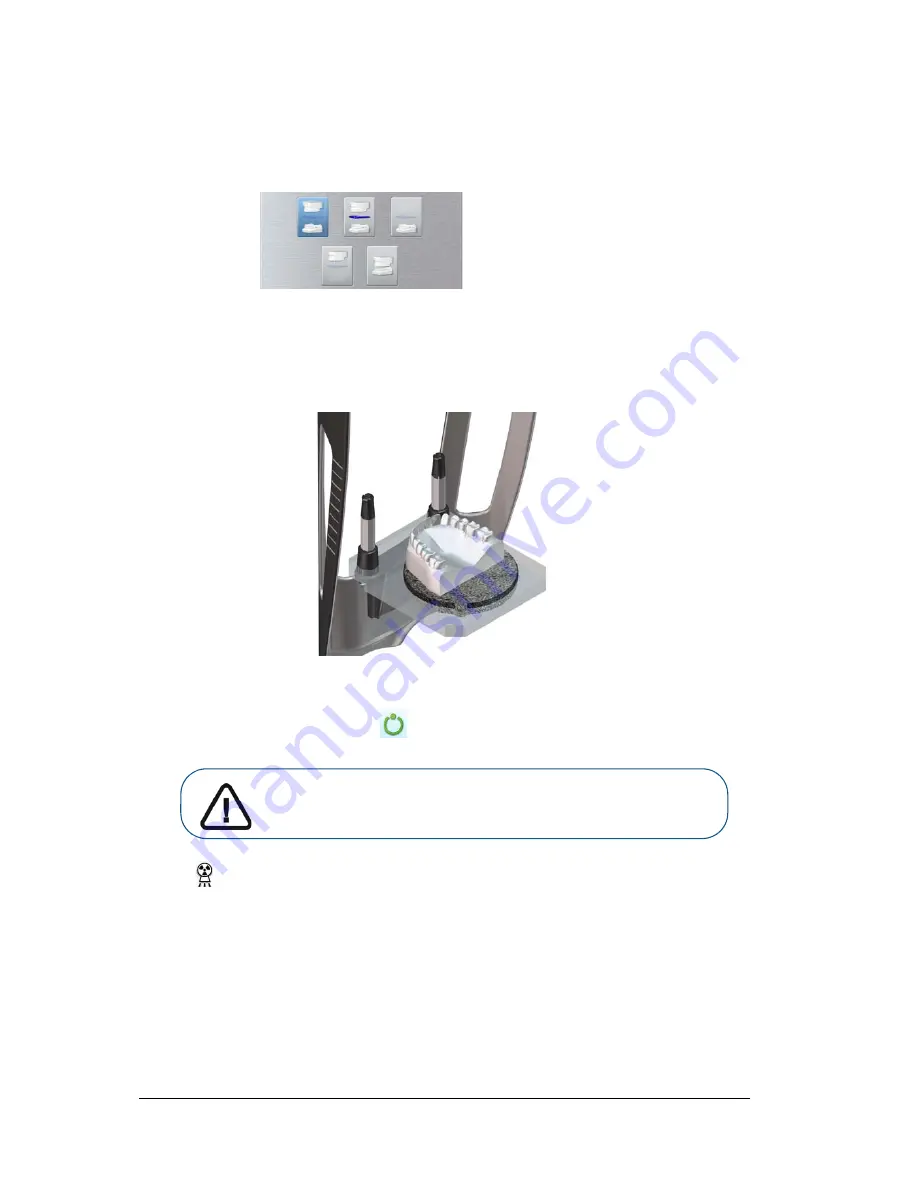
Launching the Plaster Acquisition
To launch the acquisition, follow these steps:
1.
Select either one of the acquisition options.
2.
Follow the on-screen animated instruction on how to correctly position either one of the following
objects at the center of the black foam:
•
upper jaw or lower jaw.
•
upper and lower jaw in occlusion.
3.
Leave the X-ray room and close the door.
4.
On the
Acquisition
interface, when
is green, press and hold the exposure button of the X-ray
remote control until the end of acquisition.
The
indicator in the acquisition interface turns yellow and a warning sound is emitted to
indicate that X-ray emission is in progress.
The acquired image appears in the
Preview Screen.
If you select the option that requires the
acquisition of the wax bite, see the following section for information:
“Launching the Wax Bite
Acquisition.”
5.
Once all items have been scanned, the
Acquisition
interface closes. Wait for the 3D object
reconstruction.
The reconstruction object will display in the image browser.
Important: If you have a problem that requires you to stop the
acquisition, release the exposure button of the remote control or
press the red emergency stop button.
Summary of Contents for CS 8100 3D
Page 1: ...User Guide CS 8100 3D Family CS 8100 3D CS 8100 3D Access CS 8100SC 3D CS 8100SC 3D Access...
Page 6: ...vi...
Page 8: ...2 Chapter 1 Conventions in This Guide...
Page 28: ...22 Chapter 3 Imaging Software Overview...
Page 32: ...26 Chapter 4 Getting Started...
Page 46: ...40 Chapter 5 Acquiring Panoramic Images...
Page 94: ...88 Chapter 8 Maintenance...
Page 96: ...90 Chapter 9 Troubleshooting...


