


3. Select
OK
.
4. Select
OK
again when all settings are completed.
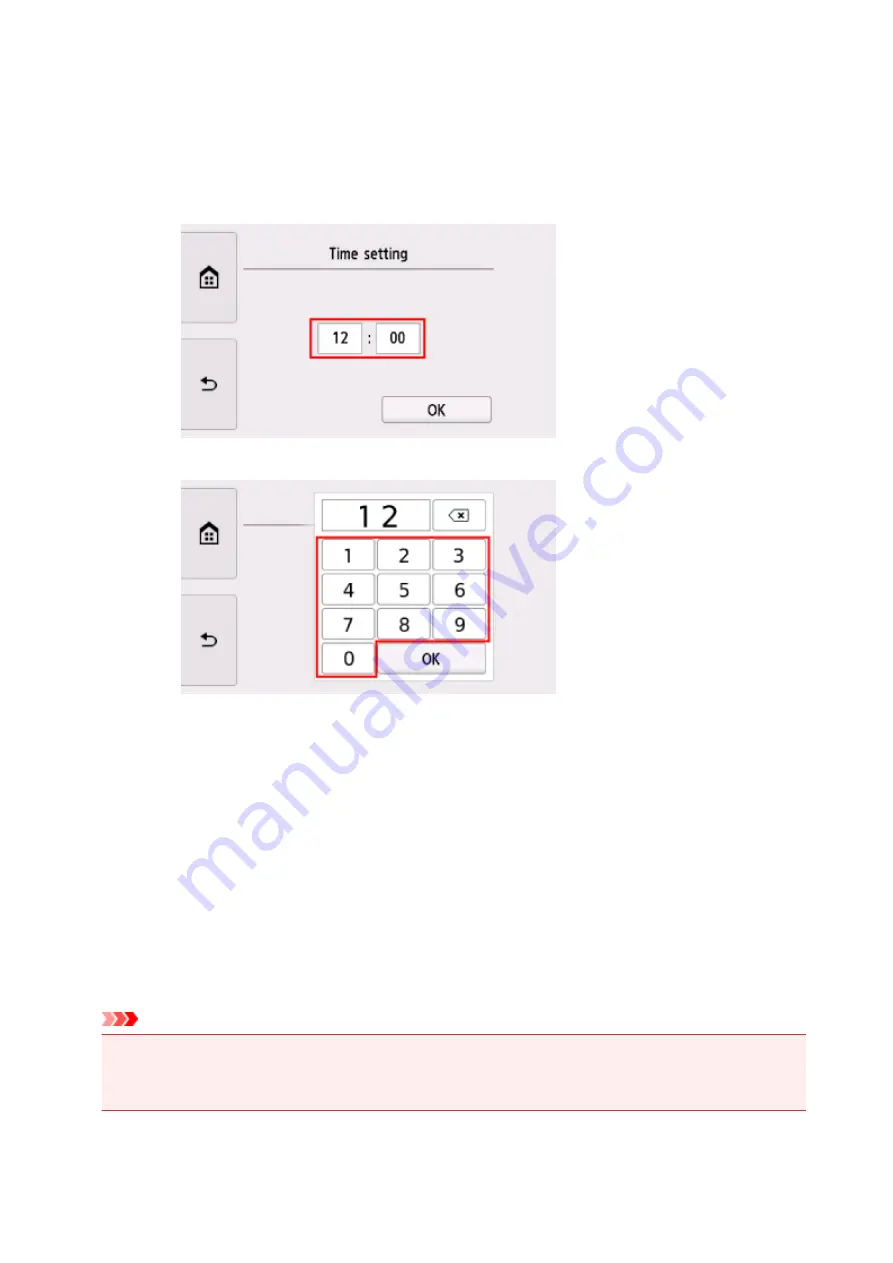
8. Set time.
1. Select a setting item to change.
2. Select number to enter.
Enter the date and time in 24-hour format.
3. Select
OK
.
4. Select
OK
again when all settings are completed.
9. Press
HOME
button to return to HOME screen.
Setting Daylight Saving Time (Summer Time)
Some countries adopt the daylight saving time (summer time) system that shifts the clock time forward at
certain periods of the year.
You can set your printer to automatically change the time by registering the date and time that daylight
saving time (summer time) begins and ends.
Important
• Not all the latest information of all countries or regions is applied for
Daylight saving time setting
by
default. You need to change the default setting according to the latest information of your country or
region.
382
Summary of Contents for TR8500 Series
Page 11: ...5B00 596 6000 597 C000 598 ...
Page 46: ...Note Many other convenient faxing features are available Faxing 46 ...
Page 49: ... Notices when printing using web service Notice for Web Service Printing 49 ...
Page 97: ...Replacing Ink Tanks Replacing Ink Tanks Checking Ink Status on the Touch Screen Ink Tips 97 ...
Page 127: ...Safety Safety Precautions Regulatory Information WEEE EU EEA 127 ...
Page 150: ...Main Components Front View Rear View Inside View Operation Panel 150 ...
Page 173: ...The Page Setup tab is displayed again 173 ...
Page 183: ...For more on setting items on the operation panel Setting Items on Operation Panel 183 ...
Page 199: ...Language selection Changes the language for the messages and menus on the touch screen 199 ...
Page 239: ...Note Selecting Scaled changes the printable area of the document 239 ...
Page 257: ...In such cases take the appropriate action as described 257 ...
Page 331: ...Note To set the applications to integrate with see Settings Dialog Box 331 ...
Page 341: ...ScanGear Scanner Driver Screens Basic Mode Tab Advanced Mode Tab 341 ...
Page 361: ...361 ...
Page 379: ...8 Specify number of time and select OK 9 Select OK The Function list screen is displayed 379 ...
Page 434: ...4 When a confirmation message is displayed click Yes 434 ...
Page 442: ...Receiving Faxes Receiving Faxes Changing Paper Settings Memory Reception 442 ...
Page 452: ...Other Useful Fax Functions Document Stored in Printer s Memory 452 ...
Page 500: ...Other Network Problems Checking Network Information Restoring to Factory Defaults 500 ...
Page 523: ...Scanning Problems Windows Scanning Problems 523 ...
Page 524: ...Scanning Problems Scanner Does Not Work ScanGear Scanner Driver Does Not Start 524 ...
Page 527: ...Faxing Problems Problems Sending Faxes Problems Receiving Faxes Telephone Problems 527 ...
Page 528: ...Problems Sending Faxes Cannot Send a Fax Errors Often Occur When You Send a Fax 528 ...
Page 538: ...Telephone Problems Cannot Dial Telephone Disconnects During a Call 538 ...
Page 550: ...Errors and Messages An Error Occurs Message Support Code Appears 550 ...


