


Output Size
Select an output size.
Output size options vary by the item selected in
Destination
.
Flexible
Adjust the cropping frames (scan areas) freely.
In thumbnail view:
Drag the mouse over a thumbnail to display a cropping frame. When a cropping frame is
displayed, the portion within the cropping frame will be scanned. When no cropping frame is
displayed, each frame is scanned individually.
In whole image view:
When no cropping frame is displayed, the entire Preview area will be scanned. When a cropping
frame is displayed, the portion within the cropping frame will be scanned.
Paper Size (such as L or A4)
Select an output paper size. The portion within the cropping frame will be scanned at the size of
the selected paper size. Drag the cropping frame to enlarge/reduce it while maintaining the
aspect ratio.
Monitor Size (such as 1024 x 768 pixels)
Select an output size in pixels. A cropping frame of the selected monitor size will appear and the
portion within the cropping frame will be scanned. Drag the cropping frame to enlarge/reduce it
while maintaining the aspect ratio.
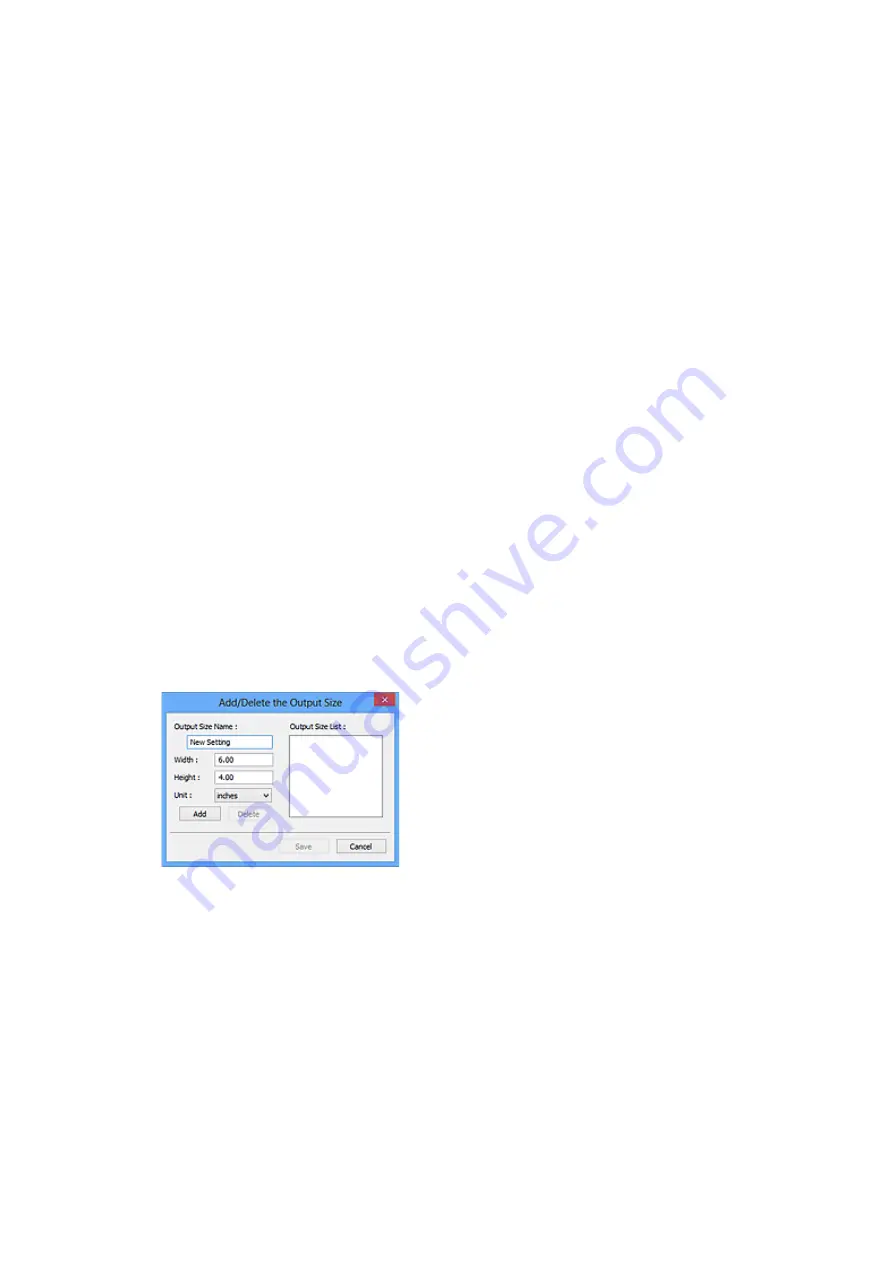
Add/Delete...
Displays the
Add/Delete the Output Size
dialog box for specifying custom output sizes. This
option can be selected when
Destination
is
or
Image display
.
In the
Add/Delete the Output Size
dialog box, multiple output sizes can be specified and then
saved at one time. Saved items will be registered to the
Output Size
list and can be selected,
along with the predefined items.
Adding:
Enter
Output Size Name
,
Width
, and
Height
, and then click
Add
. For
Unit
, select
inches
or
mm
if
Destination
is
; if it is
Image display
, only
pixels
can be selected. The name of the
added size appears in
Output Size List
. Click
Save
to save the items listed in
Output Size List
.
Deleting:
Select the output size you want to delete in
Output Size List
, and then click
Delete
. Click
Save
to save the items listed in
Output Size List
.
307
Summary of Contents for PIXMA TS5000 Series
Page 19: ...Basic Operation Printing Photos from a Computer Copying Printing Photos 19 ...
Page 34: ...Loading Paper Loading Plain Paper Photo Paper Loading Envelopes 34 ...
Page 52: ...52 ...
Page 72: ... For Mac OS Adjusting Print Head Position 72 ...
Page 89: ...89 ...
Page 91: ...Transporting Your Printer Legal Restrictions on Scanning Copying Specifications 91 ...
Page 92: ...Safety Safety Precautions Regulatory Information WEEE EU EEA 92 ...
Page 106: ...Main Components and Their Use Main Components Power Supply LCD and Operation Panel 106 ...
Page 107: ...Main Components Front View Rear View Inside View Operation Panel 107 ...
Page 132: ...For more on setting items on the operation panel Setting Items on Operation Panel 132 ...
Page 142: ...Language selection Changes the language for the messages and menus on the LCD 142 ...
Page 148: ...Network Connection Network Connection Tips 148 ...
Page 189: ...Note Selecting Scaled changes the printable area of the document 189 ...
Page 241: ...Changing the Printer Operation Mode 241 ...
Page 304: ...ScanGear Scanner Driver Screens Basic Mode Tab Advanced Mode Tab 304 ...
Page 390: ...Scanning Problems Scanner Does Not Work ScanGear Scanner Driver Does Not Start 390 ...
Page 402: ...Errors and Messages An Error Occurs Message Appears 402 ...
Page 427: ...1660 Cause An ink tank is not installed What to Do Install the ink tank 427 ...


