


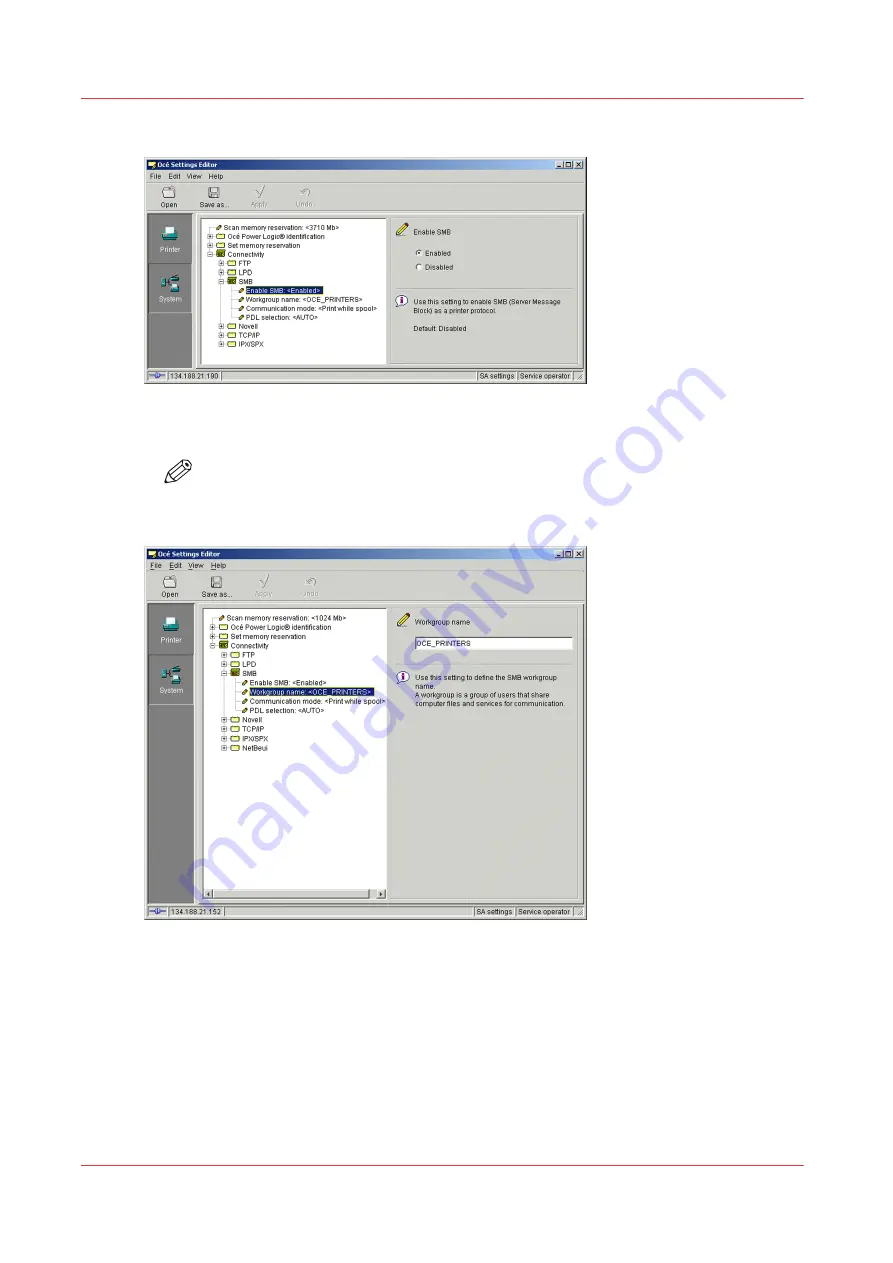
3.
Select ‘Enabled’ on the right panel (‘Enable SMB’).
4.
Then, go to the 'Workgroup name' setting.
5.
Type in the new workgroup name in the input field.
NOTE
This field is mandatory once the SMB printing protocol is enabled. You must fill it in,
otherwise the controller will continuously restart.
6.
Click ‘Apply’.
You are proposed to restart the controller.
Either click ‘OK’ and go on with the other parameters setup, or, once all the setups are done,
restart the controller (see
Reboot the controller on page 130
Enable SMB printing protocol
40
Chapter 2 - Configure the print system controller
Océ TDS/TCS/TC Connectivity information for Windows environments
Summary of Contents for Oce TC Series
Page 1: ...Administration guide Océ TDS TCS TC Systems Connectivity information for Windows environments ...
Page 6: ...Contents 6 Océ TDS TCS TC Connectivity information for Windows environments ...
Page 7: ...Chapter 1 Introduction ...
Page 19: ...Chapter 2 Configure the print system controller ...
Page 55: ...Chapter 3 Print via LPD LPR ...
Page 97: ...Chapter 4 Print via FTP ...
Page 101: ...Chapter 5 Print via WPD2 on a Failover Cluster ...
Page 111: ...Chapter 6 Simple Network Management Protocol SNMP ...
Page 117: ...Chapter 7 Troubleshooting ...
Page 127: ...Chapter 8 Appendix A Océ TDS TCS systems basic procedures ...
Page 131: ...Chapter 9 Appendix B You and Océ ...
Page 137: ......


