

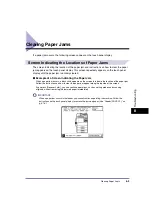


Clearing Paper Jams
8-5
8
T
ro
u
b
les
ho
oti
n
g
1
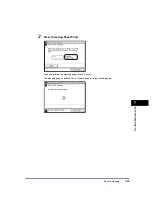
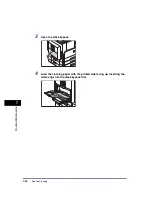
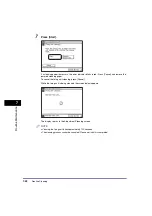
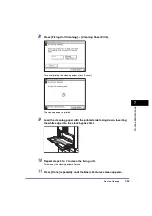
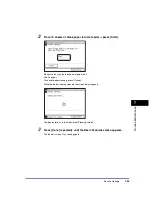
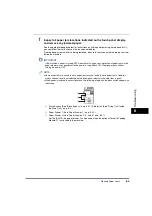
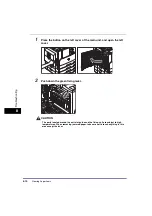
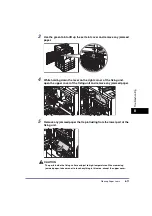
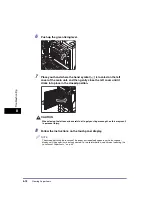
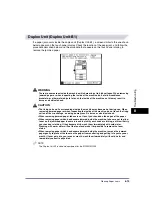
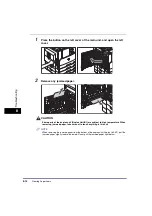
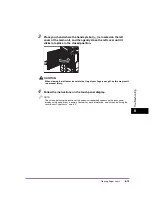
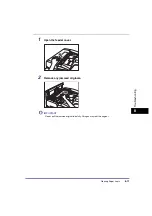
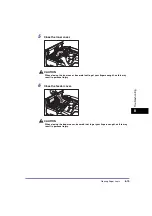
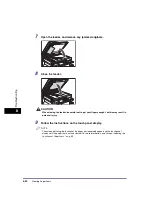
Inspect all paper jam locations indicated on the touch panel display,
and remove any jammed paper.
See the appropriate pages below for instructions on finding and removing jammed paper. Or,
you can follow the instructions on the touch panel display.
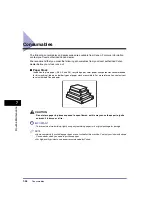
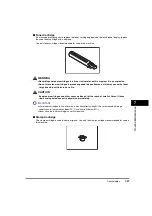
If jammed paper tears while it is being removed, be sure to remove any remaining pieces from
inside the machine.
IMPORTANT
If the machine’s power is turned OFF when there is a paper jam, detection of paper jams in the
paper drawers is not possible after the power is turned back ON. Clear paper jams without
turning the power OFF.
NOTE
•
Some areas that are shown to have paper jams may not actually have paper jams. However,
always check all locations indicated on the touch panel display in the order that is given.
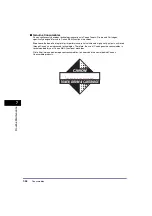
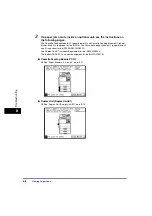
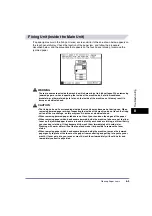
•
When paper is jammed in several locations, the following image with the black circles appears on
the screen.
a
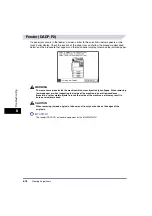
Stack Bypass (See “Stack Bypass,” on p. 8-21.)/Fixing Unit (See “Fixing Unit (Inside
the Main Unit),” on p. 8-9.)
b
Paper Drawer 1 (See “Paper Drawer 1,” on p. 8-22.)
c
Paper Drawer 2 (See “Paper Drawers 2, 3, and 4,” on p. 8-27.)
For the iR2018i, the paper drawer 2 can be used when the optional Cassette Feeding
Module-P1 is attached to the machine.
a
b
c
Summary of Contents for iR2018i
Page 2: ...iR2030 iR2025 iR2022i iR2018i Reference Guide 0 Ot ...
Page 115: ...Available Paper Stock 2 58 2 Basic Operations ...
Page 144: ...Card Reader E1 3 29 3 Optional Equipment 11 Press OK ...
Page 151: ...Card Reader E1 3 36 3 Optional Equipment 4 Press Done 5 Press OK ...
Page 154: ...Card Reader E1 3 39 3 Optional Equipment 5 Press Done 6 Press OK ...
Page 241: ...Cleaning and Adjusting the Machine 4 86 4 Customizing Settings ...
Page 443: ...Index 9 16 9 Appendix ...