4
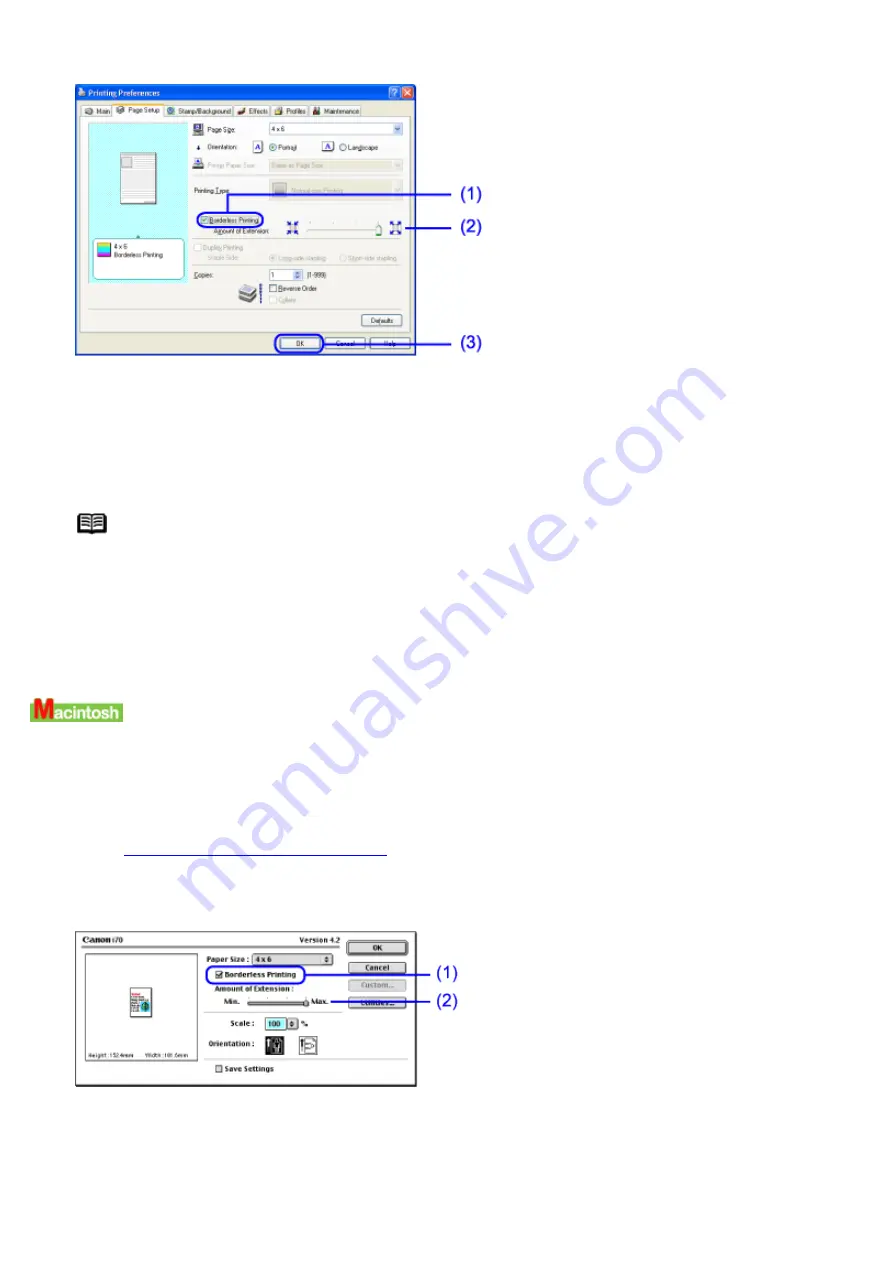
Specify the Borderless Printing settings.
(1)
Select this check box. When the notification message appears, confirm and click OK.
(2)
Move this slide bar to adjust the portion that extends beyond page border. It is recommended that
you normally set the slide bar to the right end. If you move the slide bar to the left to reduce the
extension amount, a border may appear.
(3)
Click OK.
Note
Use the Preview Screen to view your photograph. Click on the Preview before printing
check box in the Main tab.
5
Click Print in the Print dialog box.
Printing will now begin.
1
Resize the image in application to suit paper size.
2
Open the Page Setup dialog box.
See
Opening the Page Setup Dialog Box
3
Specify the Borderless Printing settings.
(1)
Select this check box.
(2)
Move this slide bar to adjust the portion that extends beyond page border. It is recommended that
you normally set the slide bar to the right end. If you move the slide bar to the left to reduce the
extension amount, a border may appear.
4
Click OK.
Summary of Contents for i70 Series
Page 1: ......
Page 21: ......
Page 24: ...Printable area ...
Page 38: ......
Page 51: ......
Page 65: ......
Page 71: ......
Page 88: ......
Page 130: ......
Page 140: ...5Click Print in the Print dialog box Printing will now begin ...
Page 146: ...3Click Print in the Print dialog box Printing will now begin ...
Page 155: ...Index ...
Page 169: ...Printable area ...


