3-22
FAX-L350 Chapter 3: Maintenance and Service
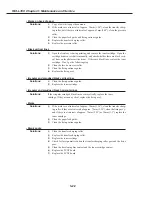
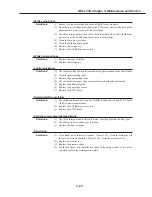
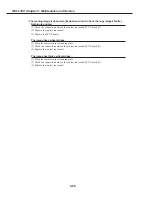
• Marks on back of paper
Solutions:
(1) Copy a few white paper documents.
(2) If the marks are at intervals of approx. 50mm (1.96"), clean the transfer charg-
ing roller, but if they are at intervals of approx. 63mm (2.48"), clean the pressure
roller.
(3) Clean the paper feed guide and fixing entrance guide.
(4) Replace the transfer charging roller.
(5) Replace the pressure roller.
• Black vertical lines
Solutions:
(1) Open the front cover during printing, and remove the toner cartridge. Open the
cartridge drum cover shutter manually, and check whether there are black verti-
cal lines on the photosensitive drum. If there are black lines, replace the toner
cartridge. If not, go the following step.
(2) Clean the face-down eject roller.
(3) Clean the fixing entrance guide.
(4) Replace the fixing ass’y.
• Irregular and smudged black vertical lines
Solutions:
(1) Clean the fixing entrance guide.
(2) Replace the toner cartridge.
• Irregular and smudged black horizontal lines
Solutions:
If the irregular smudged black lines occur cyclically, replace the toner
cartridge. If they are non-cyclical, replace the fixing ass’y.
• Marks
Solutions:
(1) If the marks are at intervals of approx. 50mm (1.96"), clean the transfer charg-
ing roller; if they are at intervals of approx. 75mm (2.95"), clean the fixing ass’y;
and if they are at intervals of approx. 75mm (2.95"),or 38mm (1.5"), replace the
toner cartridge.
(2) Clean the paper feed guide.
(3) Clean the fixing entrance guide.
• Blank spots
Solutions:
(1) Clean the transfer charging roller.
(2) Replace the transfer charging roller.
(3) Replace the toner cartridge.
(4) Check for foreign matter button the transfer charging roller gear and the drive
gear.
(5) Clean the developing bias contact and the toner cartridge contact.
(6) Replace the PCNT board.
(7) Replace the SCNT board.
Summary of Contents for FAX-L350
Page 2: ......
Page 6: ...III III REVISION HISTORY REVISION CONTENT 0 Original ...
Page 11: ...VIII This page is intentionally left blank ...
Page 12: ...Chapter 1 General Description ...
Page 13: ......
Page 30: ...1 17 FAX L350 Chapter 1 General Description This page intentionally left blank ...
Page 56: ...Chapter 2 Technical Reference ...
Page 57: ......
Page 60: ...2 3 FAX L350 Chapter 2 Technical Reference This page intentionally left blank ...
Page 64: ...2 7 FAX L350 Chapter 2 Technical Reference This page intentionally left blank ...
Page 68: ...2 11 FAX L350 Chapter 2 Technical Reference This page intentionally left blank ...
Page 109: ...2 52 FAX L350 Chapter 2 Technical Reference This page intentionally left blank ...
Page 110: ...Chapter 3 Maintenance and Service ...
Page 111: ......
Page 197: ...3 86 FAX L350 Chapter 3 Maintenance and Service This page intentionally left blank ...
Page 198: ...Chapter 4 Appendix ...
Page 199: ......
Page 211: ...4 12 FAX L350 Chapter 4 Appendix This page intentionally left blank ...
Page 212: ......

