63
Step
8
- Do not touch the hard disk parts, printed wire, or connectors with your
hands.
- To prevent the hard disk from being affected by static electricity, keep it in
the protective bag until it is ready to be installed. Also, keep the hard disk
away from products that generate strong magnetic waves.
•
Do not drop or jolt the hard disk.
•
Because the hard disk is a precision device, do not press on the top of its
drive, place it over another, or hit it against other objects.
•
Be sure not to remove any label or others attached to the top of the drive
of the hard disk. Also, do not attach any other labels.
•
Do not move the hard disk suddenly from a cool location to a hot location.
•
After installing the hard disk, you need to initialize the SETUP menu.
Therefore, if you have changed the printer setting, output the Configuration
Page Print and confirm and save the status of the printer setting before
installing the hard disk. For details on the procedure for outputting
Configuration Page Print, see "Checking the Operations with Configuration
Page Print," on p. 42.
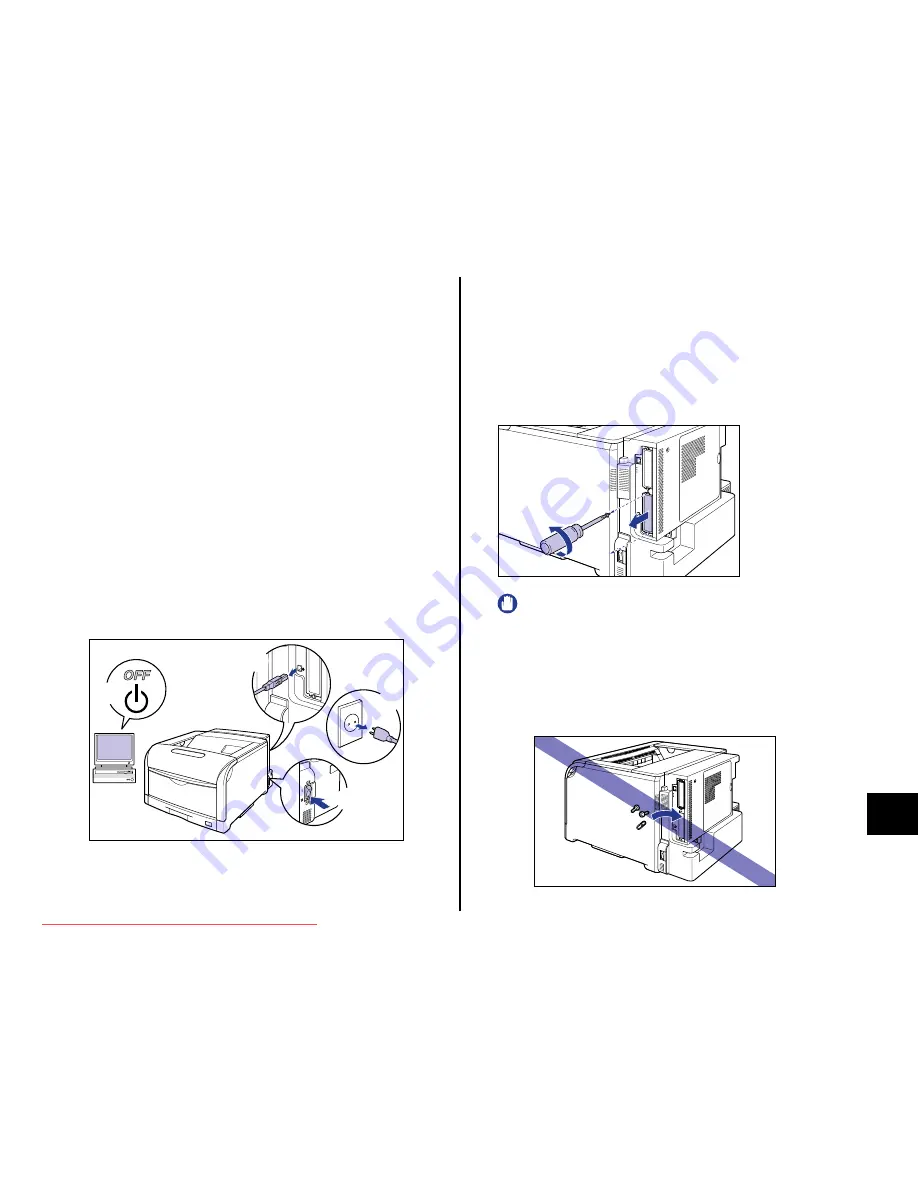
1
Turn the printer and computer OFF
a
, remove the USB
cable
b
, and then disconnect the power plug from the AC
power outlet
c
.
2
Remove all the interface cables and the power cord from
the printer.
If there is not sufficient space to install the hard disk, move the printer to a place
where you can work easier.
3
Remove the screws and remove the protective plate for the
hard disk.
IMPORTANT
•
The removed protective plate and screws are required when the hard disk
is removed. Be sure not to misplace them.
•
After removing the protective plate, be careful not to drop screws, paper
clips, staples, or other metal objects inside the hard disk slot. If any of
these objects should drop inside the hard disk slot, do not plug the power
plug into the AC power outlet and contact your local authorized Canon
dealer.
a
a
b
c
Downloaded from ManualsPrinter.com Manuals


