TSE BUSINESS 5000
English
|
10
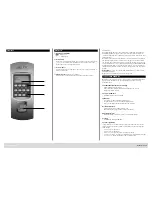
E-Key functions
Door opening:
– Press 1 × briefly, green LED flashes
– Automatic function (only together with a keypad)
Hold the button pressed for 6 seconds, green LED flashes
briefly 2 × in a row
In the automatic mode the door can be opened by pressing the
On/Enter
button on the keypad. For this purpose, the E-Key must be within the
radio range. This function is automatically deactivated after a period of 15
minutes.
Programming mode:
The programming mode has three purposes:
– Registration of an E-Key by means of a keypad or of a TSE software
– Synchronization of the radio signal set up in the E-Key with the channel
set in the lock
– Searching for the E-Key within the TSE software
E-Key programming
When programming the E-Key for the first time, please press the button
once (green LED flashes) when being required to do so by the keypad or by
the software.
When programming the E-Key later on, please keep the button pressed for a
period of 10 seconds, until the green LED flashes three times in a row. Then
release the button.
Remarks
In case the door opens with a delay of 3 to 7 seconds after the button on
the E-Key is pressed once, and the red LED flashes, the battery (CR2032) in
the E-Key should be replaced immediately.
In case the door opens with a delay of 3 to 7 seconds after the button on
the E-Key is pressed once, and the red LED does not flash, the batteries
(2 × 1.5 V LR06 alkaline) in the cylinder should be replaced. This is also valid
for the keypad if existing.
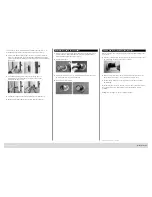
Battery replacement
1
Open the housing cover by carefully forcing open the detent lugs.
2
Lift the silicon pad and replace the battery.
3
Clap the silicon pad back and close the cover.
1
3
2
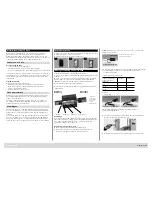
Assembly instruction cylinder TSE 5000
The installation of the TSE cylinder is described below.
Please read this Assembly Manual carefully before the assembly and then
store it at a safe place.
The cylinder is provided with a special detent system offering you a possibility
to use the cylinder for doors up to a thickness of 120 mm (60/60 mm,
measured at the cylinder fixing screw). No prior adjustment is necessary.
The fixing of the rotary knobs is provided with an incorporated locking
screw in each knob.
Outer side
Inner side
Outer knob
Inner knob
Cover panel Adapter 2
Adapter 1 Cylinder fixing screw
Remark
The base size of the cylinder is 30 mm per side. When delivered, the cylinder
is completely collapsed (the smallest door thickness). Before you insert the
cylinder into the door, you should adjust it to your door thickness.
When installing the cylinder, proceed as follows:
1
Take a rough measurement of the door thickness (incl. fittings).
2
Pull the outer knob from the shaft, move the inner knob over the
detent system (spacing 2.85 mm) to the required dimension.
Schematic
illustration of an
installed cylinder
incl. both adapter
pieces.
Attention:
Never pull the inner knob completely from the shaft,
this can lead to damaging of the electronics.
Inner knob
Adjustment range 30 mm
Schematic illustration of setup
of the inner knob
3
Depending on the door thickness, you can affix an appropriate adapter
on the outer side, in order to improve the path for the emergency key.
The following combinations are possible:
Space detent bolt /
mounting (mm) on the
outer side
Adapter 1
Adapter 2
< 43
–
–
44 – 53
X
–
54 – 60
X
X
X: To be selected
–: Not provided
2,9 × 16
Adapter 2
M2 × 10
Adapter 1
Table:
cylinder fixing screw
/mounting [mm] on the outer side and
the required adapter.
4
Move the TSE cylinder from inside to outside through the mortise lock
into the door and then tighten the cylinder fixing screw.


