-8-
5.
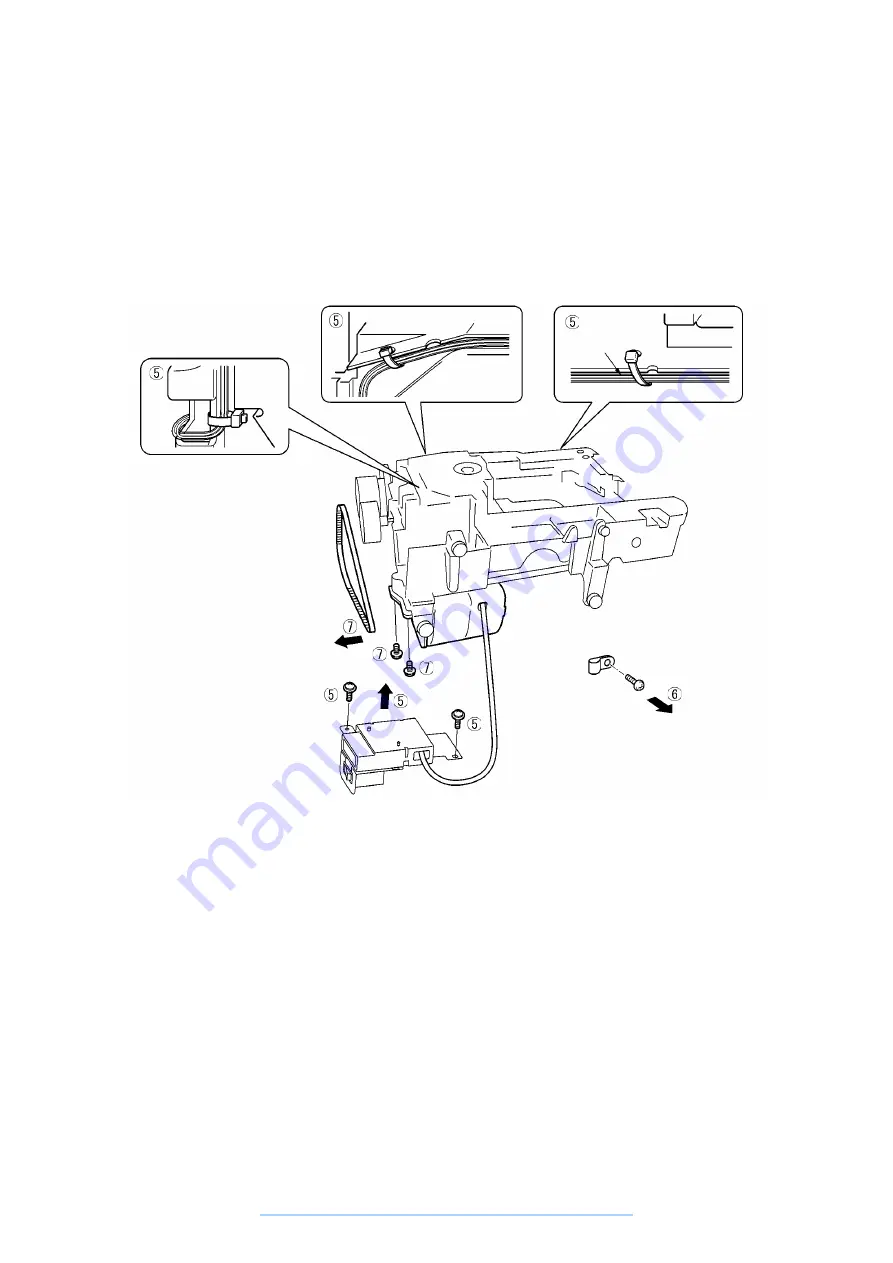
Remove the two screws holding the 3-pin socket folder assembly on the rear of the sewing machine,
remove the 3-pin socket folder, and then remove the three wiring harness bands for the lamp cord.
6.
Remove the screws holding the cord clamp.
7.
Remove the two screws holding the motor holder, then remove the motor. The driving belt can be removed
too.
Lamp cord
www.promelectroavtomat.ru
Summary of Contents for XL-6040
Page 1: ... 6 2001 www promelectroavtomat ru ...
Page 3: ... 1 I 1 MECHANICAL CHART 2 2 POWER TRANSMISSION CHART 3 www promelectroavtomat ru ...
Page 4: ... 2 1 MECHANICAL CHART www promelectroavtomat ru ...
Page 29: ... 27 2 LEAD WIRES ARRANGEMENT www promelectroavtomat ru ...
Page 61: ...XL 6060 Series XL 6050 Series XL 6040 Series H1040194 www promelectroavtomat ru ...


