250
Menus/Tools
■
Sew Setting Stage
List of menus
■
File menu
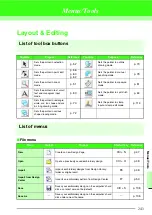
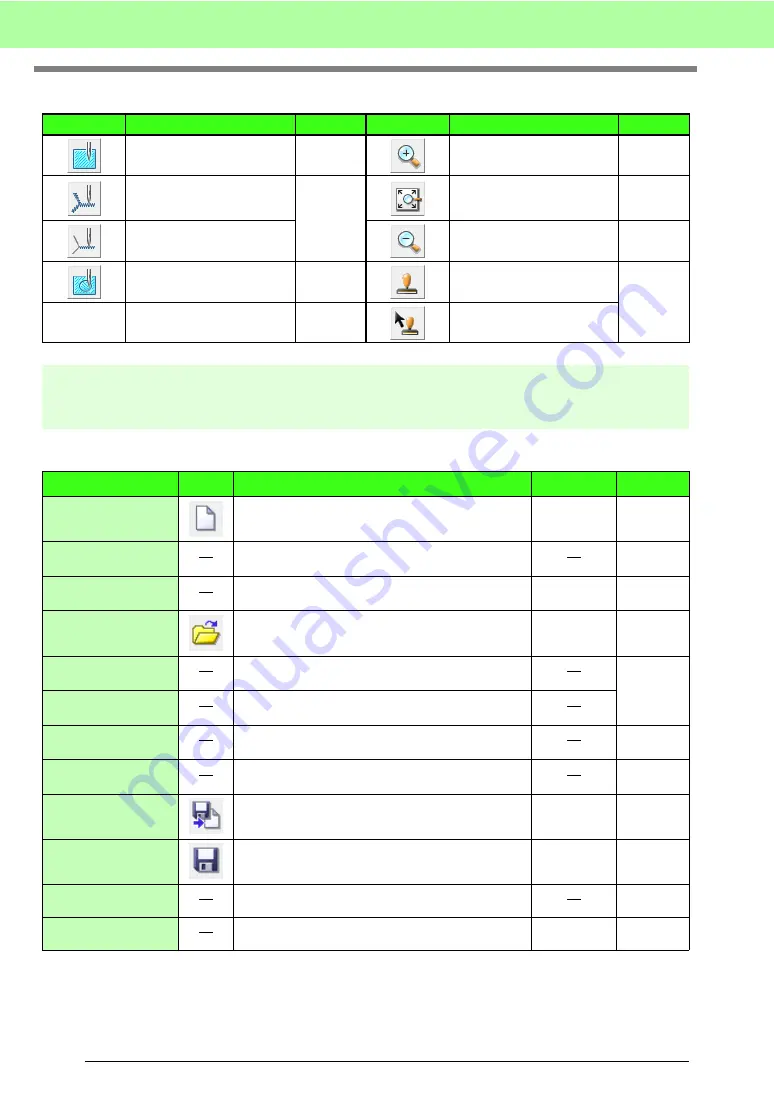
Tool Box
Purpose
Reference
Tool Box
Purpose
Reference
Sets the pointer in region
sewing mode.
Sets the pointer in zoom-in
mode.
Sets the pointer in line (all)
sewing mode.
Maximizes the selected
Design Page to fit in the
window.
Sets the pointer in line (part)
sewing mode.
Sets the pointer in zoom-out
mode.
Sets the pointer in hole
sewing mode.
Sets the pointer in stamp
input mode.
Sets the pointer in stamp edit
mode.
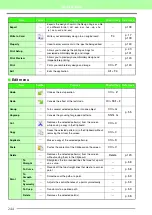
Menu
Toolbar
Purpose
Shortcut key
Reference
New Line Image
Creates a new Design Page and switches to the Line
Image Stage.
Ctrl + N
New Figure Data
Creates a new Design Page and switches to the
Figure Handle Stage.
Wizard
Gives a step-by-step guide for creating pattern,
according the type of data you want to create.
F3
Open
Opens a previously saved file (.pem, .pel) or image file.
Ctrl + O
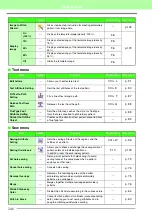
Select TWAIN Device
Selects which TWAIN device installed in the computer
to use.
Input from TWAIN
device
Operates a TWAIN standardized scanner or other
device to import an image.
Input from Clipboard
Opens a new Design Page in the Original Image Stage,
and imports the image data from the Clipboard.
Output to Clipboard
Copies the Original Image Stage image data to the
Clipboard.
Import Figure
Adds a .pem file to your Design Page (available only
in the Figure Handle stage).
F8
Save
Saves your Design Page on the disk as latest version
file (default).
Ctrl + S
Save As
Saves the current pattern under a new file name.
Exit
Exits the application.
Alt + F4
Summary of Contents for PE-Design 8
Page 1: ...Instruction Manual ...
Page 146: ...144 Arranging Embroidery Designs Layout Editing ...
Page 200: ...198 Managing Embroidery Design Files Design Database ...
Page 218: ...216 Creating Custom Stitch Patterns Programmable Stitch Creator ...
Page 244: ...242 Tips and Techniques ...
Page 269: ...English ...


