


PREPARING THE FABRIC
Em
br
oi
de
ry
123
5
b
Place the embroidery sheet in the inner
frame, and then align the guide lines on the
embroidery sheet with the marks on the
fabric.
a
Inner frame
b
Guide lines
c
Stretch the fabric within the inner and outer
frames so that there are no folds or wrinkles
(see page 122).
a
Inner frame
b
Outer frame
d
Remove the embroidery sheet.
Embroidering Small Fabrics and Fabric
Edges
Use embroidery stabilizer to provide extra support. After
embroidering, carefully remove the stabilizer.
■
Embroidering Small Fabrics
When embroidering small pieces of fabric, use
temporary spray adhesive to attach the small piece
of the fabric to stabilizer, and then hoop the
stabilizer in the embroidery frame. If you do not
wish to use a temporary spray adhesive, attach the
fabric to the stabilizer with basting stitches.
a
Fabric
b
Stabilizer
■
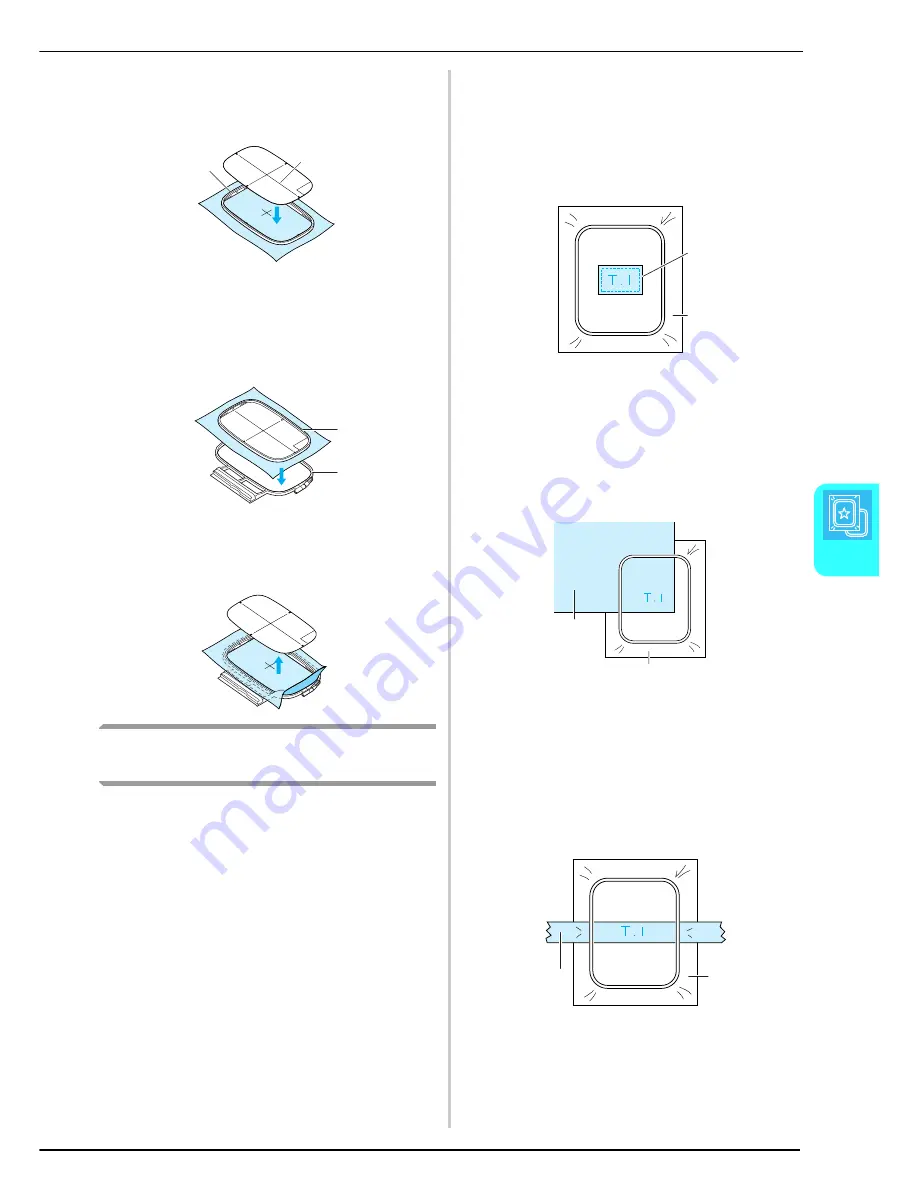
Embroidering Edges or Corners
When embroidering corners or edges of fabric, use
temporary spray adhesive to attach the corner or
edge of the fabric to stabilizer, and then hoop the
stabilizer in the embroidery frame. If you do not
wish to use a temporary spray adhesive, attach the
fabric to the stabilizer with basting stitches.
a
Fabric
b
Stabilizer
■
Embroidering Ribbons or Tape
When embroidering narrow pieces of fabric, use
temporary spray adhesive to attach the ribbon or
tape to stabilizer, and then hoop the stabilizer in the
embroidery frame. If you do not wish to use a
temporary spray adhesive, hoop both ends of the
ribbon or tape together with the stabilizer in the
embroidery frame.
a
Ribbon or tape
b
Stabilizer
a
b
a
b
a
b
a
b
a
b
Summary of Contents for Innov-is 1500D
Page 1: ......
Page 9: ...8 ...
Page 47: ...USEFUL FUNCTIONS 46 ...
Page 149: ...EMBROIDERY APPLICATIONS 148 ...
Page 175: ...USING STORED CUSTOM STITCHES 174 ...
Page 201: ......


