


4 - 2
Test Mode
Starting test mode/Starting and stopping operation
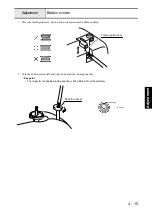
1. How to start test mode
• Turn on the power while pressing the
(Stitch selection key) and the
(Reverse stitch button), then test
mode starts.
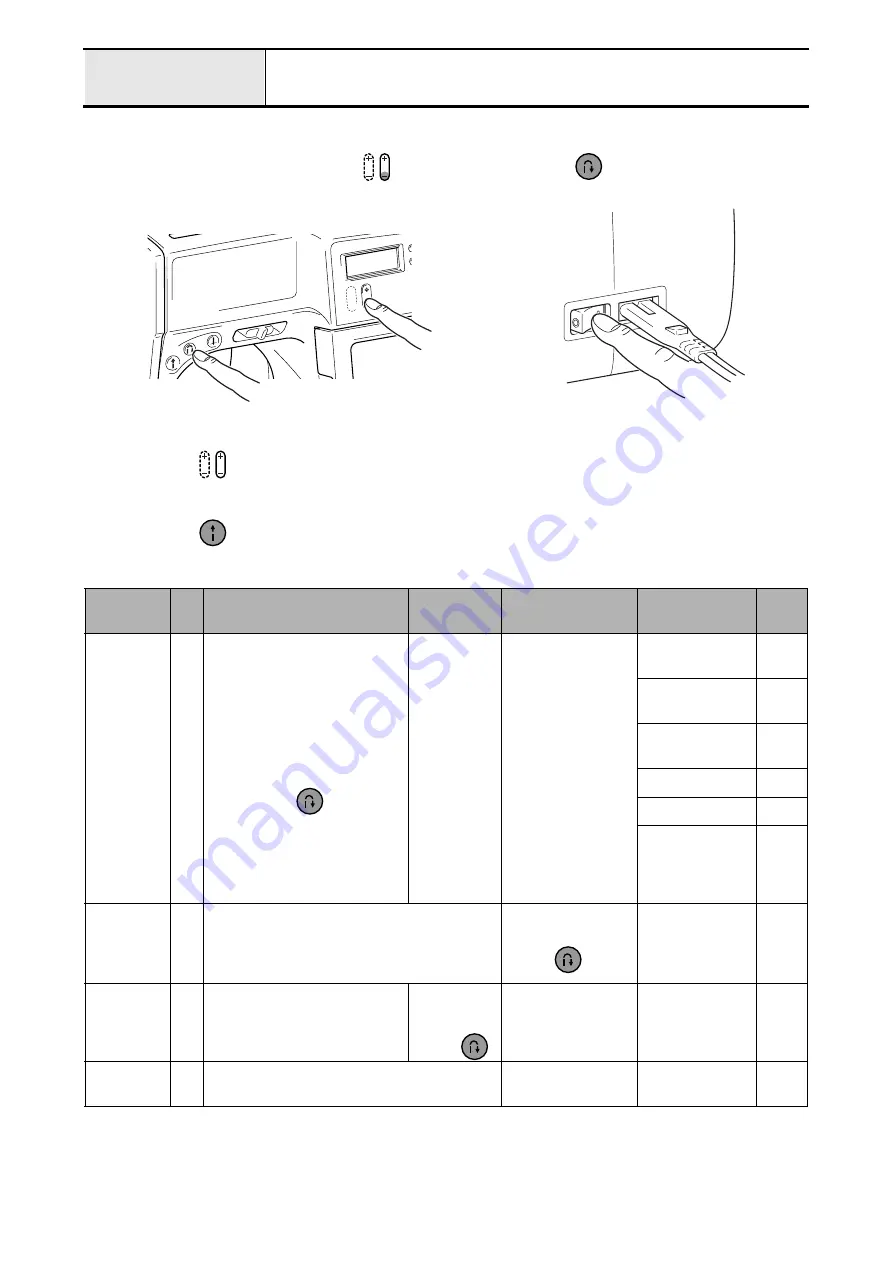
2. Mode selection
• Press the
(Stitch selection keys) and select pattern number (mode).
3. Starting and stopping test mode
• Press the
(Start/stop button).
4. Test modes (used for adjustments)
When the test mode will be changed the power off and the test mode will start again.
Mode
No.
Z (zigzag)
operations
F (feed)
operations
Operating speed
Used adjustment
Ref.
page
3 point
needle drop
2
Switches base line with each
stitch.
*Switches left base line/center
base line/right base line with
each push of
.
0mm
(none)
Any speed may be
selected using the
speed control key.
Clearance
between needle
and rotary hook
point
Feed
adjustment
5
100 stitches forward on the left base line.
100 stitches reverse on the right base line.
Switches low/middle/
high speed with each
push of
.
Feed dog
position
7
Stops center base line.
Switches
0mm/5mm
with each
push of
.
Any speed may be
selected using the
speed control key.
Front/back and
left/right position of
feed dog
Pattern
adjustment
14
Sewn adjustment pattern.
None.
Summary of Contents for HS-3000
Page 1: ......
Page 2: ......
Page 3: ......
Page 9: ...vi ...
Page 16: ...2 1 2 Disassembly Main parts 2 2 Feed unit 2 22 Needle presser unit 2 30 ...
Page 17: ...2 2 Main parts Main parts location diagram Main unit ...
Page 37: ...2 22 Feed unit location diagram Main unit ...
Page 45: ...2 30 Needle presser unit location diagram Main unit ...
Page 55: ...3 2 Main parts Main parts location diagram Main unit ...
Page 77: ...3 24 Main unit Main parts 36 Accessory table attachment 1 Attach the accessory table 1 1 ...
Page 78: ...3 25 Assembly Feed unit Feed unit location diagram Main unit ...
Page 90: ...3 37 Assembly Needle presser unit Needle presser unit location diagram Main unit ...
Page 163: ...7 12 ...
Page 164: ......