background image

43 


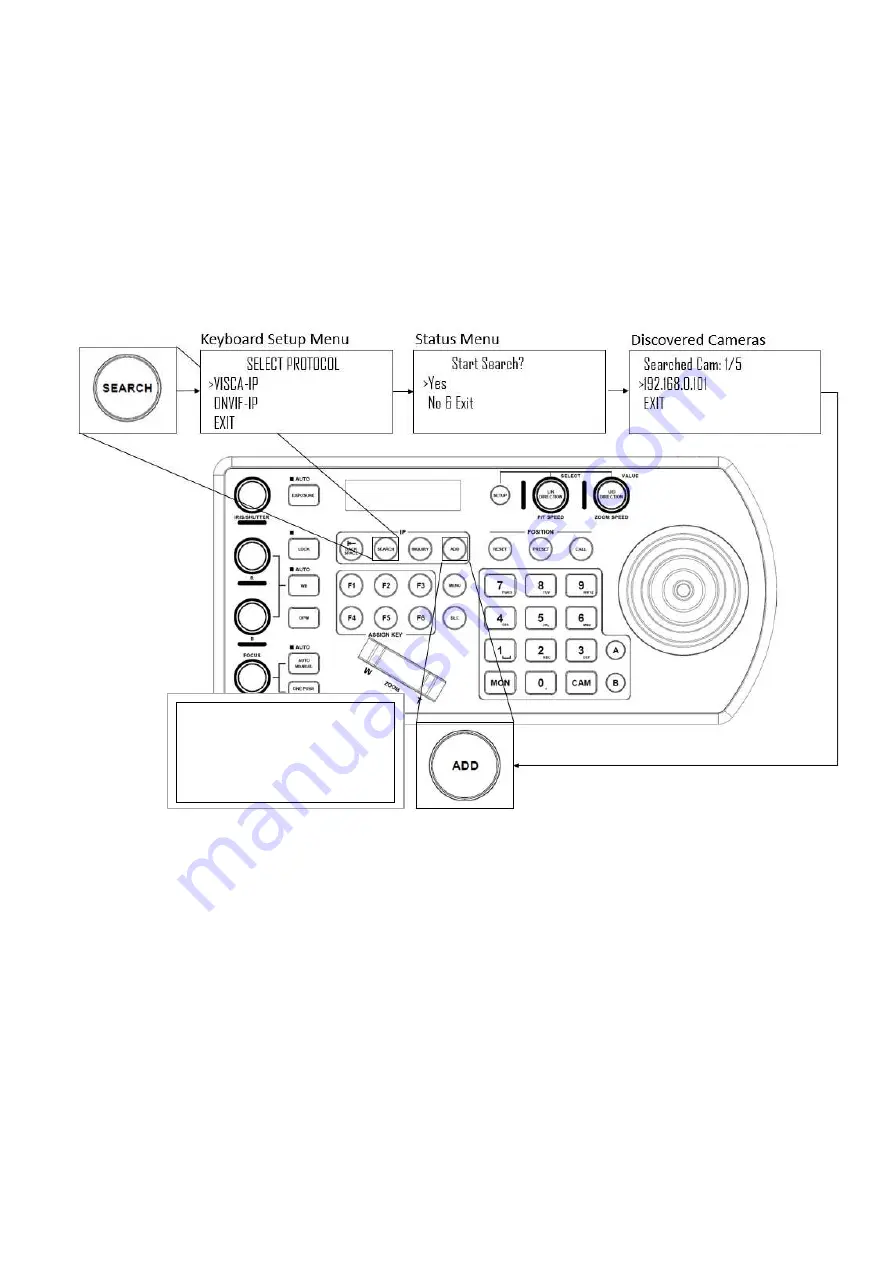
Scanning local network for available VISCA over IP cameras 


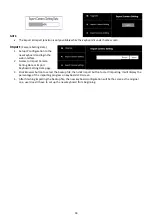
Press the Search button to bring up the Auto Search menu 


Move the cursor to VISCA-IP 


Select Yes to start the search 


A list of discovered cameras will appear showing the cameras that have been discovered. Scroll through the 
discovered cameras using the Zoom Speed dial 


To add a camera to be controlled by the KBD-1010, press the ADD button 


With the cursor on CAM ID, Assign the camera to a CAM ID by rotating the Zoom Speed dial 


Click the Zoom Speed dial to save 


Move the cursor to the Title, and use the alphanumeric keypad to give the camera a title 


Click the Zoom Speed dial to save 


Repeat this process for each discovered camera that you wish to add to the KBD-1010 


Adding VISCA over IP cameras to be controlled via WAN 


1.


At Camera Location: 


For commands to flow from outside the network in to a camera, ports must be opened 


Contact the network administrator at the camera location to create a port-forwarding rule in the router 
allowing commands to flow through the necessary ports using these values: 

o

  Source/ external port:

 52381 

o

  Destination / internal port: 

52381 

o

  IP Address:

 IP Address of the camera 

o

  Protocol:

 Both (TCP and UDP) 


2.


At Keyboard location: 


Set the keyboard to DHCP 


Contact the network administrator at the Keyboard location to create a port-forwarding rule in the 
router allowing commands to flow through the necessary ports using these values: 

o

  Source/ external port:

 52381 

o

  Destination / internal port: 

52381 

o

  IP Address:

 IP Address of the keyboard 

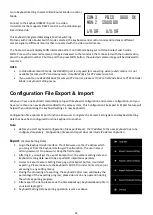
>CAM ID: 001 
  Title: - 
  Exit 


Summary of Contents for KBD-1010

Page 1: ...1 KBD 1010 Universal PTZ Camera Remote Controller USER MANUAL VERSION KBD M 03252020 KBD 1010 R KBD 1010 RNV 2020 Bolin Technology ...

Page 2: ...ECTION WITH BOLIN PRODUCTS 30 CONTROL MODE VIDEO ROUTER SWITCH 30 CROSS PROTOCOL MIX CONTROL VIDEO ROUTER SWITCH MODE 30 CONFIGURATION FILE EXPORT IMPORT 32 KEYBOARD CONFIGURATION 34 Interacting with the KBD 1010 34 SETUP 34 Setup button 34 IP SETUP 34 BUTTON LIGHT 35 ASSIGN KEYS 35 FACTORY DEFAULT 36 TALLY GPI I O 36 PASSWORD SETTING 37 JOYSTICK ZOOM SETTING 38 MODEL INFO 38 VISCA OVER IP 38 CONT...

Page 3: ...ING A CAMERA 45 Engaging the Camera OSD Menu for non IP cameras 45 Engaging the Camera OSD Menu for PELCO D or ONVIF IP Cameras 45 MANUAL MOVEMENTS 45 SETTING AND CALLING PRESETS 46 Setting creating presets 46 Calling presets 46 Resetting Clearing presets 46 ADJUSTING IMAGE PARAMETERS 47 FIRMWARE UPGRADE 48 Keyboard IP firmware upgrade 48 Keyboard MCU firmware upgrade 48 LCD SCREEN SETTING TREE 49...

Page 4: ...ct appearance shown in this manual is for reference only and may be different from the actual appearance of your device This manual is a guide for multiple product models and so it is not intended for any specific product In this manual the illustrations of displayed interface parameters displayed drawings and value ranges may vary with models Please see the actual product for details Due to uncer...

Page 5: ... energy and if not installed and used in accordance with the instruction manual may cause harmful interference to radio communications Operation of this equipment in a residential area is likely to cause harmful interference in which case the user will be required to correct the interference at his own expense This product complies with Part 15 of the FCC Rules Operation is subject to the followin...

Page 6: ...ill be needed When RS422 RS485 and RS232 cameras are being controlled simultaneously When more than one group of RS422 RS485 cameras is being controlled simultaneously When a 8 Pin Mini Din RS232 connector camera needs to be connected to and controlled ...

Page 7: ...x control It allows you to use RS232 RS422 IP control on one controller to control cameras in a single system With IP control automatically search available IP cameras in the network and assign IP addresses easily IP control supports ONVIF CGI VISCA Over IP Up to 256 camera presets with memory of image parameters and 8 patterns cruises to recall camera moves Requires camera support Tally Indicator...

Page 8: ...6 RS232 interface RJ 45 port Connect RS232 adapter 7 IP Interface RJ 45 port Connect the keyboard to a network or a PoE switch for power supply 8 RS422 B interface use for RS485 as well RJ 45 port Connect an RS422 adapter to control up to 7 daisy chained RS422 cameras Group A 9 RS422 A interface a In PTZ Controller Mode use for RS485 as well RJ 45 port Connect an RS422 adapter to control up to 7 d...

Page 9: ...eed adjustment Adjust value in menu Press Save in menu Long press Invert U D Direction 12 Manual Adjustment for Exposure Iris Priority Shutter Priority Manual Iris Gain Manual Shutter Gain Black Level 13 Manual Red Adjustment for White Balance 14 Manual Blue Adjustment for White Balance 15 Manual Focus 16 One Push Focus 17 Focus Auto Manual Toggle 18 OPW One Push WB For White Balance 19 Assign Key...

Page 10: ...O when the connection or the communication between the camera and the keyboard is not working properly 6 IP address of the IP camera is being controller 7 Monitor Identifier When VIDEO ROUTER SWITCH mode is selected identifies which monitor is being used for display the selected camera video image 8 Exposure Control Mode use Auto Exposure knob to select an exposure control mode among Full Auto Iri...

Page 11: ...pplied DC power adaptor and cord 3 Junction Box body 4 Terminal Contact connection for RS422 or RS232 5 RJ45 port for connection between Junction Box and The camera Use Network cable to connect directly 6 NOTE Do not use the top row of holes as these are not contact ports All labels apply to the bottom row Item 4 in the chart ...

Page 12: ...ntrolling only RS232 cameras the keyboard can control a total of 7 RS232 cameras When controlling RS422 and RS232 cameras simultaneously the keyboard can control a total of 7 RS232 and RS422 cameras When controlling only RS422 cameras the keyboard can control up to 14 RS422 cameras 2 daisy chains of 7 When controlling only RS485 cameras the keyboard can control up to 255 RS485 cameras The keyboard...

Page 13: ...RS422 and IP Cross protocol mix control It allows you to use RS232 RS422 IP control on one controller to control cameras Protocol support VISCA PELCO D P ONVIF VISCA over IP CGI in a single system Power directly connect to the keyboard o o o o o o o o o ...

Page 14: ...red at EITHER the keyboard OR the Junction Box If the junction box is powered no additional power supply is needed for the keyboard as the junction box will provide power to the keyboard via the control port Connector Pinout Definition ...

Page 15: ...Keyboard IP Configuration Make Serial Port Connection The controller supports serial RS232 RS422 and IP Cross protocol mix control It allows you to use RS232 RS422 IP control on one controller to control cameras Protocol support VISCA PELCO D P ONVIF VISCA over IP in a single system IP port to network switch o o RS232 Connection RS232 Connection ...

Page 16: ...16 RS232 connection Use for the controller with Non Bolin camera connection Bolin camera connection see the separate section following Follow the diagram below for the following options ...

Page 17: ...17 ...

Page 18: ...18 RS422 connection Use for the controller with Non Bolin camera connection Bolin camera connection see the separate section following Follow the diagram below for the following options ...

Page 19: ...19 ...

Page 20: ...20 ...

Page 21: ...21 ...

Page 22: ...22 RS485 connection Use for the controller with Non Bolin camera connection Bolin camera connection see the separate section following Follow the diagram below for the following options ...

Page 23: ...23 ...

Page 24: ...24 ...

Page 25: ...25 ...

Page 26: ...26 IP Control Use ONVIF IP Control Use VISCA OVER IP Control ...

Page 27: ...th RS422 VISCA control connection Cable Preparation 1 Build standard multiple cameras RS 422 daisy chain control connection between the keyboard controller and the cameras For more RS422 control information details please refer to Keyboard Controller user guide a Via Junction Box ...

Page 28: ...h by tally function cable c Access to KEYBOARD SETTING GPI I O Setting and change it to Input mode then Exit to home directory d After done above operations we can switch to different camera by video switch for example if we switch to camera 1 on video switch it will send tally signal to keyboard via the tally function cable and keyboard will transmit this tally signal to camera 1 via standard RS ...

Page 29: ...SETTING GPI I O Setting and change it to Output mode then Exit to home directly c After done above operation we can switch to different camera by keyboard for example if we switch to camera 1 on keyboard it will send tally signal to camera 1 via standard RS 422 control cable so camera 1 tally light will turn on and keyboard can control camera 1 pan and zoom d If switch to camera 2 on keyboard then...

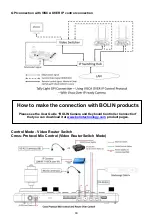
Page 30: ... Mode Video Router Switch Cross Protocol Mix Control Video Router Switch Mode How to make the connection with BOLIN products Please see the User Guide BOLIN Camera and Keyboard Controller Connection that you can download it at www bolintechnology com product pages ...

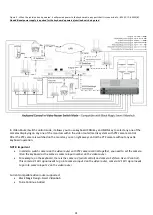
Page 31: ...Z camera is switched on the monitor you can right away control the PTZ camera without any extra keyboard operation NOTE Important In order to switch camera on the video router with PTZ camera control together you need to set the camera ID on the keyboard as the same as camera input number on the video router For example on the keyboard there is the camera 3 serial control and camera 12 Visca Over ...

Page 32: ...rds added to the same system This Configuration File Export Import feature will help with you duplicating the keyboard settings to new keyboards Configuration file export import function allows user to migrate the Camera Setting data and Keyboard Setting data that have been configured from one keyboard to another Note Before you start keyboard configuration file export import the IP address fo the...

Page 33: ...mport Camera Setting Data or Import Keyboard Setting Data page 3 Click Browser button to select the backup file then click Import button to start importing It will display the percentage of the importing progress on keyboard LCD screen 4 After finishing importing the backup file the new keyboard configuration will be the same as the original one user doesn t have to set up the new keyboard from be...

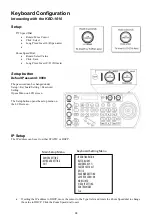
Page 34: ...g Opens Menu on LCD screen The Setup button opens the setup menu on the LCD screen IP Setup The IP address can be set to either STATIC or DHCP If setting the IP address to DHCP move the cursor to the Type field and rotate the Zoom Speed dial to change the value to DHCP Click the Zoom Speed dial to save CAMERA SETTING KEYBOARD SETTING EXIT Main Setup Menu IP CONFIGURATION BUTTON LIGHT ASSIGNED KEY ...

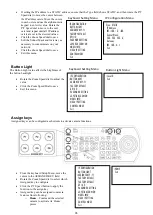
Page 35: ...d Setup Menu move the cursor to the ASSIGNED KEY field Rotate the Zoom Speed dial to select which Assigned key to configure Click the P T Speed button to apply the function to the assign key Assigned key can be assigned to camera features from following o Home Command the selected camera to activate its Home preset IP CONFIGURATION BUTTON LIGHT ASSIGNED KEY F1 FACTORY DEFAULT GPI I O PASSWORD SETT...

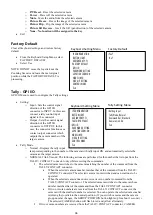
Page 36: ...t is input from the TALLY CONTACT connector only while receiving the commands The selected camera switches to the camera matching the number of the command from the TALLY CONTACT connector When the selected camera number matches that of the command from the TALLY CONTACT connector The selected camera is not switched and can continue to be operated When the selected camera does not receive its own ...

Page 37: ...utputs 1 to 7 If the unit and cameras are connected by LAN connection cameras 1 to 10 in group 1 correspond to input outputs 1 to 10 o Expand Handles camera numbers as binary numbers Tally input numbers 8 and higher in a serial connection are ignored In this case the response is equivalent to no input Numbers in a LAN connection corresponding to cameras 1 to 10 in groups 1 to 10 are handled as the...

Page 38: ...Payload Header SONY BOLIN For the cameras from these makers Set it ON For the cameras from other makers Set it OFF Or consult the camera provider Port The control port for Visca over IP By default is 52381 Camera maker SONY BOLIN use port 52381 Other camera makers may use port 1259 IP CONFIGURATION BUTTON LIGHT ASSIGNED KEY F1 FACTORY DEFAULT GPI I O PASSWORD SETTING JOYSTICK ZOOM ON MODEL INFO VI...

Page 39: ... can store settings to control up to 255 cameras by RS485 PELCO protocol separately 7 cameras by VISCA protocol via RS422 group A separately 7 cameras by VISCA protocol via RS422 group B separately 255 cameras by IP ONVIF protocol separately 255 cameras by VISCA Over IP protocol separately Total 255 cameras by cross protocol mix controlling With the cursor on the Camera Selection use the Zoom Spee...

Page 40: ...the camera is configured to communicate on a field other than port 80 change the port number using the alphanumeric keypad ESC button works as a backspace Exit this menu Scanning Local Area Network LAN for available ONVIF cameras Cameras can be detected on the network and added to the keyboard to be controlled Press the Search button to bring up the Auto Search menu Move the cursor to ONVIF IP Sel...

Page 41: ... TCP and UDP 2 At Keyboard location Set the keyboard to DHCP Contact the network administrator at the Keyboard location to create a port forwarding rule in the router allowing commands to flow through the necessary ports using these values o Source external port 80 default o Destination internal port 80 default o IP Address IP Address of the keyboard o Protocol Both TCP and UDP Within the Setup me...

Page 42: ... Header SONY BOLIN For the cameras from these makers Set it ON For the cameras from other makers Set it OFF Or consult the camera provider Port The control port for Visca over IP By default is 52381 Camera maker SONY BOLIN use port 52381 Other camera makers may use port 1259 USER you can set the port that your camera is using Please consult your camera provider for port information This keyboard s...

Page 43: ...h discovered camera that you wish to add to the KBD 1010 Adding VISCA over IP cameras to be controlled via WAN 1 At Camera Location For commands to flow from outside the network in to a camera ports must be opened Contact the network administrator at the camera location to create a port forwarding rule in the router allowing commands to flow through the necessary ports using these values o Source ...

Page 44: ...h TCP and UDP Within the Setup menu of the KBD 1010 add the VISCA over IP camera using the WAN IP of the camera location as the IP Address Click the P T Speed dial to save Interacting with Cameras Dual RS422 button A B ...

Page 45: ... a Move up down to navigate through menu options b Move the joystick to the right to send an enter command c Move up down to adjust values d Move the joystick to the left to send an exit command Engaging the Camera OSD Menu for PELCO D or ONVIF IP Cameras 1 On the alphanumeric keypad call preset 95 to engage the menu type 95 and then press the Call button Manual Movements Pan Tilt and Zoom movemen...

Page 46: ...esired preset number on the alphanumeric keyboard and then hold the Preset button for 3 seconds to save Calling presets 1 Enter the desired preset number on the alphanumeric keypad 2 Press the Call button Resetting Clearing presets 1 Enter the number of the preset you would like to clear 2 Press the Reset button ...

Page 47: ...47 Adjusting image parameters The following image parameters can be set adjusted by using the Image Adjustment Panel ...

Page 48: ...ware ready from Bolin website or your dealer or consulting Bolin technical support Keyboard MCU firmware upgrade This process begins with the keyboard powered off 1 After you download the FW file you must RENAME THE FILE to KEYBOARD bin if the file name you get is like this 02040367A1 KEYBOARD Version076 bin 2 Load the bin file onto a flash drive Must Formatted as FAT32 with the KEYBOARD bin firmw...

Page 49: ...ED KEY F1 F2 F3 F4 F5 F6 Home P T Reset Power Mute Picture Freeze Picture Flip Picture L R Reverse None Exit Factory Default Yes No Setting Input Output Tally Mode Normal On Air Command Sel Standard Expand Camera Link On Off Exit Old Password User entry using keypad New Password User entry using keypad Confirm User entry using keypad Save Exit Joystick Zoom ON OFF MODEL INFO IP Address FW Version ...

Page 50: ...50 Dimensions Unit mm KBD 1010 Junction Box ...

Page 51: ...51 www bolintechnology com 2082 TECHNOLOGY LLC dba BOLIN TECHNOLOGY ...

Reviews: