_____________________________________________________________________
724-746-5500 | blackbox.com
Page 257
-
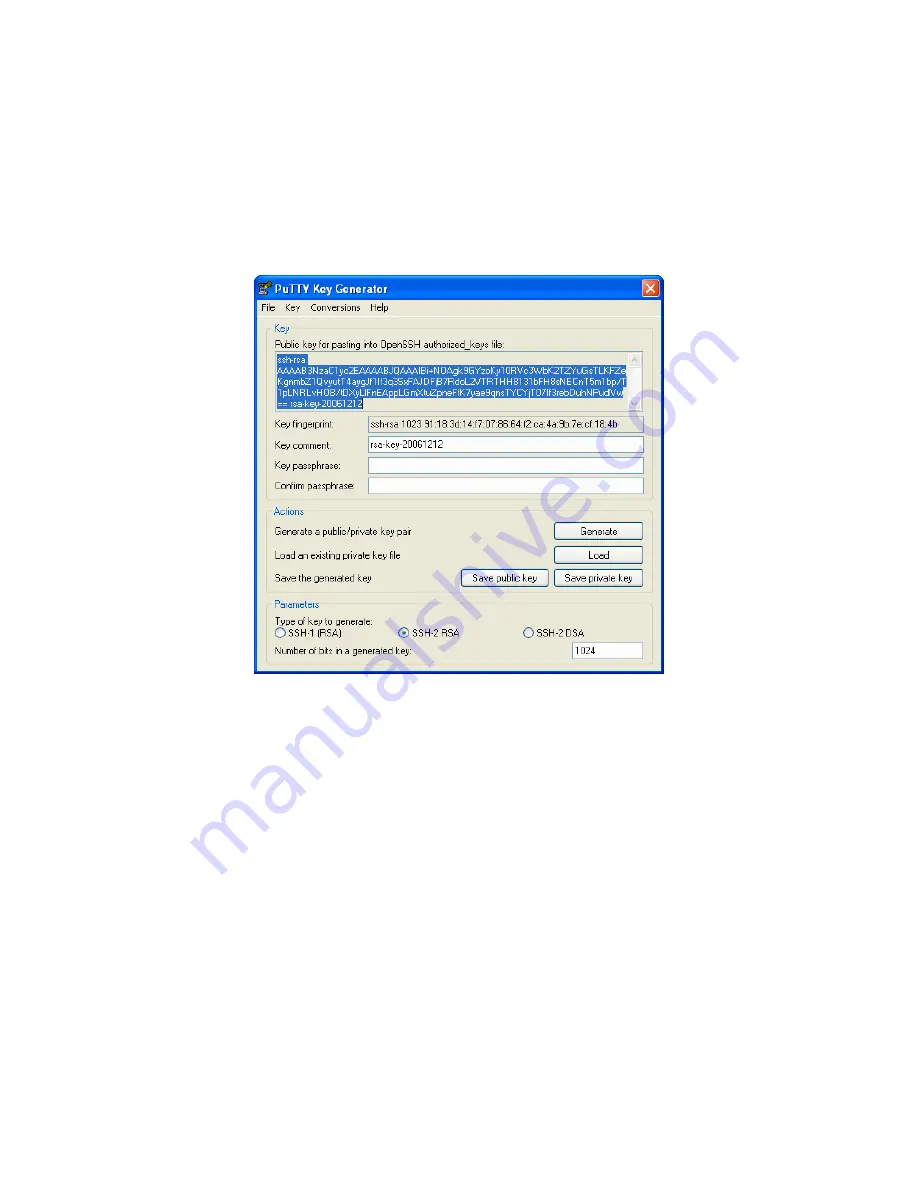
Execute the PUTTYGEN.EXE program.
-
Select the desired key type
SSH2 DSA
(you may use RSA or DSA) within the
Parameters
section.
-
It is important that you leave the passphrase field blank.
-
Click on the
Generate
button.
-
Follow the instruction to move the mouse over the blank area of the program in order to create random data used
by PUTTYGEN to generate secure keys. Key generation will occur once PUTTYGEN has collected sufficient random
data.
-
Create a new file "
authorized_keys
" (with notepad) and copy your public key data from the "Public key for pasting
into OpenSSH authorized_keys file" section of the PuTTY Key Generator, and paste the key data to the
"authorized_keys" file. Make sure there is only one line of text in this file.
-
Use WinSCP to copy this "authorized_keys" file into the users home directory: e.g.
/etc/config/users/testuser/.ssh/authorized_keys
of the Black Box gateway which will be the SSH server. You will
need to make sure this file is in the correct format with the correct permissions with the following commands:
# dos2unix \
/etc/config/users/testuser/.ssh/authorized_keys && chown testuser \
/etc/config/users/testuser/.ssh/authorized_keys
-
Using WinSCP copy the attached sshd_config over
/etc/config/sshd_config
on the server (Makes sure public key
authentication is enabled).
-
Test the Public Key by logging in as "testuser" Test the Public Key by logging in as "testuser" to the client Black Box
device and typing (you should not need to enter anything): # ssh -‐o StrictHostKeyChecking=no <server-‐ip>
To automate connection of the SSH tunnel from the client on every power-‐up you need to make the
clients
/etc/config/rc.local
look like the following:


