


106
1.877.877.2269
BLACKBOX.COM
NEED HELP?
LEAVE THE TECH TO US
LIVE 24/7
TECHNICAL
SUPPORT
1.877.877.2269
CHAPTER 4: CONFIGURATION
OSD
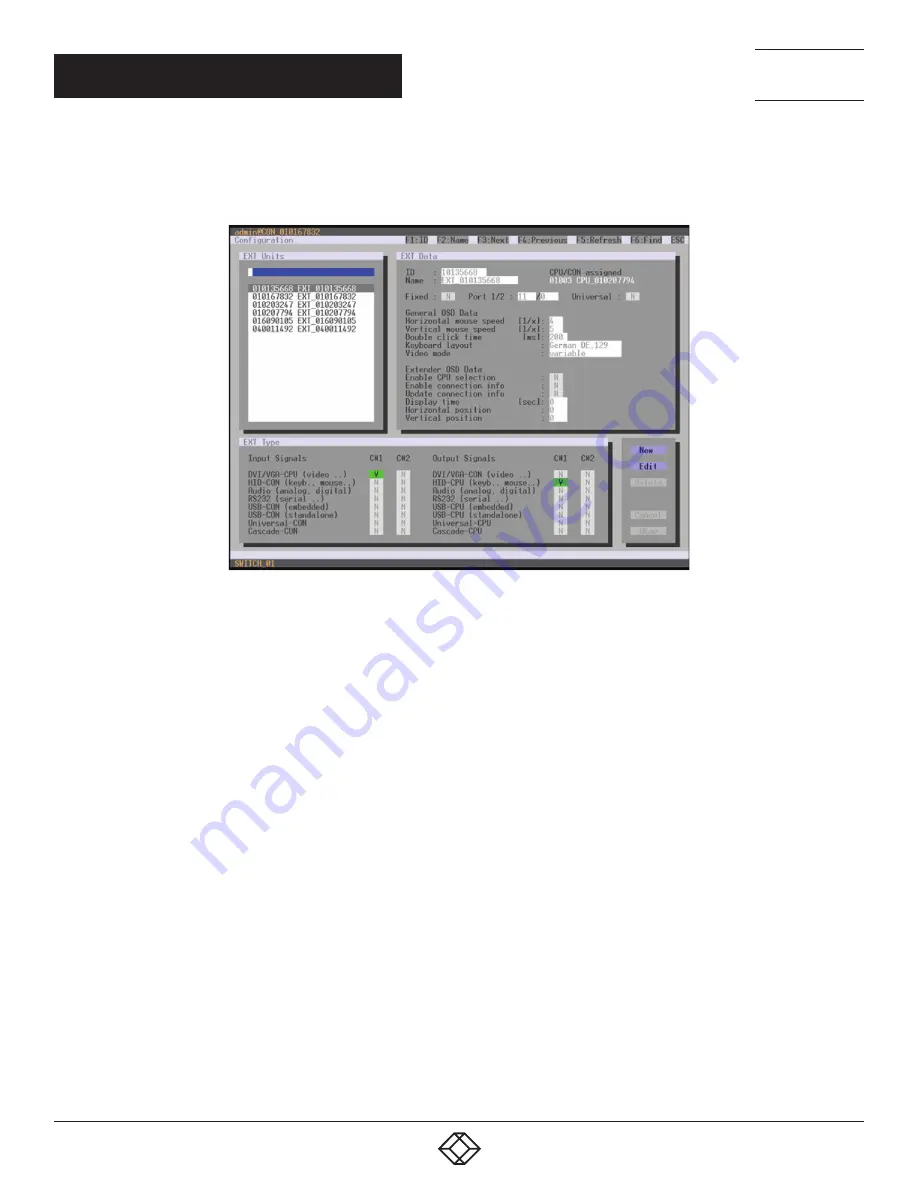
Select Configuration > EXT Units in the main menu.
FIGURE 4-33. CONFIGURATION—EXT UNITS
1. Insert the SFP modules into the matrix and connect the extenders according to the required application.
One extender will be created for each SFP module in the EXT Units list. The appropriate names always start with “UNI.”
2. To configure a CON Unit, select one of the extenders in the EXT Units list that are physically connected to a USB CON Unit.
3. Edit the extender by setting the USB-CON (standalone) option in the Input Signals field to Y for C#1. Set also the Universal-CPU
option in the Output Signals field to N for C#1.
4. To configure a CPU Unit, select one of the extenders in the Ext Units list that are physically connected to a USB CPU Unit.
5. Edit the extender by setting the USB-CPU (standalone) option in the Output Signals field to Y for C#1. Set also the Universal-CPU
option in the Input Signals field to N for C#1.
6. The edited EXT Units for the respective USB CON Units now have to be either assigned to an existing CON Device
or you have to create a new CON Device by using the New R. button for an assignment in the Configuration > CON Devices menu.
7. The edited EXT Units for the respective USB CPU Units now have to be either assigned to an existing CPU Device
or you have to create a new CPU Device by using the New R. button for an assignment in the Configuration > CPU Devices menu.
8. If you use parallel operation within the matrix, set the Release Time in the Configuration > Switch menu to 10 seconds or more.
9. Restart the matrix.
The USB extenders are completely configured now and can be used.


