


122
Preparation
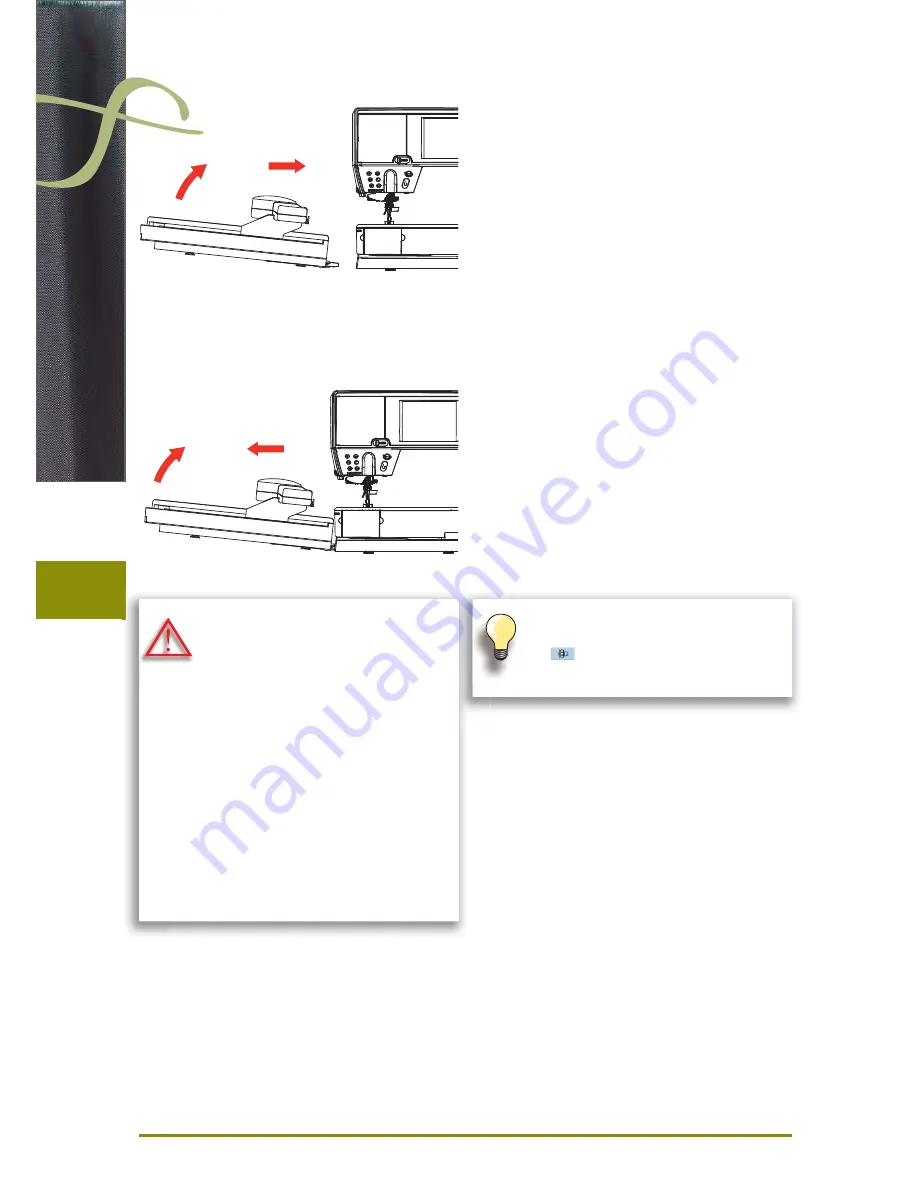
Attaching the Module
Removing the Module
to the Sewing computer
lift the embroidery module on the left and carefully slide
►
it from left to right into the sewing computer connection
1
2
from the Sewing computer
lift the embroidery module on the left and carefully pull
►
out and off to the left
1
2
The slide-on table must not be attached
while the embroidery module is being
attached or removed.
When attaching the embroidery module
ensure that all the units are on the same
even surface.
The embroidery computer may run at high
speeds when embroidering. Therefore the
two units must be placed on a stable
surface or the motor speed reduced when
embroidering.
Make sure that there is enough space
around the sewing computer and embroi-
dery module to allow the unimpeded
movement of the embroidery arm!
Always separate the sewing computer and
the embroidery module from one another
before transporting – do not transport as a
single unit.
The
wh
atta
Wh
ens
The slide-on table can only be attached
with the embroidery module arm to the far
left
.
T
w
l
Summary of Contents for Record 830
Page 84: ...84 Impressions...
Page 118: ......
Page 129: ...129 Overview...
Page 130: ...130 Overview Display M Embroidery Sewing mode M Entry to Embroidery Mode Embroidery Alphabet...
Page 131: ...131 Overview My Designs Motifs from USB Personal Design Stick BERNINA Motif...
Page 186: ...186 Troubleshooting...
Page 189: ...189 Sewing Stitch Categorys Cross Stitches Satin Stitches Satin Stitches Sideways Motion...
Page 190: ...190 Sewing Stitch Categorys Ornament Stitches Heirloom Stitches Heirloom Sideways Motion...
Page 192: ...192 Sewing Stitch Categorys Quilt Stitches Tapering Stitches Skyline Stitches...
Page 193: ...193 Sewing Stitch Categorys Alphabets Block Double Block...
Page 194: ...194 Sewing Stitch Categorys Quilting Text Script...
Page 195: ...195 Sewing Stitch Categorys Comic Sans Monograms...
Page 204: ...204 Embroidery Motifs DG 21 DG 22...
Page 206: ...206 Embroidery Motifs...


