10
Assembling your monitor hardware
or
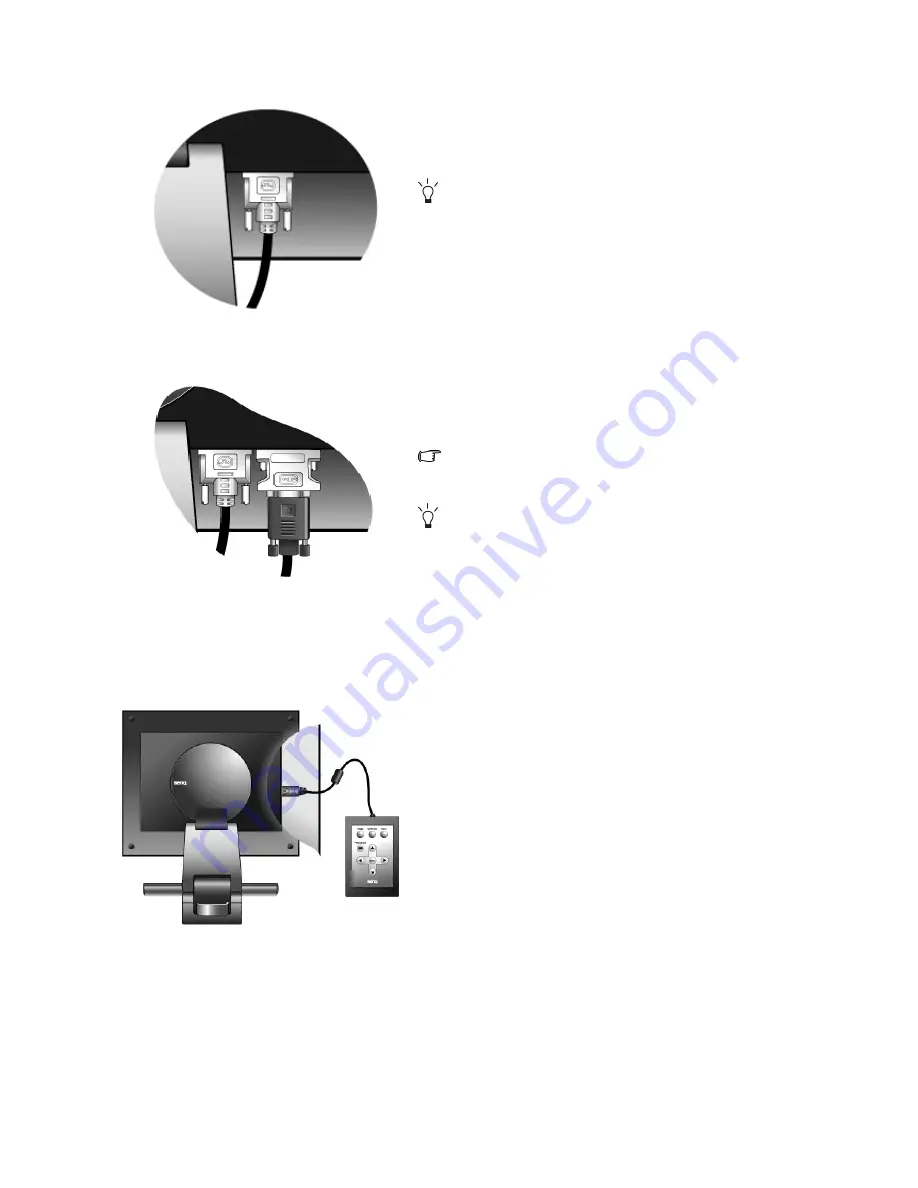
3. Connect the signal cable.
Connect one end of the DVI-D cable to one of the moni-
tor DVI-I sockets and the other end to the DVI-I port on
your computer.
The DVI-D format is used for direct digital connection
between source video and digital LCD monitors or
projectors. The digital video signals produce a superior
quality picture than analog video signals.
If you don’t have an appropriate DVI-D port on your
computer, you can attach the enclosed DVI-I to D-Sub
adapter to the standard video D-Sub cable (at the end with
the ferrite filter), so that the analog video signals can be
converted into digital video signals via the DVI-I interface.
Then connect the DVI-I to D-Sub adapter to the monitor
DVI-D socket and the other end of the D-Sub cable (at the
end without the ferrite filter) to the computer video
D-Sub socket.
Such a DVI-I-to-D-Sub input signal may not present the
superior quality picture as DVI-D input signal.
If you wish to switch between two input signals, you may
connect two signal cables from two computers to the
DVI-I sockets and use
Input
on the monitor controller to
assign the input signal without any time lag. For more
information, see
Input on page 33
.
Tighten all finger screws to prevent the plugs from acci-
dently falling out during use.
4. Connect the monitor controller to the monitor.
Connect the plug of the cable attached to the monitor con-
troller to the controller jack on the rear of the monitor as
illustrated.
The On Screen Display (OSD) items are controlled by the
monitor controller. You use the controller to adjust the
display settings according to your needs. The controller
contains a built-in luminance sensor, which is used to cali-
brate the monitor light output and compensate for any
loss caused by backlight decay.
When not being used, you should store the monitor con-
troller in the supplied controller dock. It can be left con-
nected to the monitor for quick access to the monitor
controls, or unplugged and removed for storage.
For more information about accessing and adjusting the
OSD, see "
Adjusting your monitor on page 29
".


