12
1. Installation
Machine Functions
2
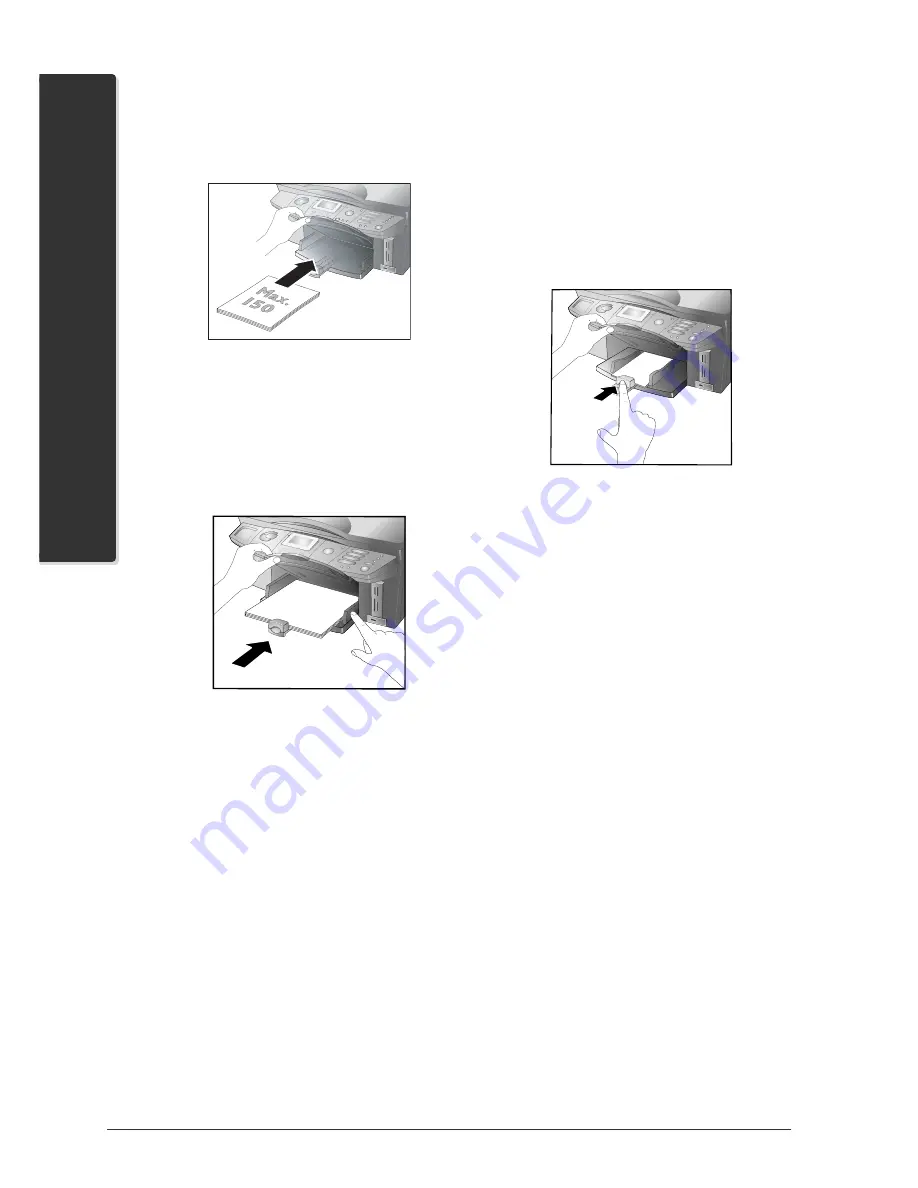
Lift up and hold the printout tray. Pull the front
paper guide as far out as it will go. Lay a maxi-
mum of 150 sheets of paper (standard format
A4
,
210×297 mm, 80 g/m
2
) into the paper tray
with
the short edge out
, inserting them up to the
stop.
Æ
The capacity of the paper tray depends on the
thickness of the printing medium loaded. In-
sert a stack no higher than the height limit of
the two side paper guides (see indicator marking
printed on the machine).
3
Enclose the paper with the two side paper guides
and the front guide. Be sure not to enclose it so
tightly that it bends.
4
Carefully return the printout tray back to its origi-
nal position.
Instructions on the Use of Paper
¿
To prevent paper jams and poor printing quality, do
not use moist or damaged paper. Do not add paper
while the machine is printing. If the paper curls in the
printout tray after printing, remove it immediately. In-
structions for removing a paper jam can be found in the
chapter
Troubleshooting
/ Removing a Paper Jam.
Æ
Never open the paper jam door while the
multifunction machine is printing.
¿
Printouts with high printing density (e.g. due to
complex graphics) can remain damp for a longer
time. Leave the printout in the printout tray for 30 to
60 seconds to dry.
Loading Photo Paper
²
The original photo paper was specially de-
signed for your multifunction machine in or-
der to achieve the best possible printing quality
and durability. If you use other types of paper,
it is possible that the paper could be drawn in
incorrectly or the ink could smudge.
Lay the photo paper in the paper tray with the coated
side (= glossy side) facing down and the short side out,
inserting it until it reaches the stop. Also enclose 10×15
paper with the tab on the front paper guide.
²
Protect the surface of the photo paper by in-
serting
at least two sheets of paper (up
to max
.
20 sheets) together
into the paper
tray.
After printing a photo on 10×15 format, load A4
or letter paper into the paper tray; otherwise in-
coming faxes will not be printed out completely.
(Set the paper format and the paper type with the
functions 241 and 242.)
Instruction on the Use of Photo Paper
¿
Only hold the photo paper by the edges to avoid
fingerprints and flecks on the coated side or in the
printing area.
¿
Avoid contact with moisture and liquids, and do
not use the photo paper in environments with high
humidity, extreme temperatures or in direct sunlight.
¿
Store the photo paper in the original package in a
cool and dry location, and do not expose it to ul-
traviolet light.
¿
Allow the printouts to dry under normal room
conditions for at least 24 hours. Lay acid-free paper
between the individual printouts.
¿
Use photo albums of acid-free material, and avoid
plastics that contain PVC to prevent your photos
from fading.
¿
Follow these instructions to achieve the best pos-
sible durability and printing quality with the photo
paper.
Summary of Contents for Belgafax 710
Page 2: ......
Page 68: ...68 Appendix...
Page 69: ...Appendix 69 Appendix...
Page 70: ...70 Appendix...
Page 71: ......


