12. FITTING THE FASCIA
12.1 Fitting the Bolero fascia.
1. As supplied the fascia has two additional
brackets which are not required. These are
located at the top of the side sections. Unscrew
and remove the brackets.
2.
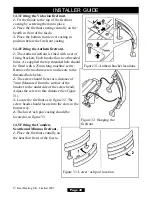
Carefully lift the fascia. Place the fascia
against the fireplace front surface so that the two
retaining plates at the back of the fascia are
directly above the two upper retaining brackets at
the top of the hotbox. Lower the fascia unit
making sure that the retaining plates locate fully
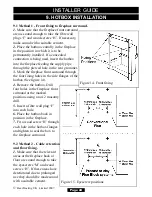
into the brackets on the hotbox (See figure 24). If
the inlet pipe runs along the front of the fireplace,
the bottom of the fascia will have to be
swung forward to clear the pipe while
lowering the fascia.
3.
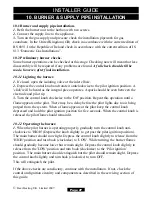
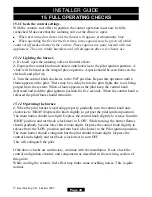
Secure the fascia using the two ‘E’
screws and ‘D’ washers supplied (See
figure 25).
4.
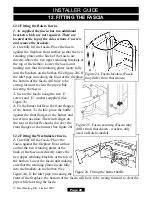
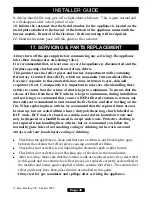
Fit the burner baffle to the front flanges
of the burner. To do this, place the baffle
against the front flanges of the burner and
lower into position. The return edges on
the rear of the baffle should slot over the
front flanges of the burner (See figure 26).
12.2 Fitting the Westminster fascia.
1.
Carefully lift the fascia. Place the
fascia against the fireplace front surface
so that the two retaining plates at the
back of the fascia are directly above the
two upper retaining brackets at the top of
the hotbox. Lower the fascia unit making
sure that the retaining plates locate fully
into the brackets on the hotbox (See
figure 24). If the inlet pipe runs along the
front of the fireplace, the bottom of the fascia will have to be swung forward to clear the
pipe while lowering the fascia.
Page 29
INSTALLER GUIDE
©
Baxi Heating U.K. Limited 2007.
Figure 26. Fitting the burner baffle
Figure 25. Fascia securing (Fascia may
differ from that shown - washers only
used on Bolero model)
Figure 24. Fascia location (Fascia
may differ from that shown)

