


8. Geometry Menu
Image 8-59
11
11
11
11
11
11
11
11
11
15
14
15
13
15
14
15
12
15
14
15
13
15
14
15
11
14
14
14
14
14
14
14
14
11
15
14
15
13
15
14
15
12
15
14
15
13
15
14
15
11
13
13
13
13
13
13
13
13
11
15
14
15
13
15
14
15
12
15
14
15
13
15
14
15
11
14
14
14
14
14
14
14
14
11
15
14
15
13
15
14
15
12
15
14
15
13
15
14
15
11
12
12
12
12
12
12
12
12
11
15
14
15
13
15
14
15
12
15
14
15
13
15
14
15
11
14
14
14
14
14
14
14
14
11
15
14
15
13
15
14
15
12
15
14
15
13
15
14
15
11
13
13
13
13
13
13
13
13
11
15
14
15
13
15
14
15
12
15
14
15
13
15
14
15
11
14
14
14
14
14
14
14
14
11
15
14
15
13
15
14
15
12
15
14
15
13
15
14
15
11
11
11
11
11
11
11
11
11
10
10
10
10
10
10
10
10
10
10
10
10
10
10
10
10
1
2
1
2
3
2
1
2
1
4
4
4
6
5
6
4
4
6
5
6
4
4
4
5
5
7
7
7
7
7
7
7
7
7
7
7
7
7
7
7
7
9
9
9
9
9
9
9
9
9
9
9
9
9
9
9
9
8
8
8
8
8
8
8
8
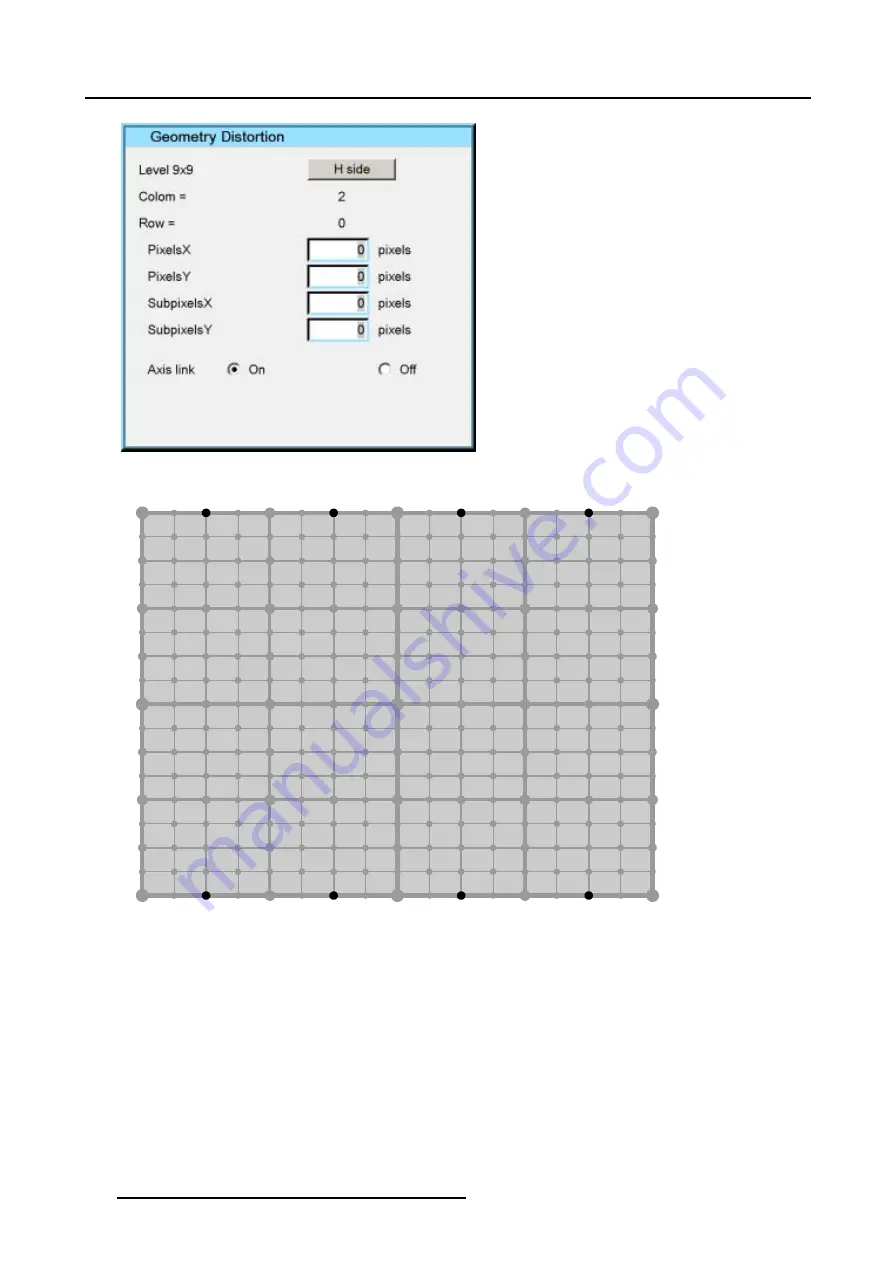
Image 8-60
9x9 H-side (Level 7) selections
8.5.4.3
Adjusting the 9x9 H-side (Level 7)
How to adjust the 9x9 H-Side (Level 7)?
1. Push the cursor key
↑
or
↓
to highlight the
Pixels X
edit box and press
ENTER
to select. (image 8-61)
2. Use the cursor key
←
or
→
, the numeric keys on the RCU, or the local keypad, to edit and change the values, e.g. to coarse
shift the selected H-side in a horizontal way. Press
ENTER
to continue. (image 8-62)
3. Push the cursor key
↑
or
↓
to highlight the
Pixels Y
edit box and press
ENTER
to continue.
4. Use the cursor key
←
or
→
, the numeric keys on the RCU, or the local keypad, to edit and change the values, e.g. to coarse
shift the selected H-side in a vertical way (Follow this procedure in a similar way to adjust any desired H-side position). Press
ENTER
to continue. (image 8-63)
5. Use the subpixel adjustments to fine shift the selected H-side.
104
R5976870 BARCOREALITY SIM 5PLUS/SIM 5R 04/04/2007
Summary of Contents for R9040380
Page 1: ...BarcoReality SIM 5plus SIM 5R Owner s Manual R9040380 R9040381 R5976870 03 04 04 2007...
Page 4: ......
Page 10: ...1 Safety Instructions 6 R5976870 BARCOREALITY SIM 5PLUS SIM 5R 04 04 2007...
Page 28: ...3 Installation Guidelines 24 R5976870 BARCOREALITY SIM 5PLUS SIM 5R 04 04 2007...
Page 36: ...4 Connections 32 R5976870 BARCOREALITY SIM 5PLUS SIM 5R 04 04 2007...
Page 59: ...7 Image Menu Image 7 22 R5976870 BARCOREALITY SIM 5PLUS SIM 5R 04 04 2007 55...
Page 72: ...7 Image Menu Image 7 55 Image 7 56 68 R5976870 BARCOREALITY SIM 5PLUS SIM 5R 04 04 2007...
Page 163: ...8 Geometry Menu Image 8 162 Image 8 163 R5976870 BARCOREALITY SIM 5PLUS SIM 5R 04 04 2007 159...
Page 164: ...8 Geometry Menu 160 R5976870 BARCOREALITY SIM 5PLUS SIM 5R 04 04 2007...
Page 186: ...10 Lamps Menu 182 R5976870 BARCOREALITY SIM 5PLUS SIM 5R 04 04 2007...
Page 198: ...12 Display Setup Menu 194 R5976870 BARCOREALITY SIM 5PLUS SIM 5R 04 04 2007...
Page 216: ...13 Installation Menu 212 R5976870 BARCOREALITY SIM 5PLUS SIM 5R 04 04 2007...
Page 218: ...14 Service Menu Image 14 2 214 R5976870 BARCOREALITY SIM 5PLUS SIM 5R 04 04 2007...
Page 220: ...15 Adjustment Menu 216 R5976870 BARCOREALITY SIM 5PLUS SIM 5R 04 04 2007...
Page 226: ...A Standard Image Files 222 R5976870 BARCOREALITY SIM 5PLUS SIM 5R 04 04 2007...
Page 232: ...B Scheimpflug Lens Adjustment 228 R5976870 BARCOREALITY SIM 5PLUS SIM 5R 04 04 2007...
Page 236: ...C Calibrate Measured Values 232 R5976870 BARCOREALITY SIM 5PLUS SIM 5R 04 04 2007...
Page 240: ...D Software Update 236 R5976870 BARCOREALITY SIM 5PLUS SIM 5R 04 04 2007...
Page 242: ...E Troubleshoot 238 R5976870 BARCOREALITY SIM 5PLUS SIM 5R 04 04 2007...


