4. Lenses & Lens selection
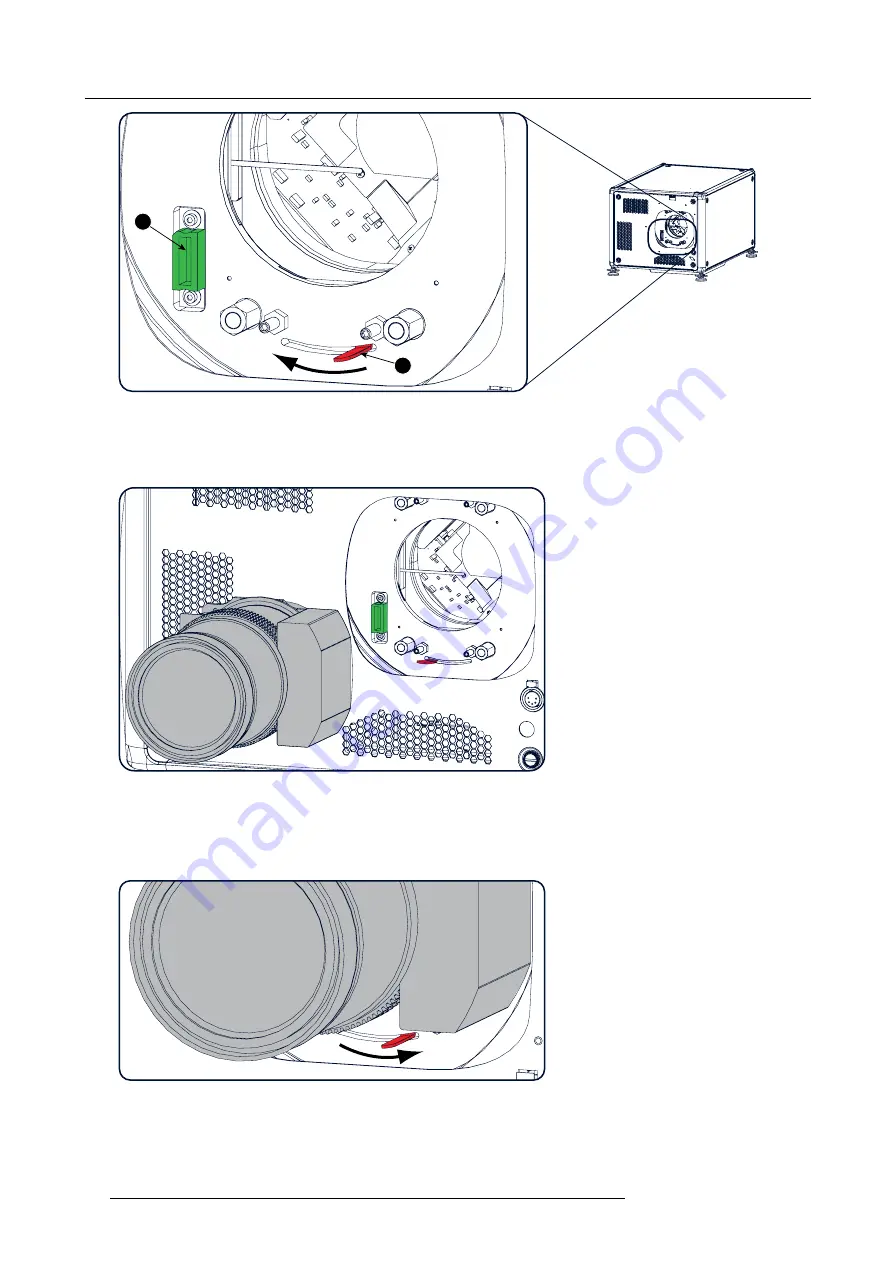
A
B
Image 4-10
Lens installation, preparation
5. Ensure that the lens holder stands in the On-Axis position (horizontal and vertical mid position).
Note:
The lens holder is placed default in the On-Axis position at factory.
6. Gently insert the lens in such a way that the lens connector matches the socket (B).
Image 4-11
Lens insertion
7. Insert the lens until the connector seats into the socket.
Warning:
Do not release the Lens yet, as the Lens may fall out of the Lens Holder.
8. Secure the lens in the lens holder by sliding the lens lock handle into the “locked” position, which is away from the lens power
supply socket. Ensure the lens touches the front plate of the lens holder.
Image 4-12
Lock lens
9. Check if the lens is really secured by trying to pull the lens out of the lens holder.
32
R5906070 HDX 4K 23/09/2016
Summary of Contents for HDX 4K
Page 1: ...HDX 4K User guide R5906070 00 23 09 2016 ...
Page 4: ......
Page 24: ...2 Installation preparations 20 R5906070 HDX 4K 23 09 2016 ...
Page 44: ...4 Lenses Lens selection 40 R5906070 HDX 4K 23 09 2016 ...
Page 50: ...5 Input Communication 46 R5906070 HDX 4K 23 09 2016 ...
Page 60: ...7 Graphic User Interface GUI 56 R5906070 HDX 4K 23 09 2016 ...
Page 62: ...8 GUI Source 58 R5906070 HDX 4K 23 09 2016 ...
Page 66: ...9 GUI Image 62 R5906070 HDX 4K 23 09 2016 ...
Page 72: ...10 GUI Installation 68 R5906070 HDX 4K 23 09 2016 ...
Page 78: ...12 Maintenance 74 R5906070 HDX 4K 23 09 2016 ...
Page 90: ...13 Servicing 86 R5906070 HDX 4K 23 09 2016 ...
Page 94: ...A Specifications 90 R5906070 HDX 4K 23 09 2016 ...


