


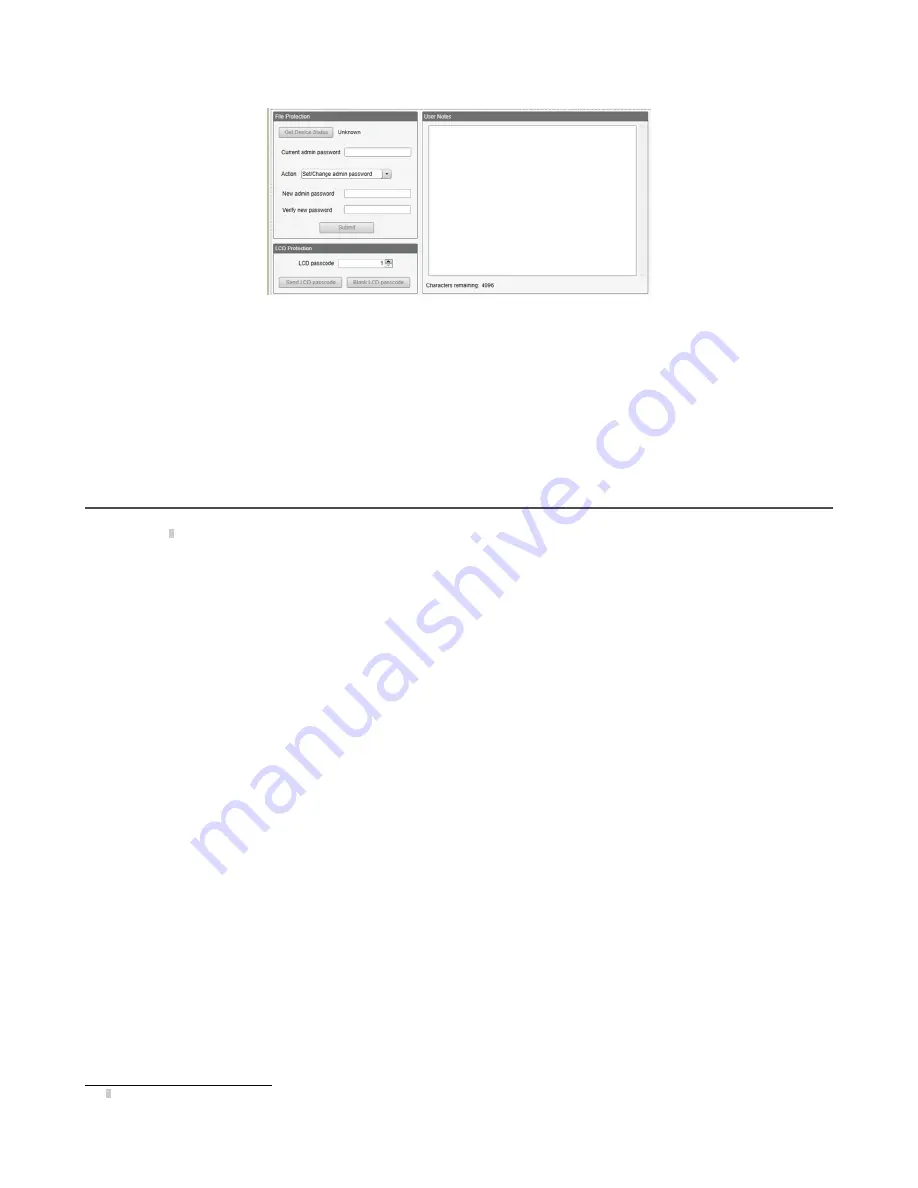
Figure 44. Settings > Administration screen
Use the DXM Configuration Software to:
•
Set the Admin Password
•
Change the Admin Password
•
Remove the Admin Password
To change or remove an admin password, the current password must be supplied. The DXM must be connected to the PC to
change the administration password.
The DXM can be unlocked without knowing the administration password, but doing this erases the configuration program,
logging files, and any ScriptBasic program on the device. For instruction on how to do this, see the
page 63 section.
8.5 EtherNet/IP
™
Configuration
The DXM is defined from the factory to send/receive register data from the Gateway and the first 16 Nodes with an
EtherNet/IP
™
3
host.
To expand the number devices going to Ethernet/IP, change the
Devices in system
parameter in the DX80 Gateway
(default setting is 8) to 32. To change this value:
1. Launch the the DX80 Configuration Software.
2. In the menu bar, go to
Device
>
Connection Settings
and select
Serial
or
Ethernet DXM
.
3. In the
Configuration
>
Device Configuration
screen, click on the arrow next to the Gateway to expand and display
the Gateway's parameters.
4. In the
System
section, use the
Devices in system
drop-down list to make your selection.
This allows the user to maximize the use of the EtherNet/IP buffer to 28 devices.
EDS (Electronic Data Sheet) files allow users of the EtherNet/IP protocol to easily add a Banner DXM device to the PLC.
Download the EDS files from the Banner website.
•
DXM EDS Configuration File (for PLCs) (p/n
•
DXM EIP Config File for DXM Controller with Internal Gateway (Models: DXM1xx-BxR1, DXM1xx-BxR3, and
)
8.5.1 Download an Existing Configuration from the DXM
If you have an existing configuration file, save the XML file locally as a back-up on your computer.
1. Apply power to the DXM.
2. Connect an ethernet or USB cable between your computer and the DXM.
3. Launch the DXM Configuration Software v4 and select your DXM model.
4. On the
Device
>
Connection Settings
menu, select one of the following:
•
Select
TCP/IP
as the connection type and enter the
IP Address
of the DXM Controller; or
•
Select
Serial
as the connection type and select the appropriate
Comm port
5. On the menu bar, select
Device
>
Get XML configuration from DXM
to download the XML configuration file.
6. Save the XML file locally on your computer.
3
EttherNet/IP is a trademark of Rockwell Automation.
Sure Cross
®
DXM150 and 1500-Bx Wireless Controllers
56
www.bannerengineering.com - Tel: + 1 888 373 6767


