


Description of Battery Level Icons and Charging
19
Description of Battery Level Icons and Charging
Determining the CP battery level
The battery icon shows the CP battery level. This icon is always displayed in the bottom
left corner of the screen when the CP is on.
The number of bars on the battery icon indicates the CP battery level, and bars
disappear from right-to-left as battery charge is depleted. The battery levels show on
this page are as follows:
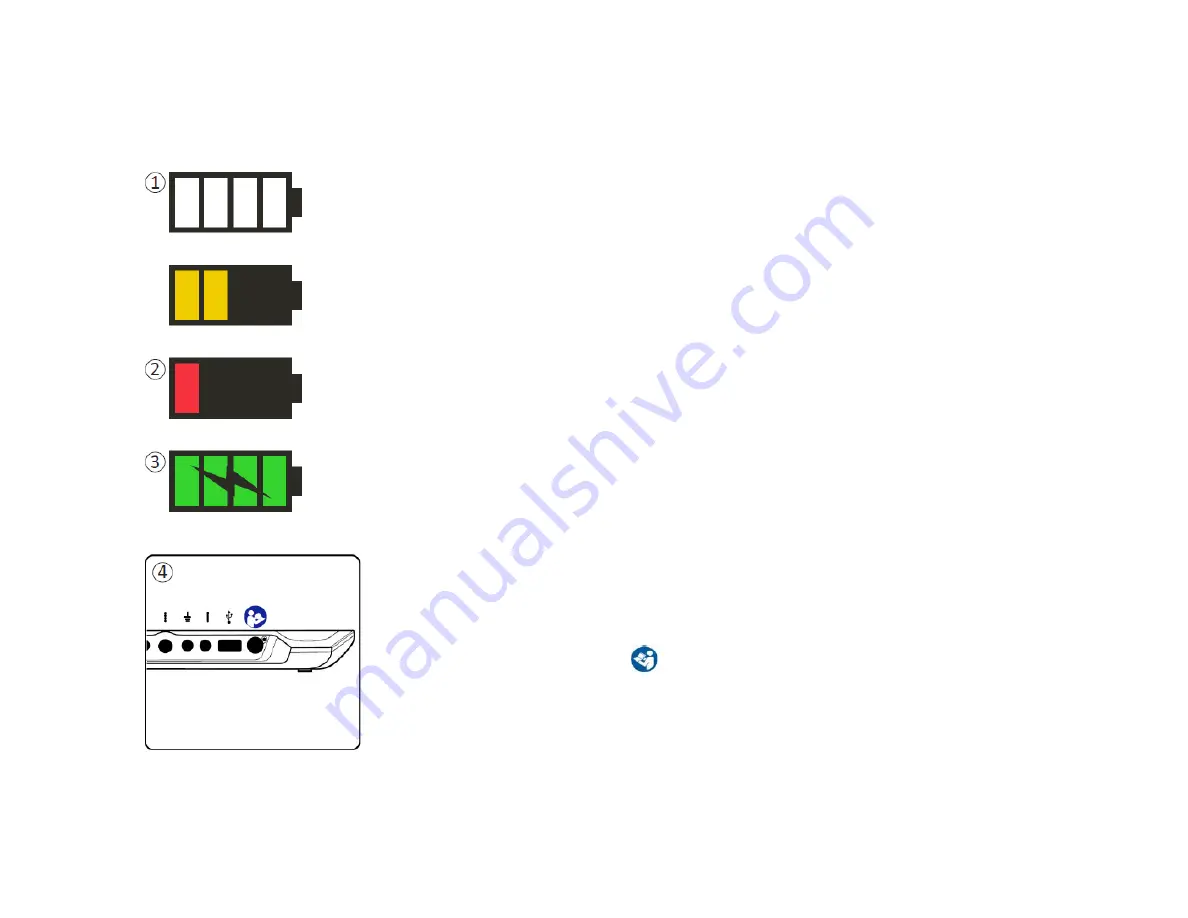
①
Partially Full to Full (2 to 4 bars)
•
When 4 bars are present the battery is full or nearly full. At 4 or 3 bars, the battery
bars are white. When the battery drops to 2 bars, the bars are yellow indicating
less than half the battery charge is remaining.
②
Low
•
When the battery level is low, the battery displays 1 red bar.
Note:
A procedure should not be started with a low battery to avoid the CP battery dying
during the procedure.
•
Two minutes before the CP automatically shuts down due to a critically low
battery, the user will be prompted to charge the CP. This prompt can only be
disabled by plugging in and charging the CP.
③
Charging
•
When the device is charging, the battery icon shows 4 green bars and a lightning
bolt. Charging a fully depleted CP can take up to 6 hours.
How to Charge the CP
To charge the CP, plug the power supply into a power outlet and into the CP (④). The
power supply plugs into the CP at the right end of the Connection Panel and is indicated
by the “Refer to manual” symbol.
Note
: Charge the CP after each use. A full battery should last for approximately 3-4 hours of use. If
multiple implant procedures are scheduled on a single day, charge the CP between procedures to
ensure the battery does not run out.
Note
: The CP should provide 5 or more years of service. With repeated charging, the CP battery
may lose capacity. Notify Axonics if you experience a significant change in the operating time for
a fully charged CP battery.


