


3. Operation
57
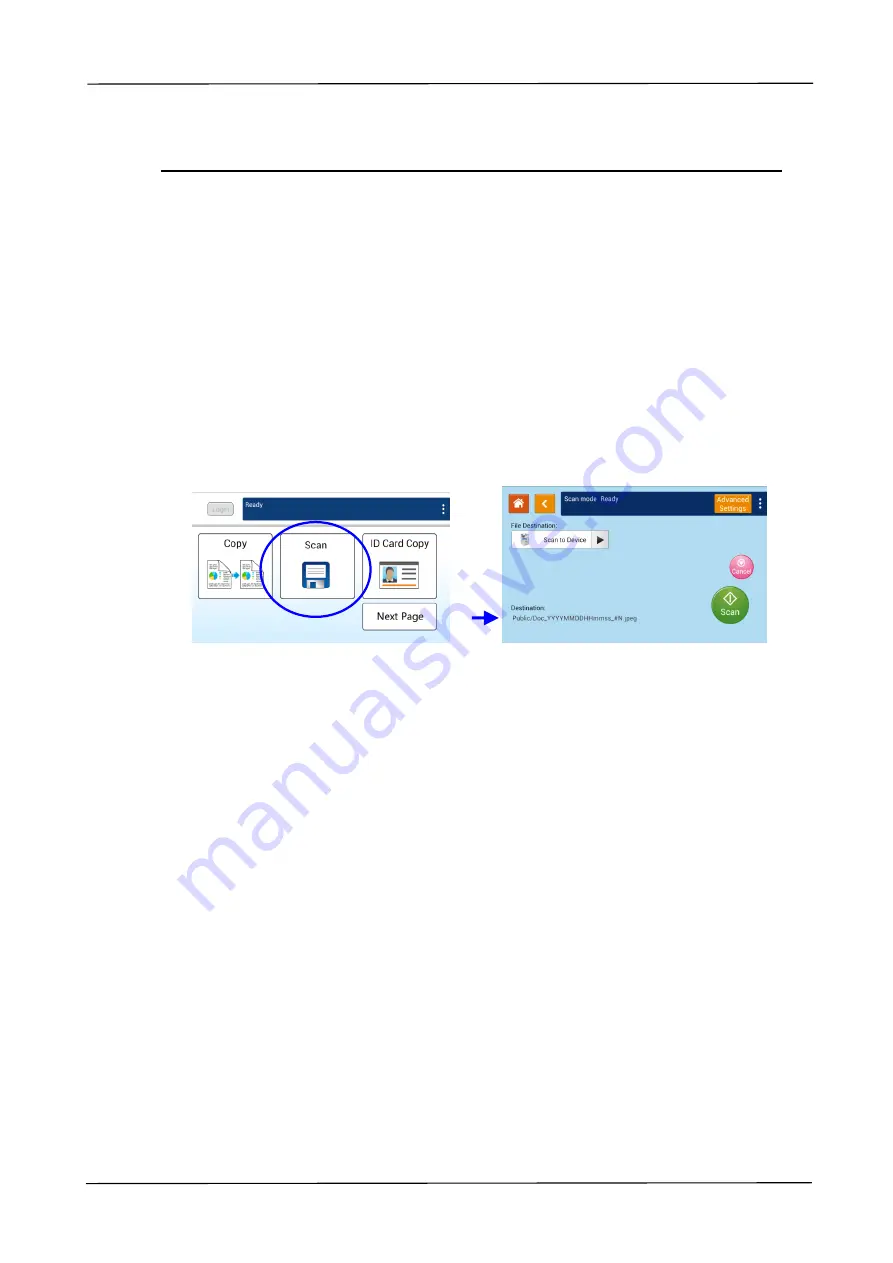
Scan
The scan function allows you to first scan your documents and then send the scanned
image to a specified destinations such as Scan to Device (this product’s memory), or
Scan to USB (an inserted USB flash drive).
The Operational Steps:
1.
Place your multi-page document
Face Up
and
Top First
in the auto document
feeder or single-page
Face Down
on the document glass.
2.
Tap the
「
Scan
」
button on the touch screen, and the
「
Scan
」
screen will be
displayed.
3.
Tap
「
Scan to Device
」
to choose your scan-to destination.
Scan to Device
: Send the scanned document to the product’s memory.
(Download the image through the embedded web page.)
Scan to USB
: Send the scanned documents to the inserted USB flash drive.
4.
Tap [
Advanced Settings
]
to c
onfirm or change Scan options as desired such
as Resolution, Output Color, Density, 1/2-Sided Scanning, File Format, Folder, or
Original Size.
Resolution
:
Choose the resolution of the scanned image. The higher the value,
the more details can be reviewed yet more disk space will be
required. Choice:
150
/200/300/600 dpi
150 dpi
: Suits to be viewed on the screen.
200 dpi: Suits for most business document.
300 dpi/600 dpi: High quality image helps increase OCR (optical
character recognition) accuracy.
Color Mode
:
Choose your desired color mode. Choice:
Color
、
Gray
、
B&W
Original Size
: Choose your scan size. Choice:
Auto
, A3
, A4
, A4
, A5
, B4
,
B5
1/2-Sided
:
Choose if you wish to scan one side or both the front and rear side
of your document. Choice:
1-Sided
、
2-Sided
Density
: Lighten or darken your original. Levels: 1~7 (
default:
4
)


