


56
-
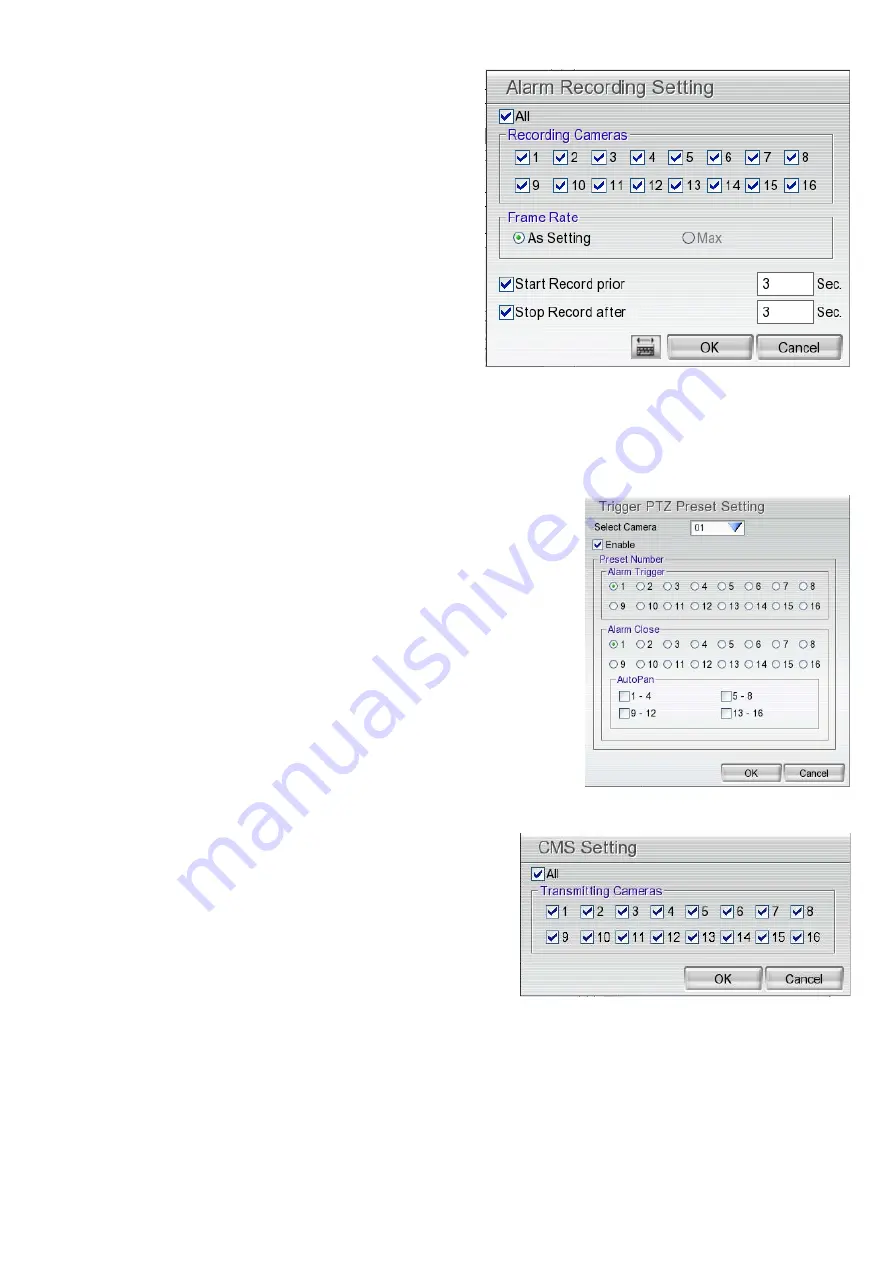
Start Recording
Record the video from the selected camera.
1. Beside the Start Recording check box, click
Detail
.
2. In the Alarm Recording Setting dialog box, select
the camera to enable/disable video recording.
Enable
All
to select all cameras.
3. In the Frame Rate selection, select
As Setting
to
record the number of frames based on the
Recording Setting.
4. In the
Start Record prior
text box, mark and set
the number in second for the program to begin
recording after the alarm has been trigger. The
time range is 1~10 seconds.
5. In the
Stop Record after
text box, mark and set the number in second for the program to continue
recording after the alarm has ended. The time range is 1~999 seconds. If user doesn’t mark and set
the time, the alarm recording will continue recording until alarm is reset.
6. Click
OK
to accept the new settings and
Cancel
to exit without saving.
-
PTZ preset point
Position the PTZ camera based on the preset point setting. Beside
the PTZ preset point check box, click
Detail
. In the Trigger PTZ
Preset Setting dialog box, select the PTZ camera number then
select the
Enable
check box. Select the position of the PTZ
camera when the alarm is activated and ended. For the PTZ
camera end point, user can also select on preset position or
Auto
Pan
between preset position groups.
-
Send to CMS (Central Management System)
Enable/disable the selected camera to send video to CMS
when the alarm is activated.
Beside the Send to CMS check box, click
Detail
. In the
CMS Setting, select the camera to enable/disable sending
the video to CMS. Enable
All
to select all cameras. Then,
click
OK
to accept the new settings and
Cancel
to exit
without saving.


