Verifit
®
User's Guide Version 4.8
©
November 2016
3.
DO
make sure the tubing on the HA-2 (BTE) coupler is free from any cracks/tears.
4.
DO
make sure that any replacement tubing used on the BTE coupler is either obtained from Audioscan, or is
#13 heavy wall earmold tubing exactly 10 mm (.38 inches) in length.
Probe microphone:
Debris can alter the probe module reference microphone calibration and frequency response and can
permanently clog the probe module port.
1.
DO NOT
reuse probe tubes. Probe tubes can be wiped with alcohol wipes for re-use with the same patient,
but must not be used with multiple patients. Attempts at ultrasonic cleaning usually result in cerumen
becoming lodged in the lateral end which causes irreparable damage to the probe microphones.
2.
DO NOT
attempt to open or repair the probe microphone. Attempting to repair the probe module may lead
to damage or alteration of the factory calibration.
3.
DO
keep the probe module and probe tubes in a clean area.
4.
DO
stow the probe module when not in use or when transporting the Verifit.
Mouse and keyboard
Failure to follow operating instructions could place the user or operator at risk.
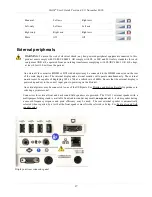
The Verifit may be operated from a mouse or a standard computer keyboard, which may also be used to enter
headers and comments on printouts. A USB mouse or keyboard may be plugged directly into any of the USB
ports provided. See Input device operation.
Monitor headphones
Failure to follow operating instructions could place the user or operator at risk.
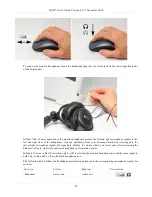
You can use the supplied monitor headphones to listen to the signal from the coupler or the probe microphone.
This is useful for:
1. Listening to the hearing aid to troubleshoot sound quality complaints
2. Listening to the wearer's own voice to troubleshoot occlusion effect complaints
3. Verifying program settings and their notification beeps
4. Demonstrating hearing aid features to parents, teachers and significant others
5. Making simultaneous comparisons between two hearing instruments
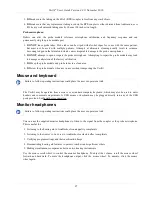
Use the mouse scroll wheel to control the monitor headphone. To adjust the volume, scroll the mouse wheel
forward and backward. To mute the headphone output, click the mouse wheel. To unmute, click the mouse
wheel again.
25
Summary of Contents for verifit
Page 1: ...Audioscan Verifit User s Guide 4 8 November 2016...
Page 17: ...Verifit User s Guide Version 4 8 November 2016 EC Declaration of Conformity 17...
Page 92: ...Verifit User s Guide Version 4 8 November 2016 92...
Page 94: ...Verifit User s Guide Version 4 8 November 2016 94...
Page 107: ...Verifit User s Guide Version 4 8 November 2016 Telecoil test results 107...
Page 123: ...Verifit User s Guide Version 4 8 November 2016 123...
Page 148: ...Verifit User s Guide Version 4 8 November 2016 148...
Page 149: ...Verifit User s Guide Version 4 8 November 2016 149...
Page 159: ...Verifit User s Guide Version 4 8 November 2016 159...

