Verifit
®
User's Guide Version 4.8
©
November 2016
Storing and restoring session files
You can save a session file at any time by clicking [Session]
. from the Verifit home menu, and then by
selecting
Store session to file
. You can enter the session file name using an attached keyboard.
If the data originate from measurements with a client, then name the session file after the client, that is, using a
unique
Client ID
. The Verifit will automatically append an increasing number to ensure that the file names are
unique and grouped by Client ID. Since uppercase and lowercase letters are distinct, you should consistently use
one or the other (e.g., all UPPERCASE), thereby avoiding the frustration of creating multiple Client IDs for the
same client. If you do not enter a file name, the Verifit will use
session.xml
.
DOE_JOHN.1.xml, DOE_JOHN.2.xml, DOE_JOHN.3.xml
session.1.xml, session.2.xml, session.3.xml
! NOTE: If a printout or session file identifies the printed or saved data as belonging to an individual, it becomes
Individually Identifiable Health Information and must be protected under the HIPAA Security Rule.
To store a session file:
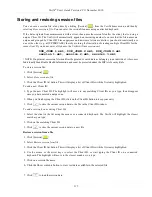
1. Click [Session]
.
2. Select
Store session to file
.
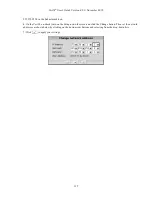
3. Click the Client ID list button. This will display a list of Client IDs with the first entry highlighted.
To add a new Client ID:
1. Type the new Client ID. The highlight will move to any matching Client IDs as you type, then disappear
once you have entered a unique one.
2. When you finish typing the Client ID, click on the Client ID button to keep your entry
3. Click
to store the current session data to the file in the Client ID window.
To add a session for an existing Client ID:
1. Select the client in the list using the mouse or a connected keyboard. The Verifit will highlight the closest
match as you type.
2. Click on the matching Client ID.
3. Click
to store the current session data to a new file.
Restore a session from a file
1. Click [Session]
.
2. Select
Restore session from file
.
3. Click the Client ID list button. This will display a list of Client IDs with the first entry highlighted.
4. Use the mouse or the arrow keys to select the Client ID, or start typing the Client ID on a connected
keyboard. The highlight will move to the closest match as you type.
5. Click on a session file name.
6. Click the Show contents button to view test data available in the selected file.
7. Click
to load the session data.
135
Summary of Contents for verifit
Page 1: ...Audioscan Verifit User s Guide 4 8 November 2016...
Page 17: ...Verifit User s Guide Version 4 8 November 2016 EC Declaration of Conformity 17...
Page 92: ...Verifit User s Guide Version 4 8 November 2016 92...
Page 94: ...Verifit User s Guide Version 4 8 November 2016 94...
Page 107: ...Verifit User s Guide Version 4 8 November 2016 Telecoil test results 107...
Page 123: ...Verifit User s Guide Version 4 8 November 2016 123...
Page 148: ...Verifit User s Guide Version 4 8 November 2016 148...
Page 149: ...Verifit User s Guide Version 4 8 November 2016 149...
Page 159: ...Verifit User s Guide Version 4 8 November 2016 159...

