


CHAPTER 12: FIRMWARE UPGRADE & RECOVERY
DigiVu
®
Series Multichannel MPEG-2/H.264 Encoder/Multiplexer with QAM &/or IP Output - Installation & Operation Manual
12-9
12.9.4 Reset the DigiVu
®
NOTE:
Do not depress the ‘RESET’ button unless you have the Password Reset firmware file
available. This will cause your DigiVu to wait indefinitely until the firmware is uploaded. There is no
cancel button for recovery mode and once recovery mode has begun, the appropriate firmware file
has to be uploaded to complete the process.
Using a pen or similar small pointed object, press and hold the ‘RESET’ on the front panel of the DigiVu Mini or the back
panel of the DigiVu or DigiVu CD for approximately 5 to 10 seconds to place the unit in RESET mode. You can recognise the
condition when both fans stop operating, then after a few seconds they restart (this assumes that the fans were running before
reset). Wait about 1 minute for the DigiVu to restart.
NOTE:
In Reset Mode, the DigiVu Management IP port reverts to 192.168.0.23.
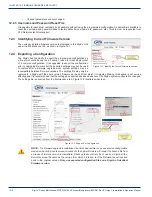
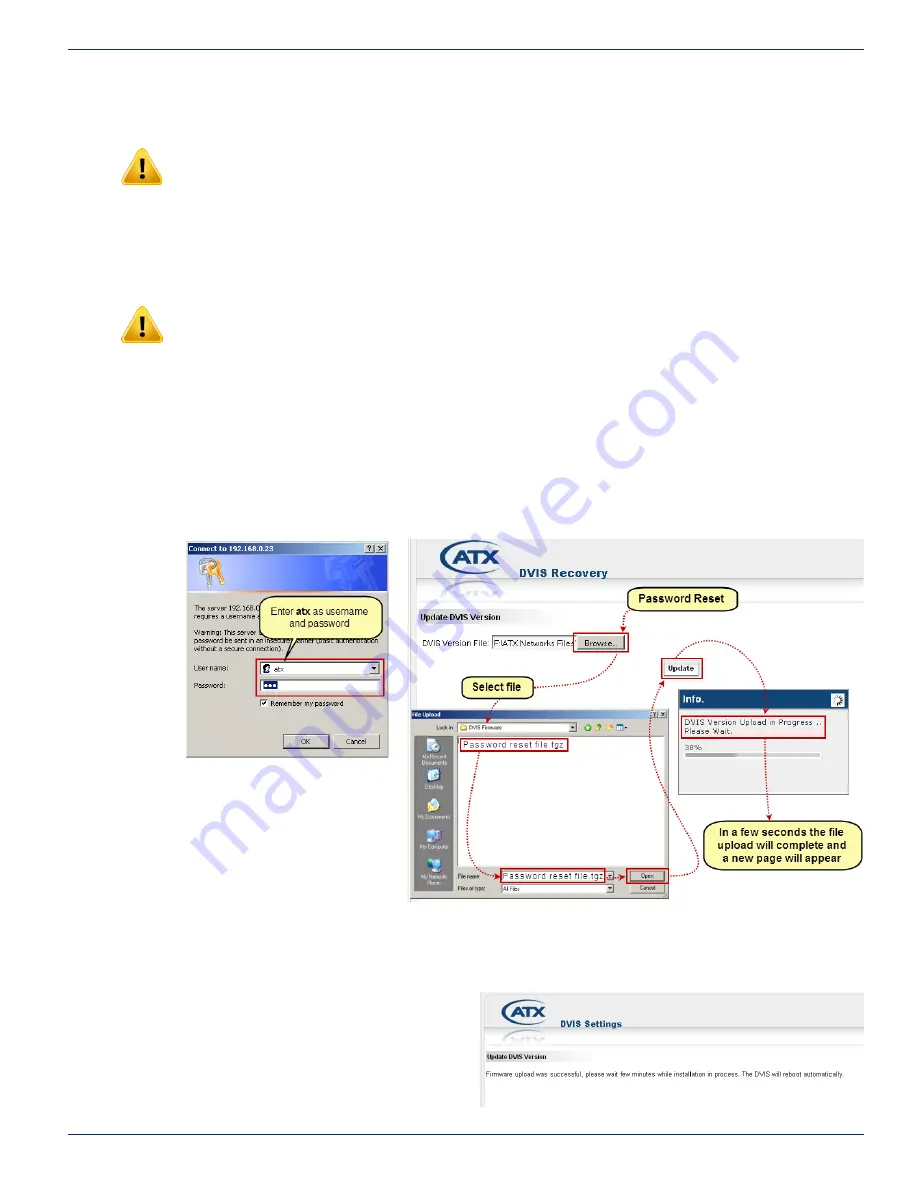
12.9.5 Connect to GUI
1. Open an Internet Explorer browser window and enter
http://192.168.0.23/site
in the address field.
2. When the login screen appears, enter
atx
for both the Username and Password, see Figure 12-14.
3. Upon validation of the login and password, the ‘DVIS Recovery’ page appears.
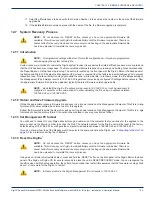
12.9.6 Upload Password Reset Firmware
1. Click
Browse
, navigate to the location of the saved files and select the file. The file name and location appear in the
selection box, see Figure 12-15.
2. Click
Update
to begin uploading the file to the unit. A progress bar indicates the percentage completion (0 to 100%)
but it happens very fast so it is easy to miss.
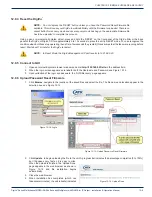
When the upload is finished, the ‘Upload Done’
page appears in the web browser as shown in
Figure 12-16 and file installation begins
automatically.
3. Close the web browser.
4. When installation has completed (which can
take several minutes), the unit reboots (indicated
Figure 12-14: Login
Figure 12-15:
Upload Password Reset Firmware
Figure 12-16: Upload Done


