


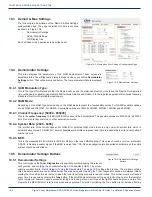


CHAPTER 9: MAINTENANCE TAB
DigiVu
®
Series Multichannel MPEG-2/H.264 Encoder/Multiplexer with QAM &/or IP Output - Installation & Operation Manual
9-5
All settings from ‘Encoder Settings’ page get exported and later loaded in the other DigiVu.
3. MUX and RF Settings
All settings from ‘MUX and RF Output’ pages get exported and later loaded in the other DigiVu.
4. IP Output Settings
All settings from ‘IP Output’ page get exported and later loaded in the other DigiVu.
5. Maintenance Settings
All settings from ‘Maintenance’ page other than Network settings get exported and later loaded in the other DigiVu.
6. Network Settings
All settings from ‘Network Settings’ section on the Maintenance page get exported and later loaded in the other
DigiVu.
7. Demod and MUX Settings
All settings from the ‘Demod and MUX Settings’ page get exported and later loaded in other DigiVu.
NOTE:
Because the ‘
Demod and MUX Settings’
page uses data from an incoming QAM in a
specific QAM RF distribution network, exporting and loading these parameters only makes sense
if the ‘receiving’ DigiVu operates in the exact same QAM RF network. Otherwise in a different QAM
RF network this export settings file won’t work because the QAM channels, programs, frequencies,
etc. could be different, therefore incorrect values will be loaded.
NOTE:
In order to generate settings in the ‘Demod & MUX Settings’ page it is required to connect
the DigiVu to the QAM RF network to collect data as required for the Demod & MUX page.
Parameters in all other GUI pages are generated directly in DigiVu, but parameters in the Demod
& MUX Settings page are a combination of real-life received/analyzed data and modification
performed by the DigiVu. It is important to note that the Demod & MUX page data always and only
can be created in the system in question and cannot be generated in a lab/office located elsewhere.
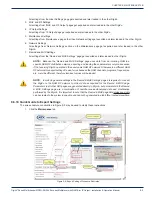
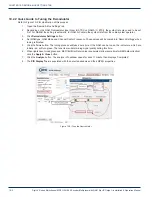
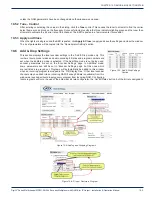
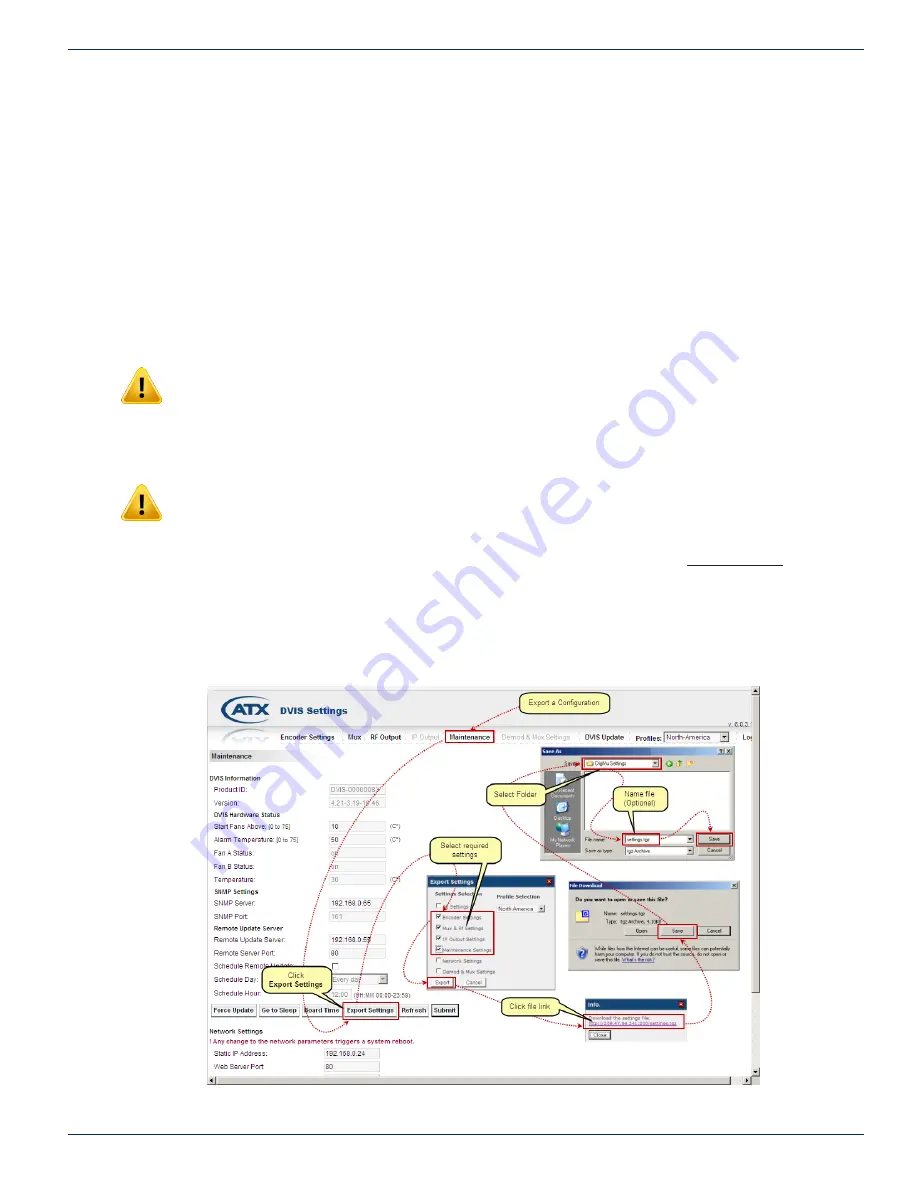
9.6.10 Quick Guide to Export Settings
The screen capture construction in Figure 9-9 may be used to clarify these instructions.
1. Click the
Maintenance
tab
Figure 9-9:
Export Settings Procedure Illustrated


