


Manual, FT Sensor, Ethernet Axia
Document #9610-05-Ethernet Axia-05
Pinnacle Park • 1031 Goodworth Drive • Apex, NC 27539 • Tel:+1 919.772.0115 • Fax:+1 919.772.8259 •
• Email:
22
7. Click on the “OK” button.
8. Click on the Local Area Connection Properties window’s “Close” button.
9. Connect the Ethernet Axia sensor to the computer’s LAN connection using an Ethernet cable. Wait a
moment to ensure the computer has time to recognize the connection.
10.
Enter the address
192.168.1.1
in the browser to view the Ethernet Axia F/T’s Welcome page.
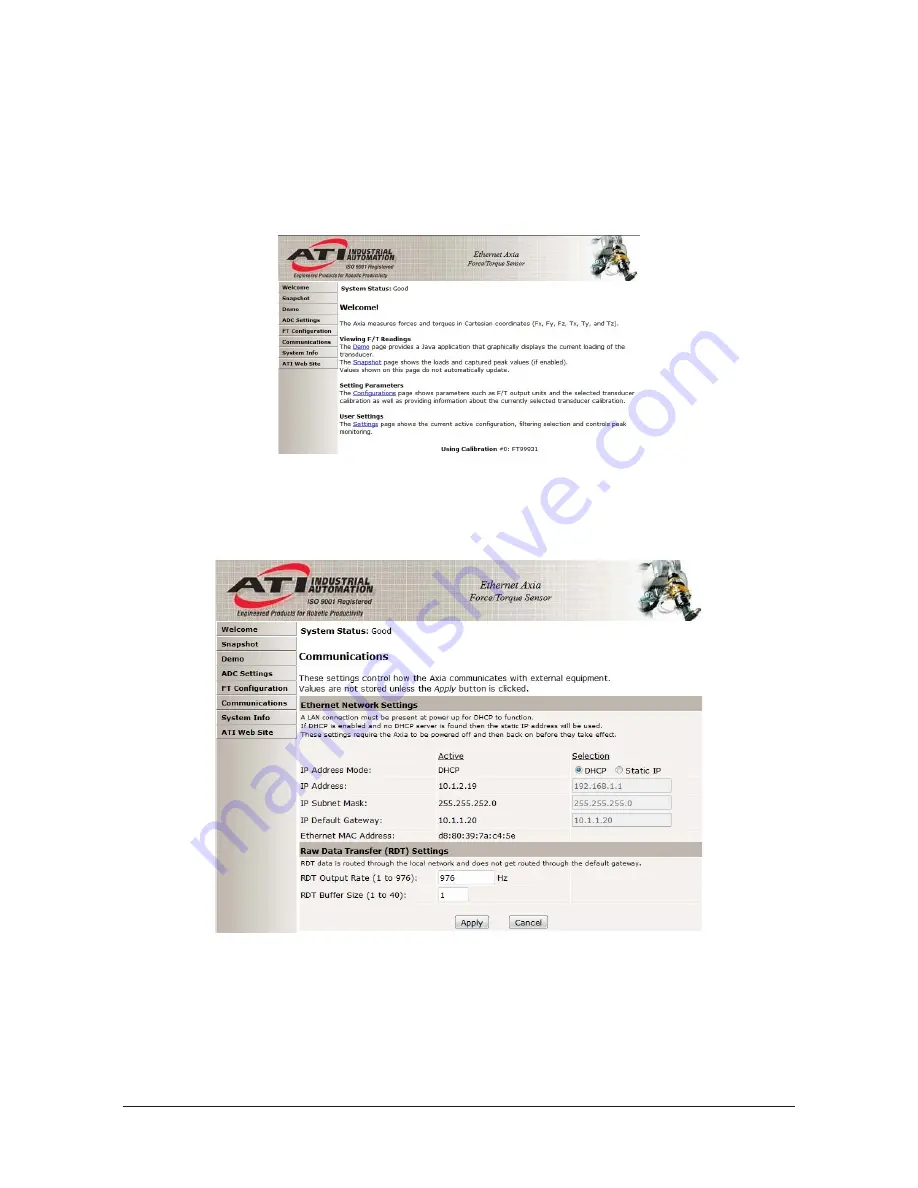
Figure 4.2—The Ethernet Axia F/T Sensor Welcome Page
11. On the left side of the page is a menu bar with buttons that link to various pages. Click on the
“Communications” button.
Figure 4.3—The Ethernet Axia F/T Sensor Communications Page
12.
Select an IP address mode.
•
If your IT department provided settings for a static IP address, enter the appropriate values for
the IP address, subnet mask, and default gateway. Select the “Apply” button. Power cycle the
sensor. Skip to step
.
•
If your IT department provided settings for DHCP, press the “Enabled” radio button next to
DHCP, and then press the “Apply” button at the bottom. Power cycle the sensor.