


Chapter 5: BIOS Setup
5-6
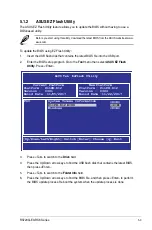
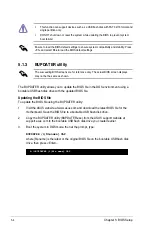
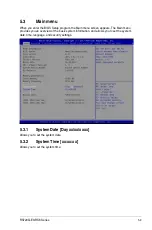
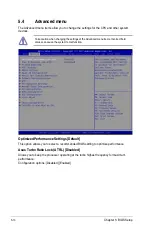
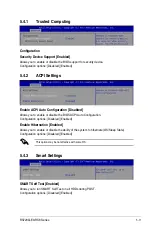
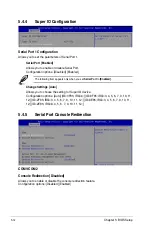
5.2
BIOS setup program
This motherboard supports a programmable firmware chip that you can update using the
provided utility described in section
5.1 Managing and updating your BIOS
.
Use the BIOS Setup program when you are installing a motherboard, reconfiguring your
system, or prompted to “Run Setup.” This section explains how to configure your system
using this utility.
Even if you are not prompted to use the Setup program, you can change the configuration of
your computer in the future. For example, you can enable the security password feature or
change the power management settings. This requires you to reconfigure your system using
the BIOS Setup program so that the computer can recognize these changes and record them
in the CMOS RAM of the firmware chip.
The firmware chip on the motherboard stores the Setup utility. When you start up the
computer, the system provides you with the opportunity to run this program. Press <Del>
during the Power-On Self-Test (POST) to enter the Setup utility; otherwise, POST continues
with its test routines.
If you wish to enter Setup after POST, restart the system by pressing <Ctrl>+<Alt>+<Delete>,
or by pressing the reset button on the system chassis. You can also restart by turning the
system off and then back on. Do this last option only if the first two failed.
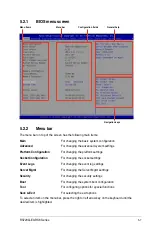
The Setup program is designed to make it as easy to use as possible. Being a menu-driven
program, it lets you scroll through the various sub-menus and make your selections from the
available options using the navigation keys.
•
The default BIOS settings for this motherboard apply for most conditions to ensure
optimum performance. If the system becomes unstable after changing any BIOS
settings, load the default settings to ensure system compatibility and stability. Press
<F5> and select
Yes
to load the BIOS default settings.
•
The BIOS setup screens shown in this section are for reference purposes only, and
may not exactly match what you see on your screen.
•
Visit the ASUS website (www.asus.com) to download the latest BIOS file for this
motherboard.
The system then runs the power-on self-test or POST. While the tests are running, the BIOS
beeps or additional messages appear on the screen. If you do not see anything within 30
seconds from the time you turned on the power, the system may have failed a power-on test.
Check the jumper settings and connections or call your retailer for assistance. The following
shows the possible beep codes and its corresponding error condition.
BIOS Beep codes
Beep
Error condition
1 short
Power supply surges detected during the previous power on.
1 short
No Keyboard Detected.
1 short, 2 short
No DIMM Detected.
1 short, 8 short
No VGA Detected.
2 long
Chassis Intrusion.
2 long
BIOS-image Crash Detected.
Summary of Contents for RS720Q-E9-RS8
Page 1: ...2U Rackmount Server RS720Q E9 RS8 User Guide ...
Page 12: ...xii ...
Page 45: ...2 21 RS720Q E9 RS8 Series RS720Q E9 RS8 Upper Mid Plane Lower Mid Plane Backplane ...
Page 56: ...Chapter 4 Motherboard Information 4 2 4 1 Motherboard and Mid plane layout Z11PH D12 ...
Page 57: ...4 3 RS720Q E9 RS8 Series RS720Q E9 RS8 S Mid Plane RS720Q E9 RS8 Mid Plane ...
Page 72: ...Chapter 4 Motherboard Information 4 18 ...
Page 118: ...Chapter 5 BIOS Setup 5 46 ...
Page 130: ...Chapter 6 RAID Configuration 6 12 ...
Page 148: ...7 18 Chapter 7 Driver Installation ...
Page 149: ...Appendix Appendix ...
Page 150: ...A 2 Appendix Z11PH D12 block diagram ...
Page 154: ...A 6 Appendix ...