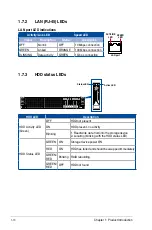

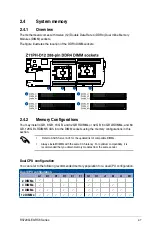
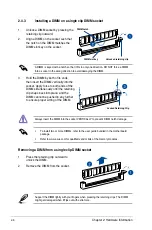
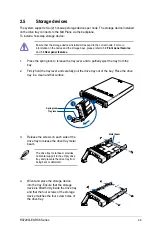


Chapter 2: Hardware Information
2-12
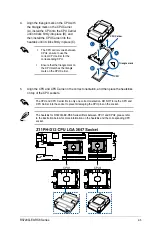
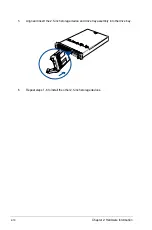
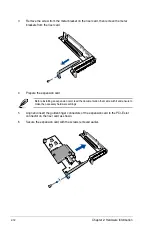
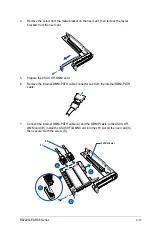
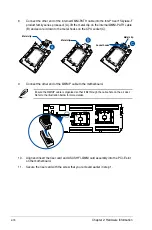
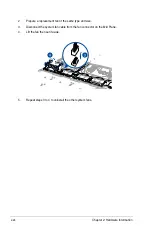
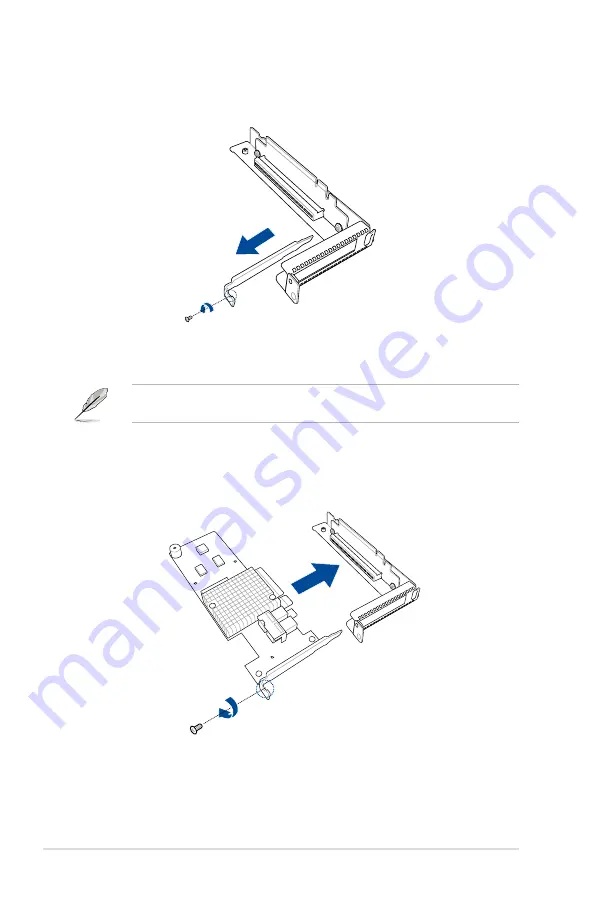
3.
Remove the screw from the metal bracket on the riser card, then remove the metal
brackets from the riser card.
4.
Prepare the expansion card.
Before installing an expansion card, read the documentation that came with it and ensure to
make the necessary hardware settings.
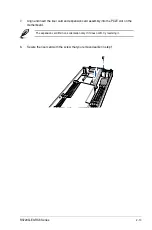
5.
Align and insert the golden finger connectors of the expansion card to the PCI-E slot
connector on the riser card as shown.
6.
Secure the expansion card with the screws removed earlier.
Summary of Contents for RS720Q-E9-RS8
Page 1: ...2U Rackmount Server RS720Q E9 RS8 User Guide ...
Page 12: ...xii ...
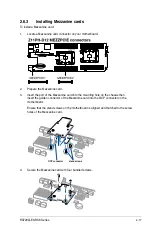
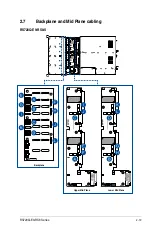
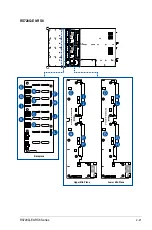
Page 45: ...2 21 RS720Q E9 RS8 Series RS720Q E9 RS8 Upper Mid Plane Lower Mid Plane Backplane ...
Page 56: ...Chapter 4 Motherboard Information 4 2 4 1 Motherboard and Mid plane layout Z11PH D12 ...
Page 57: ...4 3 RS720Q E9 RS8 Series RS720Q E9 RS8 S Mid Plane RS720Q E9 RS8 Mid Plane ...
Page 72: ...Chapter 4 Motherboard Information 4 18 ...
Page 118: ...Chapter 5 BIOS Setup 5 46 ...
Page 130: ...Chapter 6 RAID Configuration 6 12 ...
Page 148: ...7 18 Chapter 7 Driver Installation ...
Page 149: ...Appendix Appendix ...
Page 150: ...A 2 Appendix Z11PH D12 block diagram ...
Page 154: ...A 6 Appendix ...