


35
of
54
TECHNICIANS' manual
ENGLISH
Core200
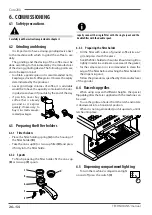
8.4
Malfunctions and solutions
Problem
Cause
Action
NO MACHINE POWER
•
The main switch is in the "OFF" position.
•
The machine switch is faulty.
•
The mains switch is in the OFF position.
•
The wiring is defective.
•
Turn the main switch to the ON position.
•
Replace the main switch.
•
Turn the mains switch to the ON position.
•
Check for any faulty connections.
NO WATER IN THE HEATING UNIT
•
The water mains tap is shut off.
•
The cut-off tap of the automatic level device is closed.
•
The pump filter is clogged.
•
The motor pump is disconnected or jammed.
•
The water filling solenoid valve is faulty.
•
The water inlet solenoid valve filter is clogged.
•
Open the water mains tap.
•
Open the automatic level device tap.
•
Replace the pump filter.
•
Check the motor pump.
•
Replace the water filling solenoid valve.
•
Clean or replace the solenoid valve filter.
TOO MUCH WATER IN THE HEATING UNIT
•
The solenoid valve of the automatic level device
is faulty.
•
The level probe is out of order (clogged by limescale).
•
Replace the solenoid valve of the automatic level
device.
•
Replace the level probe.
WATER LEAKS FROM THE MACHINE
•
The tray does not drain.
•
The drain pipe is broken, has detached, or the water
flow is obstructed.
•
Water is leaking from the hydraulic circuit.
•
Check the sewer drain.
•
Check and restore the drain pipe connection to the tray.
•
Restore the hydraulic seal by replacing the pipe, the
gasket or the fitting as necessary.
WATER LEAKS FROM THE DISPENSING
GROUP
•
The group gasket is worn.
•
Replace the group gasket.
THE PRESSURE GAUGE INDICATES UNEVEN
PRESSURE
•
The pressure gauge is faulty.
•
The motor pump has been calibrated incorrectly.
•
Replace the pressure gauge
•
Adjust the motor pump calibration.
THE SAFETY VALVE HAS CUT-IN
•
The electronic control unit is faulty.
•
Check that the electronic system is working properly.
STEAM DOES NOT COME OUT OF THE
NOZZLES
•
The machine is switched off.
•
The electrical heating element is faulty.
•
The temperature probe is faulty.
•
The nozzle sprayer is clogged.
•
The safety thermostat is deactivated or faulty.
•
Turn on the machine.
•
Replace the electrical heating element.
•
Replace the temperature probe.
•
Clean the steam nozzle sprayer.
•
Reactivate the thermostat or replace it.
STEAM MIXED WITH WATER COMES OUT
OF THE STEAM NOZZLES
•
The level of the heating unit is too high due to the
level probe being incorrectly positioned inside the
heating unit or the presence of limestone.
•
The heating unit filling solenoid valve is leaking.
•
Check the condition of the level probe: check if it
is positioned correctly and check for any surface
limescale.
•
Clean and replace the filling solenoid valve.
NO COFFEE IS DISPENSING
•
There is no water in the mains.
•
The group solenoid valve is faulty.
•
The pump is jammed.
•
The group solenoid valve is clogged or dirty.
•
The group filter is clogged.
•
The volumetric dosing device is jammed.
•
The inlet and outlet taps of the dosing device are closed.
•
The outlet nozzle of the volumetric dosing device is dirty.
•
Check that there is water in the mains.
•
Replace the group solenoid valve.
•
Replace the pump.
•
Clean or replace the solenoid valve.
•
Clean or replace the filter.
•
Check/replace the dosing device.
•
Open the taps.
•
Clean or replace the nozzle.
THE COFFEE GROUNDS ARE WET
•
The group solenoid valve drain is clogged.
•
The dispensing group is too cold.
•
The coffee has been ground too finely.
•
There's not enough ground coffee.
•
Clean the group drain.
•
Wait until the group has fully heated up.
•
Adjust the coffee grinder.
•
Increase the amount of ground coffee.
GROUNDS FOUND IN CUPS
•
The filter holder is dirty.
•
The filter holes are worn.
•
The coffee has not been ground evenly.
•
The group gasket is worn.
•
The pump pressure is too high.
•
Clean the filter holder.
•
Replace the filter.
•
Replace the grinders.
•
Replace the seal.
•
Adjust the pump pressure.
Summary of Contents for 10003318
Page 53: ......


