


1
En
gl
is
h
mo
vie
5.1
so
l
o
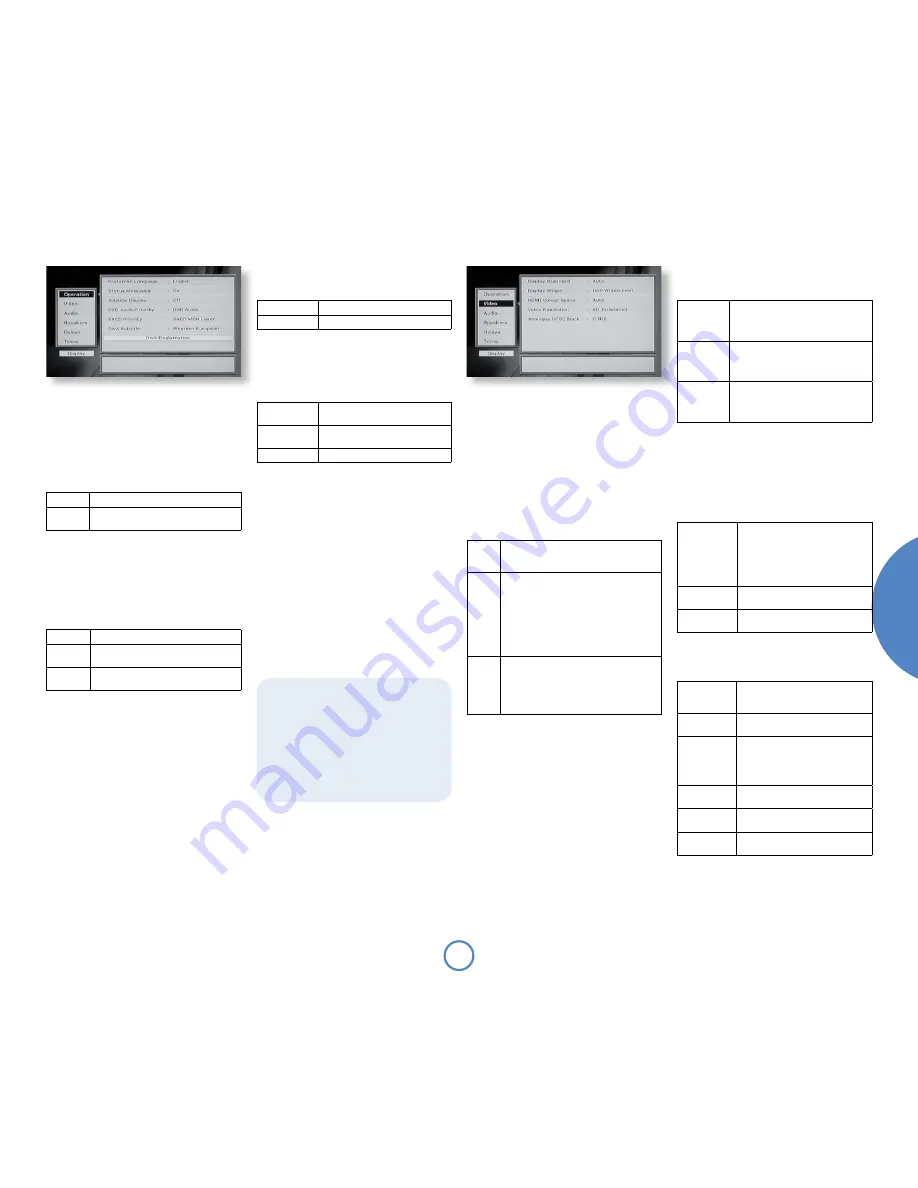
Operational set-up
Preferred language
This settings allows you to specify your preferred
language. The default language is English, but three
other languages (French, German and Dutch) are
supported.
Status messages
This setting controls the ‘pop up’ messages that
appear on screen.
On
Pop-up messages are enabled.
Off
No pop-up messages, only menus when
required.
Certain messages, such as ‘No Disc’ are always shown
regardless of how this is set.
Subtitle display
This setting controls which subtitles displayed on your
TV (although note that some discs may force the
subtitles to be displayed regardless of how this item
is set).
Off
No Subtitles.
On
Subtitles are displayed in the ‘preferred
language’.
Closed
Caption
Closed-caption information from the disc
(where available) is sent to your TV.
The default setting for Subtitle is ‘Off ’.
Note that not all discs will have your preferred
language available as a subtitle. Some discs will require
you to chose your preferred subtitle language from
the disc menu and some discs may force the subtitles
to be displayed regardless of how this item is set.
Closed-caption information is available only on discs
produced for the US and Canadian markets and will
be displayed only by TVs that support NTSC-format
signals.
DVD audio priority
Many DVD-Audio discs are actually dual DVD-Audio/
DVD-Video discs. To decide which part is selected for
playing, you can set the priority with this control.
DVD-Audio
The DVD-Audio part is played
DVD-Video
The DVD-Video part is played
SACD priority
Many SACD discs are actually hybrid SACD/CDs. If
multi-channel audio is provided on the SACD disc
you can determine which of the layers is selected for
playing.
SACD MCH
layer
The SACD multi-channel (surround-
sound) layer is played
SACD 2-CH
layer
The SACD two-channel (stereo) layer
is played
CD
The CD layer is played
DivX subtitle
If you use DivX subtitles, choose the appropriate
language group from the list. The factory setting is
‘Western European’: Turkish, Central European, Cyrillic
and Greek are the other options.
DivX registration
DivX Video-On-Demand (VOD) is a digital video
delivery service that lets you copy video content from
your computer to a CD or DVD for playback on your
Solo Movie 5.1. To register for this service, a player-
generated registration code is required. This code can
be seen by selecting the ‘DivX registration’ button.
For more information on this service, please visit
www.divx.com/vod
.
Display shape
This needs to be set correctly for the type of display
device you have and the type of display you prefer.
For 4:3 displays, ‘Letterbox’ is recommended.
4:3
Letterbox
Use this setting if you have a 4:3 display
device and you prefer to view wide screen
movies in letterbox format (with black bars
at the top and bottom).
4:3 Panscan
Use this setting if you have a conventional
4:3 display device, and you prefer to view
wide screen movies in Pan & Scan format
(cropping the sides of the image).
16:9
Use this setting if you have a wide screen
(16:9) display device.
Material in 16:9 format is displayed so as to
fill the screen.
If you have a 4:3 display device and you have set a
preference for ‘4:3 Panscan’, it does not mean you will
always see movies in this format, since Panscan display
must be supported by the disc being played.
HDMI colour space
This setting controls the type of video (the colour
space) given out over the HDMI connection.
Auto
The colour space will be set appropriately
for the connected display.
This is the recommended setting
if you are connecting Solo Movie
5.1 to an HDMI- or DVI-compliant
device.
RGB
The HDMI connection carries RGB video
with standard video levels.
YUV
The HDMI connection carries Y, Pb, Pr
(YUV) component video.
This setting has no effect on the analogue video
outputs.
Video resolution
Auto
The appropriate video resolution is
selected automatically from the display
device, where possible.
SD-interlaced
Use this setting if your display device does
not support progressive scan or HDMI.
SD
Progressive
The component- and HDMI-video
outputs will put progressive scan video
out for both PAL and NTSC discs. Use this
setting only if your display device supports
progressive scan.
720p
1280 x 720 (16:9) HDTV format,
progressive scan
1080i
1920 x 1080 (16:9) HDTV standard
format, interlaced scan
768p
1366 x 768 (16:9) Wide XGA format,
progressive scan
Video set-up
If your display device is HDMI-compliant, Solo Movie
5.1 can read the capabilities of the display device
directly; the information allows Solo Movie 5.1 to
configure its output automatically and optimally for
the attached device.
See page 8 for more information about connecting to
HDMI devices.
Display standard
This is set at the factory to be appropriate for the
type of display device used in your country. If your
display supports both PAL and NTSC standards,
select ‘Auto’. The options are as follows.
Auto
The video output is taken from that recorded on
the disc. When no disc is playing, the logo screen is
displayed using the standard of the last disc played.
NTSC
NTSC is used as the video standard. Note that
PAL discs are converted to NTSC, but this
compromises the quality of the video output (and
may cause the video to become ‘jerky’). This is
the best setting to use if your display device can
accept only NTSC video (this is generally the case
in North America); better results are obtained
by using ‘Auto’, but your display device must be
capable of supporting PAL.
PAL
PAL is used as the video standard. Note that NTSC
discs are converted to PAL, but this compromises
the quality of the video output (and may cause
the video to become ‘jerky’). Better results are
obtained using ‘Auto’, but in this case your display
device must be capable of supporting NTSC.
Progressive scan displays
Not all displays support progressive scan. If you
enable progressive scan accidentally and your
display does not support it, you may be unable to
view the picture from Solo Movie 5.1, including
the on-screen display required to change the video
settings back.
If this happens, use a composite or SCART video
connection between Solo Movie 5.1 and your
display device in order to be able to see the set-up
menu and correct the mistake.


