


E-7
E-6
English
Connecting devices
Once the Solo bar is positioned correctly,
connect it to your devices as shown in the
following illustrations.
Make sure that none of the cables are kinked
or stretched.
WARNING: Do not connect your Solo bar to the
mains until you have connected all of your audio
and video devices.
Placing the unit
The Solo bar is an incredibly versatile
product. Place it on a table top, cabinet
or shelf, making sure that it sits level and
securely. Position it below a TV set, either
free standing on a flat level surface or
mounted to a wall.
For the best listening experience, we
recommend wall mounting . Use the
custom-designed wall bracket supplied.
See page 24 for fixing and mounting
instructions.
Position the Solo bar away from direct
sunlight and sources of heat or damp.
quick start
What’s in the box?
<
Solo bar soundbar
<
Power cord
<
Remote control
<
Batteries (2 x AAA)
<
Microphone
<
Wall mount bracket
<
User manual
<
Registration card
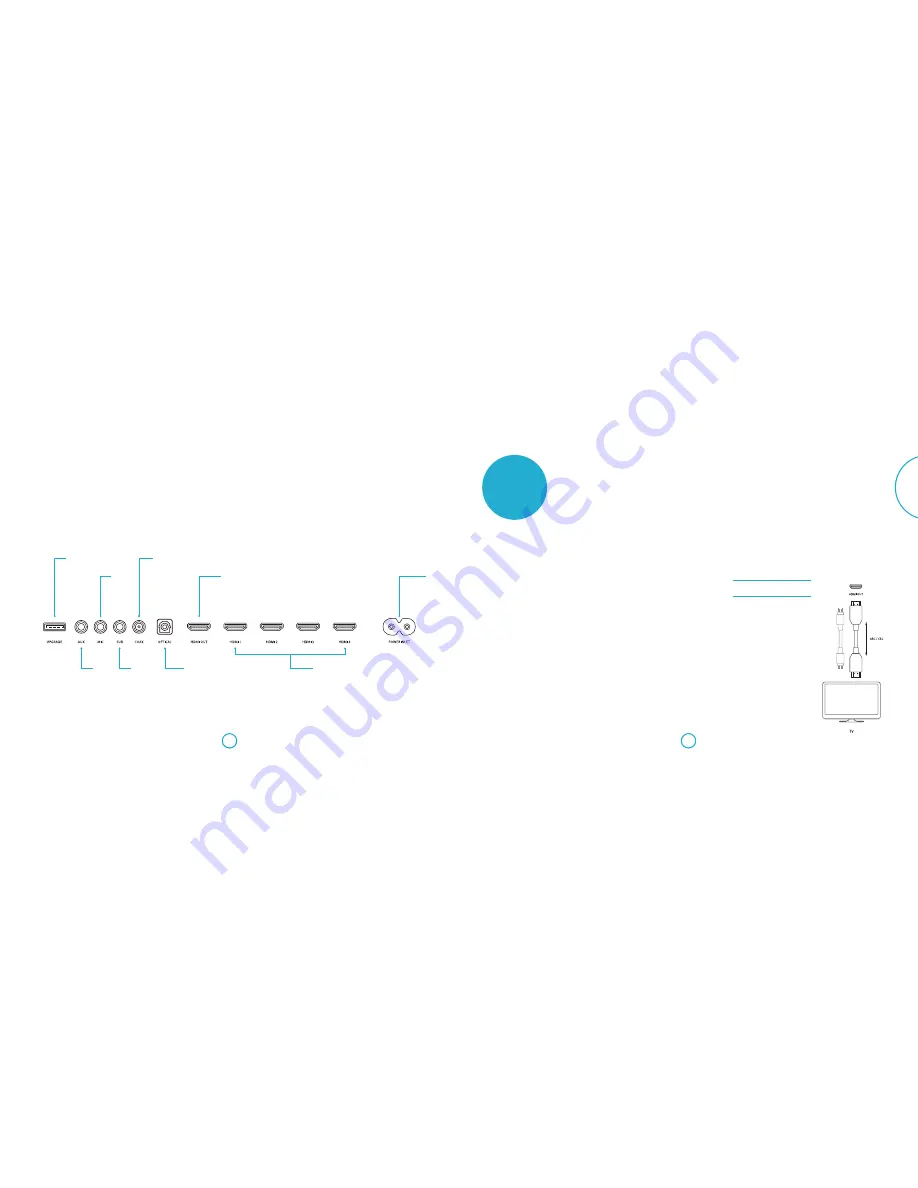
Connecting a TV
Connect your TV to HDMI OUT using an
HDMI cable. If your TV supports ARC, the
audio can be played through the Solo bar
for better sound performance – see page 20
for setup information. If your TV does not
support ARC, connect an audio cable to
OPTICAL or COAX input on the Solo bar.
Audio cable
if not ARC
Connections
USB
Used for service and
firmware updates only
See page 21 for
information about
firmware updates.
COAX
RCA socket, used
to connect a digital
audio source.
MIC
3.5mm mini jack,
used to connect mic
supplied during auto
speaker setup.
See page 17 for more
information.
HDMI OUT
Used to connect a
TV and as the Audio
Return Channel (ARC).
See page 7 for more
information.
POWER INLET
Used to connect to
mains power supply.
AUX
3.5mm stereo
mini-jack, used
to connect an
analogue audio
source.
OPTICAL
TOSLINK socket, used
to connect a digital
audio source.
SUB
RCA LFE output,
used to connect a
subwoofer.
See page 10 for
information about
connecting a Solo sub
via a wireless link.
HDMI 1 – 4
Used to connect up
to four digital devices
providing 1080p and
3D pass through.


