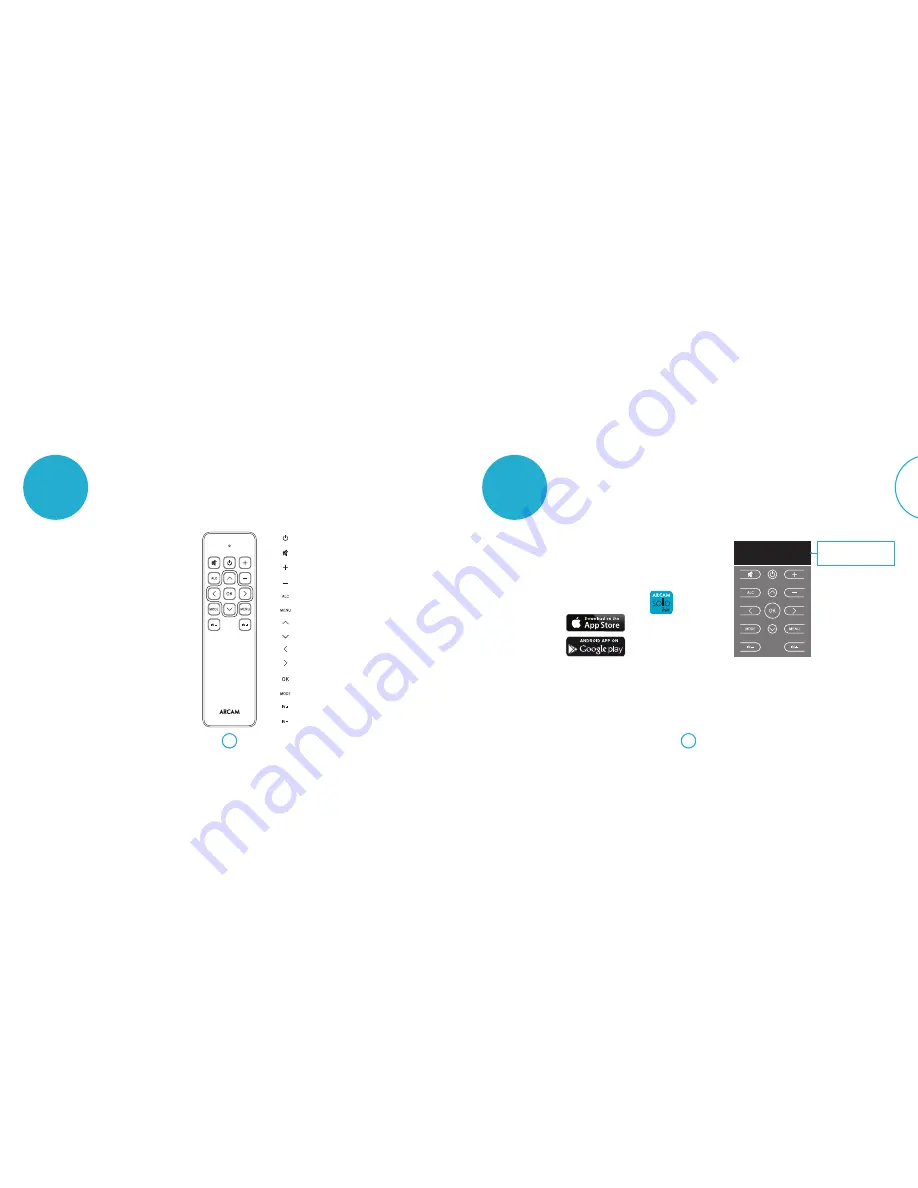
background image

E-13

E-12

English

remote control

Using the remote control

The remote control unit is programmed for 

use with the Solo bar. 

Before use, make sure the two AAA batteries 

supplied are correctly installed. 

1.  With the remote face-down, press down 

on the non-slip indentations of the 

battery compartment cover and slide 

the cover off.

2.  Insert the two ‘AAA’ batteries supplied. 

Take care to insert the batteries in the 

right direction by following the ‘

+

’ and 

’ marks.

3.  Slide the battery compartment cover 

back and lock it in place with a click.

To ensure reliable operation, the remote 

requires a clear line of sight to the Solo bar 

front panel display.

The Solo bar can be set up and controlled using either the remote control 

unit supplied or the Solo bar remote control app.

Switches the Solo bar between stand-by and on.

Press once to mute the Solo bar. Press again (or adjust the volume) to unmute.

Increase volume.

Decrease volume.

Automatic Loudness Control - switches between on and off.

Press to enter the set-up menu (see pages 18 - 20). Press again to exit the menu.

Navigate upwards through menu settings.

Navigate downwards through menu settings.

Navigate back through menu levels.

Navigate right through menu levels.

Press to select menu setting. 

Switches through stereo, movie and concert audio output modes.

Input source selector - switches forwards through connected sources.

Input source selector - switches backwards through connected sources.

HDMI 1

20

DIGITAL ST

The Arcam Solo bar remote control 

app enables you to use an Apple iOS or 

Android™ device to control the Solo bar via 

Bluetooth

.

Use the app to configure menu settings and 

control playback in exactly the same way as 

the remote control unit supplied. 

Minimum OS requirements for the app: 

iOS 6, Android 4.0

App mirrors the display of the Solo bar

Display shows input source, volume and 

audio format during normal operation or 

menu options when configuring set up.

Download instructions

Download the app from either the App 

Store

SM

 or Google Play™.

Follow the download prompts displayed on 

your device.

Once installed, tap the app icon to launch 

the application.

remote control 

app

Summary of Contents for Solo bar

Page 1: ...Handbook Sound bar English ...

Page 2: ...ns and display E 5 Connections E 6 quick start E 7 What s in the box E 7 Placing the unit E 7 Connecting devices E 7 Connecting a TV E 7 Connecting digital devices via HDMI E 8 Connecting analogue devices E 9 Connecting audio devices via digital input E 9 Connecting a subwoofer E 9 Plug in and turn on E 10 Connecting a Solo sub E 10 Connecting Bluetooth devices E 11 Using headphones E 11 remote co...

Page 3: ...ries specified by the manufacturer 12 Use only with the cart stand tripod bracket or table specified by the manufacturer or sold with the apparatus When a cart is used use caution when moving the cart apparatus combination to avoid injury from tip over 13 Unplug this apparatus during lightning storms or when unused for long periods of time WARNING To reduce the risk of fire or electric shock do no...

Page 4: ...et User manual Registration card Connecting a TV Connect your TV to HDMI OUT using an HDMI cable If your TV supports ARC the audio can be played through the Solo bar for better sound performance see page 20 for setup information If your TV does not support ARC connect an audio cable to OPTICAL or COAX input on the Solo bar Audio cable if not ARC Connections USB Used for service and firmware update...

Page 5: ...n Arcam Solo sub please see the next page Subwoofer Connecting audio devices via digital input Audio devices can also be connected to the Solo bar using the Coaxial and Optical inputs Many digital devices including set top boxes Blu ray players DVD players games consoles and camcorders can be connected using an HDMI connection Note that when using this method of connection the image will be displa...

Page 6: ...ion is activated Now follow the advice supplied with your Bluetooth headphones to put them in pairing mode Make sure that Device Search is still displayed and press The Solo bar will search for available devices for one minute If no devices are found press again to start another search You might want to make sure there are no obstacles in the way When the search is finished available devices will ...

Page 7: ...en on and off Press to enter the set up menu see pages 18 20 Press again to exit the menu Navigate upwards through menu settings Navigate downwards through menu settings Navigate back through menu levels Navigate right through menu levels Press to select menu setting Switches through stereo movie and concert audio output modes Input source selector switches forwards through connected sources Input...

Page 8: ...y the currently selected input source volume setting and audio mode Note If the unit is to be left unused for an extended period disconnect it from the mains supply to save power Selecting a source To select a particular source press the or buttons on the front panel or remote until that source is shown on the front panel display The following sources are available HDMI 1 HDMI 2 HDMI 3 HDMI 4 OPTI...

Page 9: ...nd sounds in the listening room and nearby rooms Close all windows and doors in the listening room Turn off all fans including air conditioning systems If holding the microphone in the hand keep your hand and fingers still to avoid generating any handling noise Position the microphone pointing upwards at roughly head height in the normal listening position with a direct unobstructed view of the sp...

Page 10: ...nd buttons to switch IR repeater on or off See page 16 for more information Press to go back a level or to exit setup System Info Press OK to view the system software version Factory Defaults Press OK to reset the Solo bar to factory defualts Note Paired or connected devices will be lost Press to go back a level or to exit setup Speaker EQ Setup Auto Setup Auto setup configures your Solo bar for o...

Page 11: ...simultaneously for about five seconds The Solo bar will turn on and display the following information ARCAM SB M V024 B 40526 D 30304 Note M Main software version B Bluetooth software version and D DSP software version Press the button to go to the software update screen The display will change to System Update Insert USB Note Pressing IN again will cycle between this and the software version scre...

Page 12: ...ut source is selected Bluetooth Check your Bluetooth device is paired correctly Is your Bluetooth device too far away from the unit FCC Notice This product contains FCC ID VNH IK CSRBC05 QEC GWNO This equiment has been tested and found to comply with the limits for a Class B digital device pursuant to Part 15 of the FCC Rules These limits are designed to provide reasonable protection against harmf...

Page 13: ...ommendation Arcam takes every precaution to ensure that all information contained in this publication is factually correct but accepts no liability for any error or omission Worldwide guarantee Arcam warrants that the products described in this guide shall conform to their published specification in all material respects for a period of two years from the date of purchase This entitles you to have...

Page 14: ...a display iPad 4th generation iPad mini iPad 3rd generation iPad 2 iPod touch 5th generation iPod touch 4th generation Google Play is a trademark of Google Inc Android is a trademark of Google Inc 2013 CSR plc and its group companies The aptX mark and the aptX logo are trade marks of CSR plc or one of its group companies and may be registered in one or more jurisdictions The Bluetooth word mark an...

Reviews: