91
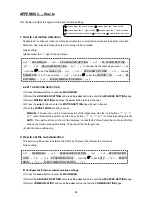
(7) Set to a "
SENSITIVITY
" of from 0.1 to 0.8 seconds.
(8) Enter and set each channel to activate or deactivate the three modes of
SENSOR
,
V LOSS
and
ACTIVE
in the
ALARM TYPE LINK
and
the
ALARM OUT LINK
items.
(9) Set the scheduled alarm setting during the scheduled time. Then press the
enter
button to enable the
setting.
(10) Exit the menu with saving.
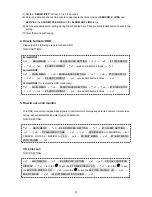
4. How to format a HDD
Please take the following steps to format a HDD.
QUICK SETTING:
Format HDD1:
○
m
×
1
→
MAIN MENU
→
○
v
×
5
→
#6 ADVANCED SETTING
→
○
e
×
1
→
○
v
×
6
→
#7 DISK SETUP
→
○
e
×
1
→
○
v
×
2
→
#3 HDD1 FORMAT
→○
e
×
1
→
press CH9 button 4 times
→
○
e
×
1
Format HDD2:
○
m
×
1
→
MAIN MENU
→
○
v
×
5
→
#6 ADVANCED SETTING
→
○
e
×
1
→
○
v
×
6
→
#7 DISK SETUP
→
○
e
×
1
→
○
v
×
3
→
#4 HDD2 FORMAT
→
○
e
×
1
→
press CH9 button 4 times
→
○
e
×
1
Format HDD3
(for removable HDD model only)
:
○
m
×
1
→
MAIN MENU
→
○
v
×
5
→
#6 ADVANCED SETTING
→
○
e
×
1
→
○
v
×
6
→
#7 DISK SETUP
→
○
e
×
1
→
○
v
×
4
→
#5 HDD3 FORMAT
→
○
e
×
1
→
press CH9 button 4 times
→
○
e
×
1
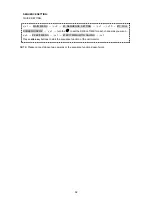
5. How to set a call monitor
This BNC connector provides video signals to call monitor to display any selected camera in full-screen
call up, sequential display and alarm call up operations.
QUICK SETTING:
○
m
×
1
→
MAIN MENU
→
○
v
×
5
→
#6 ADVANCED SETTING
→
○
e
×
1
→
#1 ALARM SETTING
→
○
e
×
1
→
○
v
×
8
→
#9 ALARM OUT LINK
→
○
e
×
1
→
○
v
×
7
→
#8 DISPLAY(CALL MONITOR)
→
set
SENSOR, V-LOSS or MOTION to YES
→
○
m
×
4
→
#9 EXIT MENU
→
○
e
×
1
→
#1 EXIT MENU
WITH SAVING
→
○
e
×
1
TITLE DISPLAY:
QUICK SETTING:
○
m
×
1
→
MAIN MENU
→
○
v
×
1
→
#2 DISPLAY OPTION
→
○
e
×
1
→○
v
×
7
→
#8 CALL MONITOR
DISPLAY
→
○
e
×
1
→
turn the
to set the #1 TIME DISPLAY ON
→
○
v
×
1
→
turn the
to set
the #2 DATE DISPLAY ON
→
○
v
×
2
→
turn the
to set the #4 TITLE DISPLAY ON
→
○
m
×
3
→
#9 EXIT MENU
→
○
e
×
1
→
#1 EXIT MENU WITH SAVING
→
○
e
×
1
Summary of Contents for DVR-3016, DVR-3016D
Page 2: ......
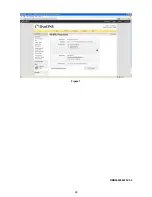
Page 100: ...98 Figure 7 RMN040200255 V5 2 ...


