22
4.1.3 Alarm Recording
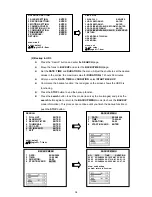
Take the following steps to activate the programmed alarm recording. For
ALARM
settings, please
refer to section 5.6.1 for more details.
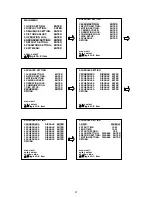
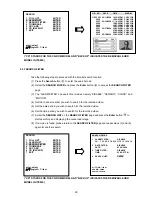
(1) Press the
menu
button
to enter the
MAIN MENU
.
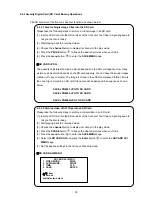
(2) Select the
ADVANCED SETTING
and press the
Enter
button
to enter the
ADVANCED
SETTING
page
.
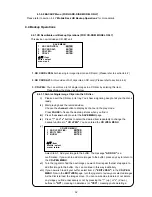
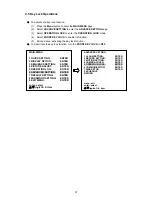
(3) Select the
ALARM SETTING
and press the
Enter
button
to enter the
ALARM SETTING
page
.
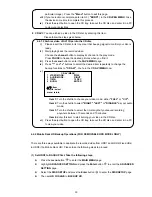
(4) Set the desired time period. The options range from "
TRANSPARENT
" to "
NONSTOP
", from
one second to 60 minutes.
(5) Set the alarm record rate.
(6) Set the alarm record mode.
(7) Set the alarm record quality.
(Please refer to section 5.6.1 for more information.)
(8) Set to a "
SENSITIVITY
" of from 0.1 to 0.8 seconds
(9) Enter and set each channel to activate or deactivate the three modes of "
SENSOR
", "
V LOSS
",
and "
ACTIVE
" in the
ALARM TYPE LINK
and
ALARM OUT LINK
items.
NOTE: The “ALARM OUT LINK” page has an item, namely “START RECORD”. Change it to
“ON” under “ACTIVE” to start alarm recording.
MAIN MENU
1 QUICK SETTING:
ENTER
2 DISPLAY OPTION:
ENTER
3 SEQUENCE SETTING:
ENTER
4 PICTURE ADJUST:
ENTER
5 OPERATION LOG:
ENTER
6 ADVANCED SETTING:
ENTER
7 DEFAULT SETTING:
ENTER
8 PASSWORD SETTING:
ENTER
9 EXIT MENU:
ENTER
enter: select
▲
/
▼
/jog/ch1~9: item
ADVANCED SETTING
1 ALARM SETTING:
ENTER
2 RECORD SETTING:
ENTER
3 MOTION SETTING:
ENTER
4 CAMERA COVER:
ENTER
5 OPERATION LOCK:
ENTER
6 COMMUNICATION:
ENTER
7 DISK SETUP:
ENTER
8 SCHEDULE:
ENTER
RETURN
menu: exit
enter: select
▲
/
▼
/jog/ch1~8: item
ADVANCED SETTING
1 ALARM SETTING:
ENTER
2 RECORD SETTING:
ENTER
3 MOTION SETTING:
ENTER
4 CAMERA COVER:
ENTER
5 OPERATION LOCK:
ENTER
6 COMMUNICATION:
ENTER
7 DISK SETUP:
ENTER
8 SCHEDULE:
ENTER
RETURN
menu: exit
enter: select
▲
/
▼
/jog/ch1~8: item
ALARM SETTING
1 ALARM DURATION:
30 SEC
2 DISK FULL ALERT:
ON
3 PREALARM:
OFF
4 ALARM RECORD RATE:
60 F/S
5 ALARM RECORD MODE:
ENTER
6 ALARM RECORD QUALITY: ENTER
7 SENSOR TYPE:
ENTER
8 ALARM INPUT LINK:
ENTER
9 ALARM OUT LINK:
ENTER
RETURN
menu: exit
enter: select
shuttle: value
▲
/
▼
/jog/ch1~9: item
Summary of Contents for DVR-3016, DVR-3016D
Page 2: ......
Page 100: ...98 Figure 7 RMN040200255 V5 2 ...


