50
5.6.3.1 How to Set Up Basic Motion Detection Recording on 16CH DVR?
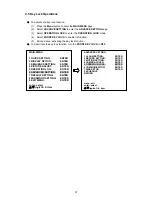
One has to modify alarm setting to make it work. Leave MOTION SETTING alone until you are comfortable
with all the parameters in the setting. You can set up motion detection without modifying MOTION SETTING.
◇
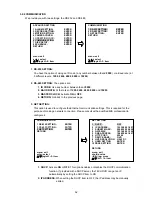
Turn on MOTION mode in ALARM INPUT LINK.
1. Press the
menu
button to enter MAIN MENU.
2. Select 6 ADVANCED SETTING and press the
enter
button.
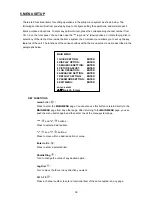
3. Select 1 ALARM SETTING and press the
enter
button.
4. Select 8 ALARM INPUT and press the
enter
button.
5. Select the channel for motion detection, press the
Right
button twice to MOTION column, set mode to
ON with the
Shuttle Ring
.
6. Repeat the above for all channels you want to activate into motion.
7. Press the
menu
button to return to ALARM SETTING.
◇
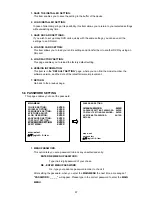
Turn on START RECORD mode in ALARM OUT LINK.
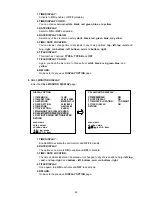
1. Select 9 ALARM OUT LINK and press the
enter
button.
2. Select 5 START RECORD. Press the
Right
button twice to MOTION column and set mode to YES
with the
Shuttle Ring
.
◇
Save settings and you are done!
1. Press the
menu
four times to MAIN MENU and the cursor should be at EXIT MENU.
2. Press the
enter
button to exit.
3. Press
enter
again to save changes.
5.6.3.2 How to Set Up Advanced Motion Detection Recording on 16CH DVR?
◇
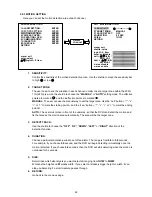
To adjust Target Zone for limited motion detection area:
1. Press the
menu
button to enter MAIN MENU.
2. Select 6 ADVANCED SETTING and press the
enter
button.
3. Select 3 MOTION SETTING and press the
enter
button.
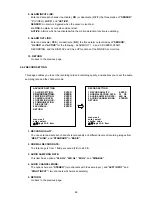
4. Select the channel to set and press the
enter
button. You should see a rectangle in the lower right
corner marked with dots. Dots means the area is enabled for motion detection.
5. Hold the
call
button and press the
Right/Left
button to control the left side of the rectangle.
6. Hold the
seq.
button and press the
Left/Right
button to control the right side of the rectangle.
7. Hold the
call
button and press the
Down/Up
button to control the top side of the rectangle.
8. Hold the
seq.
button and press the
Up/Down
button to control the bottom side of the rectangle.
9. Shrink the rectangle to cover the area you want to enable or disable for motion detection.
10. Press the
enter
button to toggle dots to x’s. The area in the rectangle is now disabled.
11. Repeat the above procedure for each area you want to enable/disable
12. Pressing the
enter
button will cycle each area in three modes: enable, disable, toggle (all enabled
sub-area will be disabled and disabled become enabled).
13. Press the
menu
button then enter button to see what has been set.
14. The procedure can be applied to each dot if needed.
◇
TARGET ZONE:
The MANUAL allows one to set up each area as described above.
The AUTO would let system pick up motion and enable detected motion area. To try it, place a camera
next to the DVR. Disable whole area, then move your hand in front of camera. All detected motion will
enable dots.
◇
TRACK DETECT:
Use the Shuttle Ring to adjust values to “UP”, “DOWN”, “LEFT”, or “RIGHT” to indicate which direction of
motion you want to track. For example, in a grocery store, if you want to start recording when someone
comes in but not record his exit, set TRACK DETECT to UP if the camera is facing the door which is on
the top of the screen.
Summary of Contents for DVR-3016, DVR-3016D
Page 2: ......
Page 100: ...98 Figure 7 RMN040200255 V5 2 ...


