background image

L0086, Rev. H  


SENSIT 3


OPERATION AND SERVICE MANUAL 


AUTOMATED MERCHANDISING SYSTEMS INC 
255 WEST BURR BLVD. 
KEARNEYSVILLE, WV 25430 
304-725-6921, Fax 304-725-6983 

www.amsvendors.com


[email protected]


INTERNATIONAL A.M.S.  S DE RL DE CV 
KM. 9 CARR. AL CASTILLO NO. 8200 
MPIO. DE EL SALTO, JAL. MEXICO 45680 
5233-36-88-07-17, Fax 5233-3-6-88-13-14 

www.amsint.com.mx


[email protected]


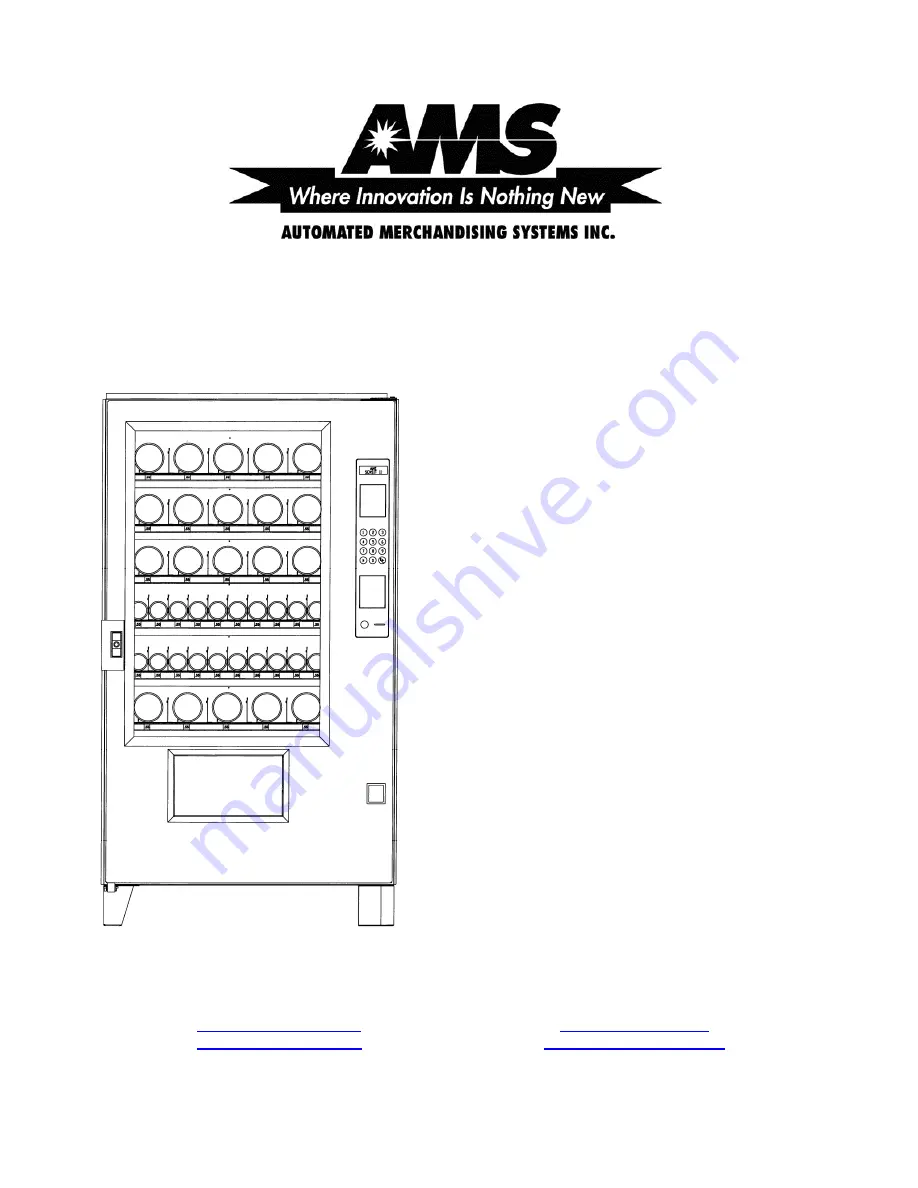
Glass Front Merchandiser 
 
 
Model AMS 39 VRM 
 
 
Outdoor Merchandiser 


Summary of Contents for Sensit 3 39 VRM

Page 1: ... WV 25430 304 725 6921 Fax 304 725 6983 www amsvendors com info amsvendors com INTERNATIONAL A M S S DE RL DE CV KM 9 CARR AL CASTILLO NO 8200 MPIO DE EL SALTO JAL MEXICO 45680 5233 36 88 07 17 Fax 5233 3 6 88 13 14 www amsint com mx servicio amsint com mx Glass Front Merchandiser Model AMS 39 VRM Outdoor Merchandiser ...

Page 2: ...L0086 Rev H AMS SENSIT 3 GLASS FRONT VRM ...

Page 3: ...tion 3 2 3 4 3 Coin Box 3 2 3 4 4 Door Switch 3 2 3 4 5 Display 3 2 3 4 6 Keypad 3 2 3 4 7 Coin Return Button 3 2 3 4 8 Lighting Options 3 2 3 5 REFRIGERATION CHILLER SYSTEM 3 2 3 5 1 Temperature Control 3 2 3 5 2 Refrigeration Controls 3 2 3 6 TRAY SUPPORT RAILS 3 2 3 7 TRAYS 3 2 3 7 1 Vend Motors 3 2 3 7 1 1 S3 Vend Motors 3 3 3 7 1 2 SII Vend Motors 3 3 3 7 2 Helixes 3 3 3 7 3 Divider 3 3 3 7 4...

Page 4: ...rimary 6 6 6 9 3 2 Secondary 6 6 6 9 3 3 Create Custom 6 6 6 9 4 Product Sensor 6 6 6 9 5 Speech 6 6 6 10 SALES BLOCKING 6 6 6 10 1 1 4 Set Periods 6 6 6 10 2 All Selections 6 7 6 11 CLOCK SETTINGS 6 7 6 12 FREE VEND 6 7 6 13 AUXILIARY OUTPUT 6 7 6 14 DATA LOGS 6 7 6 15 ENERGYSENSIT 6 8 6 15 1 Enable 6 8 6 15 2 Clear History 6 8 6 15 3 Set Temp Chg 6 8 6 15 4 Set Patt Time 6 8 6 15 5 Set Hist Fact...

Page 5: ...Figure 5 3 Pusher Bar Installation 5 3 Figure 5 4 1 5 Helix Tray 5 4 Figure 8 1 Replacing Control Chip 8 1 Figure 8 2 Refrigeration Unit Housing 8 1 Figure 8 3 Temperature Sensor 8 3 Figure 9 1 Typical Wiring Diagram 9 1 Sheets 1 and 2 PUBLICATION NOTICE L0086 Revision H ECN 2436 07 30 10 It is our intent to assist our customers with up to date documentation however this manual may not contain all...

Page 6: ...L0086 Rev H AMS SENSIT 3 GLASS FRONT VRM iv ...

Page 7: ...dditional Benefits 1 Opening the delivery bin door will not affect the Sensit 3 system The sensors are located above the delivery bin and will not be blocked by the door Product that falls while the door is open will still pass through the beam 2 Shining a light at the detector will not allow vandals to receive free product Any tampering which changes the precise amount of light normally received ...

Page 8: ... 1 Operating Environment The AMS Model 39 VRM Merchandiser is designed for indoor or outdoor use 1 3 2 Cabinet Physical Dimensions Refer to Figure 1 2 39 W x 72 H x 36 D 99 cm x 183 cm x 91 cm 1 3 3 Cabinet Weight Approx 750 lbs 340 kg 1 3 4 Unit Capacity 1440 units max 150 units min Depending on configuration Refer to Section 4 2 4 1 3 5 Power Requirements United States Canada and Mexico 115 VAC ...

Page 9: ...AMS SENSIT 3 GLASS FRONT VRM L0086 Rev H 1 3 Figure 1 2 AMS 39 VRM Cabinet Dimensions Inches mm ...

Page 10: ...pitch is 18 for each column so the configuration on this tray can hold 18 x 10 180 products A good working configuration is one column with a given helix or dual helices which easily vends a given product A record of working product configurations as shown in the example diagram will greatly speed up new set ups or conversions With Sensit 3 extra wide product can be vended using the following coup...

Page 11: ...rvice must be performed with the power on 3 Always keep electrical connections dry Do not place the merchandiser in or near standing water 4 Never use a worn or damaged power cord 2 2 2 Grounding Some electrical components have a green or green yellow ground wire attached to a grounding point in the merchandiser If it becomes necessary to remove a ground wire during service note how the wire is at...

Page 12: ...per Conditions Hazardous conditions can be created by improper use or service of the merchandiser WARNING Do not use electrical appliances inside the merchandiser unless recommended by AMS 1 Always reinstall any parts removed during service to their original locations 2 Never make unauthorized modifications to any part of the merchandiser 3 Always replace components that are worn broken or otherwi...

Page 13: ...uch as pricing and motor configuration will be saved Refer to Section 8 1 3 2 2 Mode Switch Pressing the mode switch Refer to Figure 3 1 allows the user to get in to the computer s service mode to change settings access vend data and check error codes for troubleshooting Data is displayed on the front display panel and changes entered using the keypad Pressing the switch again or closing the door ...

Page 14: ...as been made pressing the coin return will return the full credit If the Force Vend option is disabled it can also return the full credit before a selection is made If the Bill Changer option is enabled the coin return will return change for bills inserted in the bill validator 3 4 8 Lighting Options Several lighting options depending on the model and size of the merchandiser are available All opt...

Page 15: ...pusher bar is removed by pulling the bar free from the plastic clips To reinstall it is easiest to squeeze the bar into the clip using pliers Refer to Section 5 15 3 8 ELECTRICAL PANEL The electrical panel is located in the recess formed by the right rail mount on the right side of the cabinet behind an access panel 3 8 1 Power Switch The power switch is located on the side of the right rail mount...

Page 16: ...L0086 Rev H AMS SENSIT 3 GLASS FRONT VRM 3 4 ...

Page 17: ...back of the merchandiser near the power cord This requirement does not apply to any merchandiser using 120V service ELECTRICAL SERVICE REQUIREMENT FOR CE COMPLIANCE THIS EQUIPMENT IS INTENDED FOR USE ONLY IN PREMISES HAVING A SERVICE CURRENT CAPACITY OF AT LEAST 100A PER PHASE SUPPLIED FROM A DISTRIBUTION NETWORK HAVING A NOMINAL VOLTAGE OF 400 230V THE USER SHOULD DETERMINE IN CONSULTATION WITH T...

Page 18: ... the coin chute are 3 screws which correspond to slots on the back of the changer Do not adjust these screws 3 Install the changer by placing the large round opening at the bottom of each slot over a screw head Be careful to hold the wiring harnesses in this area out of the way Once each of the round openings are over the screw heads the changer is lowered to engage the narrow portion of the slot ...

Page 19: ... to save all the merchandiser selections at this price 7 The prices as set will be maintained by the merchandiser even if there is a power failure or if the machine is unplugged however prices will need to be reset if the control board has been changed or if the configuration of motors has changed 8 Using the or keys scroll through the menu or exit the service mode by pressing the mode switch or c...

Page 20: ...ed machine on a new location it is important to allow the machine to cool to the operating temperature prior to placing products in the machine All food products are to be pre packaged Depending upon the machine s initial temperature and ambient conditions it will take about 4 to 5 hours to accomplish this Normal practice is to place a machine on location and come back the next day to load it Do n...

Page 21: ...re to push the extended slide rails back into the cabinet before closing the door Otherwise the slides may be damaged 5 2 2 Installation CAUTION An incorrectly installed tray can disengage from the rails and fall when extended It is recommended that installation be performed by at least two people 1 Fully extend the slide rails in the cabinet and hold in position 2 Move the ball carriers out to th...

Page 22: ...ed wires are wide and must be connected to the wide connectors on the motors Connectors which are not used should be folded up out the way and secured in place with wire ties 6 At the back of the tray and when facing the motors tray selection 0 will be the motor on the right end Selection 9 will be on the left If the tray has ten columns attach the harness connectors to the motors red to 0 blue to...

Page 23: ...ipper bar is typically used with carbonated beverage bottles The bottles have a dimpled bottom which permits them to straddle the spiral and stand upright The tipper bar restrains the top of the bottle so that it falls bottom first rather than tumbling off the tray 1 To remove bow the bar until one end can be pulled free from the support bracket Take care not to lose the plastic bushings in the su...

Page 24: ...ting the position of the column dividers Refer to Figure 5 4 The dividers being adjustable change the column width Adjust the divider position by removing the screw at the rear of the divider Pull on the divider towards the front of the tray to loosen it Reposition the divider by inserting the mounting tabs into the appropriate slots Push the divider down and to the rear to tighten it into place R...

Page 25: ...Allows programming of the serial number that will appear in field ID101 in the DEX data The user may also choose to have this programmed serial number used in place of the changer serial number in field CA101 8 RESET CARD Displays the total cashless sales since the last reset 6 3 FILL DISPENSE The FILL DISPENSE function allows the user to add coins to the changer or dispense coins from the changer...

Page 26: ...nt price 6 6 2 VALUEVEND ValueVend starts with the prices that were set using SET PRICES Using ValueVend any two selections are grouped together a matching product or a different product and offered at a reduced price Up to 10 such groups are available For example in one group soup and crackers are offered individually at full price but if one is purchased along with the other the total price is r...

Page 27: ...AYED OPTION NAME MOTOR STOP CREDIT DEDUCTION 1 SENSIT Sensor Sensor 2 HOME SENSOR 3 Home Sensor 3 HOME SENSOR 3 FACTORY DEFAULT Home Extra Sensor 4 HOME_ONLY 3 Home Home SII WITH HOMING MOTOR TYPES 5 HOME SENSOR 2 Sensor Sensor 6 HOME SENSOR 2 Home Extra Sensor 7 HOME_ONLY 2 Home Home If S3 motors are used the switch function is ignored Extra means that if a drop is not detected by the home positi...

Page 28: ...mbers between the lowest and last column numbers saved will also display the same message The tray numbers on the front of the tray should be changed to suit Press 2 VIEW EDIT to view or change previous entries If the display continues to scroll around NEW VIEW EDIT and CLEAR then there are no entries saved If there are entries saved the display will read COUPLE 50 52 for example If the 0 button i...

Page 29: ...n unhealthy finding have become more stringent as various reported error conditions such as coin jams were removed from out of service consideration Right now in practical terms the coin mech either has to burn out completely or become disconnected to be considered unhealthy by the VMC s criteria A healthy coin mech going unhealthy should be a rather rare occurrence To help notify patrons and serv...

Page 30: ...d first in the primary language then in the secondary language 6 9 3 3 Create Custom The user can create customized versions of words or enter words in another language For convenience the primary language messages can be used as a starting point The user can then select words to modify After creating the customized messages set the primary or secondary language to CUSTOM 6 9 4 Product Sensor If s...

Page 31: ... 2 Follow the same steps as given above for time period 1 The time of day the days of the week and the selections can be different from time period 1 All four time periods may be different from others 14 The settings in sales blocking may be changed at any time by selecting the time period and changing the time of day day of the week and selections 6 11 CLOCK SETTINGS 1 TIME AND DATE Enter the cur...

Page 32: ... start at that time 6 15 3 SET TEMP CHG The factory default is 10 F TEMP CHG temperature change allows the user to set the temperature change as an increase from the original temperature set point Refer to Section 6 5 During predicted periods of inactivity the merchandiser will maintain a temperature equal to the temperature set point plus the temperature change value This value can be set from 1 ...

Page 33: ...tion 8 for Brightness Use the keypad 1 and 2 buttons to change the default brightness as shown on the display Press the key to save the new default setting The default will operate when the merchandiser door is closed The factory default is 100 During the time the door is open the LED lamps will change to 90 regardless of any settings If the EnergySensit lighting feature is turned on and the softw...

Page 34: ...INGS 1 SET PRICES 2 VALUEVEND TRAY SETUP 1 TEST MOTORS ENTER SELECTION OR TO CHOOSE OPTION 2 LINK MOTORS 1 NEW LINK 2 VIEW EDIT 3 CLEAR ALL 3 MOTOR TYPE 4 DELAYED STOP 5 LETTER NUMBER 6 CONFIGURE 7 COUPLE MOTORS MDB SETTINGS 1 FORCE VEND 2 NO CHEAT 3 CHANGE BILL 4 HOLD LOST CREDIT 5 MULTI VEND 6 LEVEL2 COIN MECH 7 INSTANT REVAL 8 HIDE CARD VALUE OPTIONS 1 MESSAGE 2 PRIZE 3 LANGUAGE 1 PRIMARY 2 SEC...

Page 35: ...ode is being displayed Correct the condition which caused the error first then clear the error code by pressing 0 Once all errors are cleared ACCT DATA will be displayed Refer to the next section for a description of error codes their causes and solutions 7 2 3 ERROR CODES CAUSES AND SOLUTIONS ERROR CODES CAUSES AND SOLUTIONS TOP LEVEL ERROR CODE SUB LEVEL CODE CAUSES SOLUTIONS X STUCK NONE Keypad...

Page 36: ...NICATIO NS 4 Communications error Check MDB harness connections SERVICE Unit needs service Consult card reader manual or manufacturer READ ERROR Reader failure Consult card reader manual or manufacturer COMMUNICATIO NS 9 Communications error Check MDB harness connections JAMMED CARD Card is jammed Clear the jammed card from the card reader 7 3 CLEARING JAMMED MOTOR If one or more motors and helixe...

Page 37: ...door is properly tightened when it is closed so that it makes contact with the gasket on all sides 3 Make sure there are no objects preventing the vend door from closing The vend door must open and close freely and close completely Rain water can enter the cabinet through the rear ventilation opening Rain entering through this opening is not considered hazardous since all components of the refrige...

Page 38: ......

Page 39: ...dary side Insure primary side of transformer is receiving power If there is no 24 VAC on secondary side replace transformer Merchandiser displays Please Make Another Selection Selection not configured in the motor matrix Reconfigure the motors Motor jammed Clear jammed motor and clear error code Vend not sensed by sensor Clear fault in sensor boards or harness possible control board error Merchand...

Page 40: ...e Gum and Mint trays Assy 20668 may be set to ON Set Home Switch to OFF Evaporator frozen Moist outside air entering cabinet Check for air leaks Close door tightly Check all gaskets for leaks Check for evaporator fan motor not working Replace failed evaporator fan motor Check evaporator fan switch harness connection Replace evaporator switch Refrigeration unit not running Door switch is not workin...

Page 41: ... Check for new options and set them as needed 8 2 CLEANING THE REFRIGERATION UNIT AMS recommends cleaning the inside of the refrigeration unit at least twice a year under normal conditions more often in dusty environments Figure 8 2 Refrigeration Unit Housing CAUTION Always wear eye protection and gloves when cleaning merchandiser Condenser fins are sharp 1 Unplug the merchandiser 2 Remove the tem...

Page 42: ...essary using mild household cleaners and water Dampen a cloth or sponge with the cleaning solution and gently wipe clean the exterior 1 Do not use chemicals or solvents These can damage paint plastic trim and decals 2 Do not use abrasive cleaners 3 Do not use a water jet 4 Do not let water or cleaning solutions contact electrical or electronic components 8 5 CLEANING THE MERCHANDISER INTERIOR Clea...

Page 43: ...21351 7 Look for the source of excess moisture 8 Look for broken or leaking product Dispose of it and clean up the liquid 9 Inspect the vend hopper and clean it of liquids and broken containers 10 Check to make sure the vend hopper door doesn t hang open 11 Check that the gasket of the chiller housing is securely contacting the cabinet and is sealing it on all sides 12 Check to ensure the sealing ...

Page 44: ...endor electrical harness by using the quick disconnect 3 Remove screws attaching the wire bushing plate from inside rear wall of cabinet 4 Remove wire bushing and power cord from the plate 5 Outside of cabinet remove the two screws attaching back grommet plate to cabinet 6 Slide grommet plate down and away from slot in molded on grommet on power cord 7 Remove power cord down and away from round cu...

Page 45: ...AMS SENSIT 3 GLASS FRONT VENDOR L0086 Rev G 9 1 9 0 WIRING DIAGRAM Figure 9 1 Typical Wiring Diagram Sheet 1 of 2 ...

Page 46: ...L0086 Rev G AMS SENSIT 3 GLASS FRONT VRM 9 2 Figure 9 1 Typical Wiring Diagram Sheet 2 of 2 ...

Page 47: ...ash discounts since last reset CA702 Value of cash discounts since initialization CA703 Number of cash discounts since last reset CA704 Number of cash discounts since initialization CA801 Value of cash overpay since last reset CA1001 Value of cash filled since last reset CA1002 Value of cash filled since initialization CB101 Control board serial number CB102 Control board model number CB103 Contro...

Page 48: ...mber of products vended since last reset PA204 Value of paid product sales since last reset PA205 Number of discounted paid vends since initialization PA206 Value of discounts given since initialization PA207 Number of discounted paid vends since last reset PA208 Value of discounts given since last reset PA401 Number of free vends since initialization PC101 Product number one based index PC102 Pro...

Page 49: ...535 Kit Cup Rail Small Helix Part No 20536 Kit Cup Rail 4 Helix Part No 20723 Kit Cup Rail 3 Helix The cup rail is a flat plastic bar that can be placed inside the helix to provide a flat surface for rigid flat bottomed packages that otherwise do not stay upright when placed in a helix Examples would be drink boxes or bottles or individual serving cups of soup pudding etc Part No 20664 Kit Banking...

Page 50: ...L0086 Rev G AMS SENSIT 3 GLASS FRONT VRM 11 2 ...

Page 51: ...returned properly packaged freight prepaid to AMS or to the authorized dealer or distributor from whom the equipment was purchased for verification of the defect Prior to returning any parts for replacement the customer is to contact the AMS Service Department at 304 725 6921 for return authorization AMS reserves the right to refuse any collect shipment This warranty applies only if the equipment ...

Page 52: ...L0086 Rev G AMS SENSIT 3 GLASS FRONT VRM 12 2 ...

Reviews: