background image

Chapter 6 AMI BIOS

80

Advanced CMOS Setup Options,

 Continued

Internal Cache Memory

This option enables the 8 KB of cache internal to the
microprocessor. The options are Enabled or Disabled.
Normally, this option is enabled. This option appears only
on 80486-based systems, since the 80486 has an internal
cache.

External Cache Memory

This option appears when EZ-Flex CPU Cards using either
80386 or 80486 processor are used. It enables or disables
cache memory on the EZ-Flex CPU Cards. EZ-Flex CPU
Cards can have 64 KB, 128 KB, 256 KB, or 512 KB of
cache memory. For speedier operation, cache memory
should always be enabled. The settings are Enabled or
Disabled.

Low Speed Emulation

This option sets the low processor speed. The settings are 6
MHz, 8 MHz, 10 MHz, 12 MHz, or 14 MHz.

512K - 640K Base Memory

This option enables or disables the 128K base memory
between 512K and 640K. The settings are Enabled or
Disabled.

Summary of Contents for 28 series

Page 1: ...American Megatrends Inc Series 28 EZ Flex Base Board User s Guide MAN 528 6 18 92 ...

Page 2: ...port materials provided with the product Trademarks American Megatrends acknowledges the following trademarks Intel is a registered trademarks of Intel Corporation MS DOS Xenix and Microsoft are registered trademarks of Microsoft Corporation IBM AT VGA OS 2 and EGA are registered trademarks of International Business Machines Corporation XT and CGA are trademarks of International Business Machines ...

Page 3: ...ll SIMMs 17 SIMM Sockets 19 Step 3 Install Base Board 20 Step 4 Connect the Power Supply 21 Step 5 Connect the Keyboard 25 Connecting a PS 2 Keyboard to P005 26 Step 6 Connect the Mouse 27 Step 7 Connect the Cables 27 P006 and P007 Serial Port Connectors 32 P004 Parallel Port Connector 33 Step 8 Install Adapter Cards 35 Step 9 Install Floppy Disk Drives 44 P002 Floppy Disk Connector 45 Step 10 Per...

Page 4: ...8 Section 3 Advanced CMOS Setup 69 Advanced CMOS Setup Screen 70 Typematic Rate Programming Rate and Delay 71 Memory Test Tick Sound 72 Wait for F1 If Any Error 74 System Boot Up Num Lock 74 Floppy Drive Seek At Boot 74 System Boot Up Sequence 74 System Boot Up CPU Speed 74 Password Check Option 75 C000 16K Cache and Shadow through DC00 16K Cache and Shadow 75 Internal Cache Memory 77 External Cac...

Page 5: ...nformation and that parts of this manual will be included in the computer owner s manual Technical Support If an AMI EZ Flex Base Board or CPU Card fails to operate as described or you need more information call AMI technical support at 404 246 8600 Acknowledgments This manual was written by Paul Narushoff who gratefully acknowledges the assistance of Terry Lauer and Sukha Ghosh What You Should Ha...

Page 6: ...es modems with data transmission rates from 1 200 to 14 400 bps If using an HST modem call 404 246 8780 If using a non HST modem call 404 246 8782 BBS Phone Numbers The following table lists the characteristics of the AMI BBS phone numbers The AMI BBS requires no parity 8 data bits and 1 stop bit Phone Number Characteristics 404 246 8780 Supports HST and v 42bis 404 246 8781 Supports HST and v 42b...

Page 7: ...modular Many components remain on the motherboard called a Base Board in an EZ Flex environment The Base Board is the main element in an EZ Flex system The AMI EZ Flex system places the CPU BIOS ROM optional coprocessor cache memory and several other system elements on a separate CPU Card An EZ Flex system consists of a Base Board and an EZ Flex CPU Card The EZ Flex CPU Card and Base Board connect...

Page 8: ...ilable Convenient Reliable Compatible The AMI EZ Flex system provides an easy to expand foundation based on a few integrated circuits using state of the art surface mount technology on the CPU Cards which reduces cost minimizes potential handling damage and reduces the overall size The Result The EZ Flex architecture is an integrated EISA system that is also ISA or AT compatible Using the AMI EZ F...

Page 9: ...OM Shadowing The AMI BIOS Setup provides shadowing for system BIOS ROM video ROM and option ROMs Shadow RAM provides significant improvement in system performance and VGA EGA video throughput This memory is configured via Setup in the system BIOS CMOS RAM The AMI EZ Flex BIOS Setup configuration settings are saved in the 64 bytes of CMOS RAM on the EZ Flex Base Board CMOS RAM and the clock and cal...

Page 10: ... dual inline bergs a parallel printer port software configurable to LPT1 or LPT2 or disabled by the ECU Interrupts are configured by the ECU The parallel port connector is a 26 pin dual inline berg connector a floppy drive controller that supports up to two low or high density and 3 or 5 inch drives An Intel 82077AA diskette controller and standard 34 pin floppy connectors are provided Mouse suppo...

Page 11: ...cs SCSI Host Adapters or other adapter cards Memory Features Simple Memory Expansion The EZ Flex Base Board provides easy memory expansion using industry standard fast page mode 70 ns RAS access time 30 pin SIMMs Single Inline Memory Modules The SIMMs on the EZ Flex Base Board must all be the same type 256 KB x 9 1 MB x 9 4 MB x 9 or 16 MB x 9 SIMMs can be used A minimum of four SIMMs must be inst...

Page 12: ...ry is paged If one bank of memory is present one bank consists of four SIMMs memory is paged If both banks of memory are present eight SIMMs memory is paged interleaved The page size is 1 KB if memory is present in Bank 1 only It is 2 KB if memory is present in both banks Bank interleave is used when groups of SIMMs are installed This technique interleaves 2 banks of DRAM SIMMs by alternating acce...

Page 13: ...n the eight SIMM slots CPU Card The microprocessor external math coprocessor BIOS ROM chips memory cache and other ICs are on the CPU Card The CPU Card plugs into a 160 pin connector on the Base Board The Base Board contains the bulk of the standard EISA system architecture Cache Memory All memory on the Base Board can be accessed by the EZ Flex memory caching subsystem which uses either write thr...

Page 14: ...le in a range of CPUs and CPU speeds See the following table Feature 80486DX 80486DX 2 8046SX 80386DX Intel AMD Clock Speeds 25 33 and 50 MHz 16 20 and 25 MHz 33 or 40 MHz External Cache Memory 128 KB None 64 KB or 256 KB Type of Cache Write back None Write back Cache Read wait states 0 Not Applicable 0 Cache Write wait states 1 Not Applicable 0 External Math Coprocessor Weitek 4167 Weitek 4167 In...

Page 15: ...ely 8 55 inches wide and 13 inches long It contains the standard mounting holes of the standard XT and Baby AT format and can be mounted in most Baby AT or XT chassis The EZ Flex is 100 AT compatible and works with all ISA and EISA adapter cards The following graphic displays the dimensions of the EZ Flex Base Board ...

Page 16: ... guides on the CPU Card connector making it easy to install CPU There is no CPU on the EZ Flex Base Board The CPU is on an AMI EZ Flex CPU Card The EZ Flex CPU Cards are EZ Flex 80486 CPU Card 80386 CPU Card and 80486SX CPU Card There is a separate AMI manual for each EZ Flex CPU Card Math Coprocessor The optional math coprocessor also resides on the EZ Flex CPU Card See the AMI CPU Card User s Gu...

Page 17: ...NK1 is filled Maximum RAM Up to 128 MB using 16 MB x 9 SIMMs can be installed on the EZ Flex Base Board Memory Speed The AMI EZ Flex Base Board requires SIMMs with a RAS access time of 70 ns Wait States Memory access for both read and write requires zero wait states 640K 1024K Memory Area This area can be used for Shadow RAM Memory Configurations The EZ Flex Base Board supports 1 MB 2 MB 4 MB 8 MB...

Page 18: ...on slots and one non bus master slot on the EZ Flex Base Board Bus Speed The AMI EZ Flex Base Board bus operates at standard ISA or EISA bus speeds Turbo Speed Mode Speed is controlled by a turbo switch that can be mounted on the front panel of the chassis and can also be controlled through the keyboard via the BIOS Ctrl Alt or keychords Software Compatibility The EZ Flex system is compatible with...

Page 19: ...d wear an anti static wristband grounded at the same point as the anti static mat Or use a sheet of conductive aluminum foil grounded through a 1 megohm resistor instead of the anti static mat Similarly a strip of conductive aluminum foil wrapped around the wrist and grounded through a 1 megohm resistor serves the same purpose 3 Inside the carton the EZ Flex board is packed in an anti static bag a...

Page 20: ...problem Warning The AMI EZ Flex main processor board contains sensitive electronic components which can be easily damaged by static electricity Follow the instructions carefully to ensure correct installation and to avoid static damage Notes Make sure that SW01 is always Off It is used only for manufacturing tests The EZ Flex Base Board has a resettable fuse It automatically resets after a certain...

Page 21: ...17 2 Install SIMMs Page 17 3 Install Base Board Page 20 4 Connect the power supply Page 21 5 Connect the keyboard Page 25 6 Connect the mouse Page 27 7 Connect cables Page 27 8 Install adapter cards Page Error Bookmark not defined 9 Install floppy disk drives Page 45 10 Perform initial test and configuration Page 47 EZ Flex Base Board Layout The graphic on the following page display the layout of ...

Page 22: ...Chapter 4 Installation 16 ...

Page 23: ...me display Set On to use a color display CGA The switch has no effect with EGA or VGA Step 2 Install SIMMs The AMI 486 EZ Flex Base Board memory system consists of two 32 bit DRAM memory banks Both banks use Single Inline Memory Module SIMM DRAMs and are labeled BANK1 and BANK2 on the Base Board Use 256 KB x 9 1 MB x 9 4 MB x 9 or 16 MB x 9 SIMMs All SIMMs must support column address strobe CAS be...

Page 24: ...liable operation Make sure that the modules do not interfere with adjacent expansion slots See the following figure Gently slide the SIMMs into the socket Tilt the SIMMs away from the latching tangs Once the SIMM is seated move it towards the tangs until it snaps in place which does not require much force SIMMs are keyed to make them difficult to install incorrectly Selecting SIMMs Parameter Speci...

Page 25: ...orola MCM94000A 70 Samsung KMM594000A 70 Oki MSC2340 70459 16 MB x 9 Mitsubishi MH16M09J 7 Mitsubishi MH16M09TJ 7 Samsung KMM5916000 7 SIMM Sockets The SIMM sockets permit up to 128 MB of onboard high speed 70 ns memory The standard SIMM 30 pin module is supported The memory configurations are Total Memory Quantity Type Location 1 MB 4 256 KB x 9 Bank 1 2 MB 8 256 KB x 9 Banks 1 and 2 4 MB 4 1 MB ...

Page 26: ...ide the board Step Action 1 Carefully position the board inside the case 2 Determine the position of the holes for the plastic standoffs 3 Place the Base Board on a piece of the shipping foam and firmly press the standoffs into the required holes until the locking pins snap in place 4 On the chassis install the plastic edge supports in the required holes 5 Install the metal standoffs in the drille...

Page 27: ...ll components make sure that the proper voltage was selected Power supplies often can run on a wide range of voltages but must be set usually via a switch to the proper range Use at least a 200 watt power supply which should have built in filters to suppress radiated emissions Power Supply Connectors The power supply is connected to PS001 and PS002 on the Base Board PS003 is available as an additi...

Page 28: ...nd the remaining six pin connector is connected to PS001 Not all power supply vendors conform to the standard color coding scheme PS003 is provided because some 400 watt power supplies have a third connector A standard 200 250 Watt power supply may not be not sufficient for the EISA EZ Flex Base Board if all EISA expansion slots are filled with EISA compatible adapters A third power supply connect...

Page 29: ...r Good Orange wire 2 VCC Red wire 3 12 Volts Yellow wire 4 12 Volts Blue wire 5 Ground Black wire 6 Ground Black wire PS002 Pinout Pin Description 1 Ground Black wire 2 Ground Black wire 3 5 Volts White wire 4 VCC Red wire 5 VCC Red wire 6 VCC Red wire PS003 Pinout Pin Description 1 VCC Red wire 2 VCC Red wire 3 VCC Red wire 4 Ground Black wire 5 Ground Black wire 6 Ground Black wire ...

Page 30: ...rs are keyed for proper installation However with some connectors keys may have to be removed You may have to cut Key 6 last key on the right on the top of the PS002 connector key 3 matches Pin 4 on the top of PS001 and key 5 next to last on right on the top of PS003 if used See the following graphic ...

Page 31: ...nnector P001 is a five pin DIN socket and is labeled KEYBOARD on the EZ Flex Base Board It accepts a regular AT compatible keyboard P005 is a five pin berg that can connect to a PS 2 type keyboard P001 and P005 Pinout Pin Description 1 Keyboard clock 2 Keyboard data 3 NC 4 GND 5 VCC ...

Page 32: ...5 For this you need a five pin berg to six pin DIN Converter to connect a PS 2 type keyboard PS 2 compatible mouse devices and keyboards have a smaller six pin DIN connector The pin connections to the DIN receptacle are different than a five pin DIN receptacle The following graphic illustrates the connections that must be made to a six pin DIN receptacle This graphic displays a bottom view of the ...

Page 33: ...use clock 2 Mouse data 3 NC 4 GND 5 VCC Step 7 Connect the Cables Most connector wires are color coded Match the color of the wires leaving the switch or LED to the same pin on the connector end There can be two connectors with the same color coded wires Follow the wire to the switch or LED Pin 1 of all connectors is labeled to identify the pin orientation when plugging in cables See the EZ Flex B...

Page 34: ...Chapter 4 Installation 28 Keyboard Lock cable to P012 The turbo switch connects to P014 The Turbo LED connects to P015 ...

Page 35: ...e Cables Continued Connect P016 Reset Button Connector P016 is a two pin single inline berg When the Reset button is pressed the system does a hard reset Pin 1 is ground and Pin 2 is Hard Reset The following graphic depicts a cable being attached to the berg ...

Page 36: ...nector The adjacent table shows the pinouts for P013 Pin 1 is labeled on the Base Board Pin Description 1 Speaker Data 2 N C Key 3 GND 4 5 Volts Connect P012 Keyboard Lock Connector P012 can be connected to the front panel power on LED and keyboard lock switch The keyboard lock switch disables system boot or entering Setup until the lock is unlocked P012 is a five pin single inline berg Pin Descri...

Page 37: ...LED Connector P015 can be connected to a front panel LED to reflect the current CPU operating speed The CPU speed can be toggled from the keyboard by an OEM specified through AMIBCP keychord such as Ctrl Alt and Ctrl Alt the default keystroke combinations P015 is a two pin single inline berg The Turbo LED is lit when the board is running at high speed Pin 1 is LED Power the anode of the LED and Pi...

Page 38: ...ct from P007 COM1 on the Base Board and P006 COM2 on the Base Board on the far left side of the Base Board to the serial DB connector attached to the chassis See page 33 for the serial port connector pinout The following graphics depict a 10 pin serial connector and a serial cable Note the orientation of pin 1 of the connectors This end of the connector typically is located near the edge of the ca...

Page 39: ...r Detect 6 Data Set Ready 2 Receive Data 7 Request to Send 3 Transmit Data 8 Clear to Send 4 Data Terminal Ready 9 Ring Indicator 5 GND 10 Key N C Serial Port IRQ Conflicts When using a network operating system with a system based on the AMI EZ Flex it is possible that the network may use the same IRQ IRQ3 that is used for one of the two onboard serial ports In this case you can disable the IRQ as...

Page 40: ... Pin Use 1 STROBE 14 AUTOFEED 2 PD0 15 ERROR 3 PD1 16 INIT 4 PD2 17 SLCTIN 5 PD3 18 GND 6 PD4 19 GND 7 PD5 20 GND 8 PD6 21 GND 9 PD7 22 GND 10 ACK 23 GND 11 BUSY 24 GND 12 PE 25 GND 13 SLCT 26 N C The parallel cable connects P004 near the floppy cable connector in the top middle part of the EZ Flex Base Board to a 25 pin parallel DB connector on the chassis See page 34 for the parallel port connec...

Page 41: ...arallel Port Pins Some pins must be cut on the P004 parallel and P006 and P007 serial sockets on the AMI EZ Flex Base Board in order for the parallel and serial cables supplied by AMI to work properly The following graphic depicts the changes that must be made ...

Page 42: ... IBM XT or AT compatible adapter cards It has eight EISA slots The slots are numbered on the motherboard from SLOT1 through SLOT8 The EISA slots can accept 8 or 16 bit ISA XT or AT compatible or 16 or 32 bit EISA adapter cards The slots are described below Slot Description 1 6 EISA bus master slot These slots accept any EISA ISA adapter card 7 8 EISA non bus master slot These expansion slots accep...

Page 43: ...rs on the edge connecters than ISA adapter cards The EISA slots on the motherboard have two rows of contacts one below the other The ISA slot can be inserted into the EISA connector only far enough to make contact with the upper row of contacts EISA adapters have longer fingers to allow contact with the second row of contacts ...

Page 44: ...or hard disk drive controllers if you do not want to use them The onboard floppy cannot be disabled via the ECU If you do not want to use it do not connect it to a floppy drive The self contained controllers are easily used by simply connecting the appropriate cable to the device When installing EISA adapter cards make sure they are fully seated in the EISA expansion slot If the card makes contact...

Page 45: ...ll Adapter Cards Continued EZ Flex CPU Card The EZ Flex CPU Card installs in the 160 pin slot on the lower right of the Base Board See the appropriate AMI CPU Card User s Guides for additional instructions The graphic below depicts CPU Card installation ...

Page 46: ...1 B8 OWS A9 SD00 B9 12 A10 IOCHRDY B10 GND A11 AEN B11 SMEMW A12 SA19 B12 SMEMR A13 SA18 B13 IOW A14 SA17 B14 IOR A15 SA16 B15 DACK3 A16 SA15 B16 DREQ3 A17 SA14 B17 DACK1 A18 SA13 B18 DREQ1 A19 SA12 B19 REF A20 SA11 B20 SYSCLK A21 SA10 B21 IRQ7 A22 SA09 B22 IRQ6 A23 SA08 B23 IRQ5 A24 SA07 B24 IRQ4 A25 SA06 B25 IRQ3 A26 SA05 B26 DACK2 A27 SA04 B27 T C A28 SA03 B28 BALE A29 SA02 B29 5 A30 SA01 B30 O...

Page 47: ... C9 MEMR D9 DREQ0 C10 MEMW D10 DACK5 C11 SD08 D11 DREQ5 C12 SD09 D12 DACK6 C13 SD10 D13 DREQ6 C14 SD11 D14 DACK7 C15 SD12 D15 DREQ7 C16 SD13 D16 5 C17 SD14 D17 MASTER C18 SD15 D18 GND 32 bit EISA Slot Pinout The following table identifies the pin values for the pins on each of the eight rows of pins on an EISA adapter card 8 and 16 bit ISA signals are shown Pins labeled xxxxxx are generally used t...

Page 48: ...d 12 SMRDC 12 Reserved 12 SA19 13 GND 13 IOWC 13 Reserved 13 SA18 14 Reserved 14 IORC 14 Reserved 14 SA17 15 BE 3 15 DAK 3 15 GND 15 SA16 16 Access Key 16 DRQ3 16 Access Key 16 SA15 17 BE 2 17 DAK 1 17 BE 1 17 SA14 18 BE 0 18 DRQ1 18 LA 31 18 SA13 19 GND 19 REFRESH 19 GND 19 SA12 20 5 volts 20 BCLK 20 LA 30 20 SA11 21 LA 29 21 IRQ 7 21 LA 28 21 SA10 22 GND 22 IRQ 6 22 LA 27 22 SA9 23 LA 26 23 IRQ ...

Page 49: ... IRQ 11 4 LA3 4 LA21 5 LA2 5 IRQ 12 5 GND 5 LA20 6 Access Key 6 IRQ 15 6 Access Key 6 LA19 7 D16 7 IRQ 14 7 D17 7 LA18 8 D18 8 DAK 0 8 D19 8 LA17 9 GND 9 DRQ 0 9 D20 9 MRDC 10 D21 10 DAK 5 10 D22 10 MWTC 11 D23 11 DRQ 5 11 GND 11 D8 12 D24 12 DAK 6 12 D25 12 D9 13 GND 13 DRQ 6 13 D26 13 D10 14 D27 14 DAK 7 14 D28 14 D11 15 Access Key 15 DRQ 7 15 Access Key 15 D12 16 D29 16 5 volts 16 GND 16 D13 17...

Page 50: ...Chapter 4 Installation 44 Step 8 Install Adapter Cards Continued 32 Bit EISA Slot Pinout cont d The following graphic displays a bottom view of an EISA adapter card connector ...

Page 51: ...y cable is identified by a colored stripe see page 16 Before inserting the floppy cable connector make sure that all connector pins are straight and aligned vertically If they are not gently straighten the bent pins using needle nosed pliers Disable all floppy controller on any adapter card s disable it completely or the Base Board floppy controller cannot function properly Attach the disk drives ...

Page 52: ... Use Pin Use 1 GND 2 RPM LC 3 GND 4 N C 5 GND 6 N C 7 GND 8 INDEX 9 GND 10 MOTOR0 11 GND 12 FDSEL1 13 GND 14 FDSEL0 15 GND 16 MOTOR1 17 GND 18 DIR 19 GND 20 STEP 21 GND 22 WDATA 23 GND 24 WGATE 25 GND 26 TRK0 27 GND 28 WRPROT 29 GND 30 RDATA 31 GND 32 HDSEL 33 GND 34 DSKCHNG Twist in Floppy Cable There is a twist in the floppy cable between the floppy connectors The last end connector should be co...

Page 53: ...ng in and turn on the switch If there are any signs of a problem turn off the unit immediately Reinstall the connectors The fuse may have to be reset Call AMI Technical Support if there are additional problems BIOS Errors If the system operates normally a display should appear on the monitor The BIOS Power On Self Test POST should execute If POST does not run successfully it beeps or displays erro...

Page 54: ...run to configure all EISA and ISA adapter cards in the system See the appropriate ECU User s Guide for information about running the ECU Error Messages If the system beeps during POST power on self test a serious problem exists with the system configuration or hardware The beeps are part of a Beep Code see Page 51 that almost always indicates a bad component or that the system must be reconfigured...

Page 55: ...AMI EZ Flex Base Board User s Guide 49 ...

Page 56: ...ization test and initialize Base Boards for normal operations and System Configuration Verification compare defined configuration with hardware actually installed BIOS Error Reporting The AMI BIOS reports errors in one of two ways If Then the error occurs before the display device is initialized a series of beeps sound Beep codes indicate that a fatal error occurred The AMI BIOS Beep Codes are des...

Page 57: ... memory the first 64 KB block of memory 3 beeps Base 64 KB Memory Failure Memory failure in first 64 KB 4 beeps Timer Not Operational A memory failure occurred within the first 64 KB of memory or Timer 1 on the Base Board is not functioning 5 beeps Processor error The CPU Central Processing Unit on the Base Board generated an error 6 beeps 8042 Gate A20 Failure Gate A20 on the keyboard controller ...

Page 58: ...he keyboard controller 8042 is not working Replace the 8042 Address Line Short An error occurred in the address decoding circuitry on the Base Board C Drive Error The BIOS is not receiving a response from drive C The drive may be missing If the drive is present run the Hard Disk Utility to correct this problem Also check the C hard disk type in Standard CMOS Setup to make sure that the hard disk d...

Page 59: ...her color or monochrome Turn the system off set the switch properly then power on DMA Error An error occurred in the DMA controller DMA 1 Error An error occurred in the first DMA channel DMA 2 Error An error occurred in the second DMA channel FDD Controller Failure The BIOS is not able to communicate with the floppy disk drive controller Check all appropriate connections after the system is powere...

Page 60: ... Board Parity Error There is a parity error in Base Board memory The message format is ON BOARD PARITY ERROR ADDR HEX XXXX XXXX is the hex address where the error occurred On Board means that it is part of the memory on the Base Board Run AMI Diag to find and correct memory problems Parity Error There is a parity error with system memory but the address of the error cannot be determined Run AMI Di...

Page 61: ...rner of the screen Press Ins to display two additional BIOS ID strings These strings contain the BIOS options in a coded form When a problem occurs make sure Wait for F1 If any Error in Advanced CMOS Setup is enabled Then freeze the screen by powering on the system and holding a key down to cause a Keyboard Error message Press F1 to continue the boot process Copy the three BIOS Identification stri...

Page 62: ...t X Y Z The ID of the EISA Adapter Card in Slot X Y or Z does not match the ID in EISA CMOS RAM Invalid Configuration Information for Slot X Y Z The configuration information for EISA Adapter Cards X Y or Z is not correct The board cannot be configured Run the ECU Software Port NMI Inoperational The software port NMI is not working ISA NMI Messages The AMI EZ Flex EISA BIOS may generate ISA compat...

Page 63: ...oftware port NMI has been generated BIOS Configuration Summary Screen A System Configuration Screen similar to the following sample screen appears when BIOS POST routines are completed System Configuration C Copyright 1985 1991 American Megatrends Inc Main Processor Numeric Coprocessor Floppy Drive A Floppy Drive B Display Type ROM BIOS Date 80486 Present 1 2 MB 1 44 MB VGA or EGA 05 01 91 Base Me...

Page 64: ...at any time by pressing Ctrl Alt Processor speed can be decreased by pressing Ctrl Alt Enable Cache Memory If a CPU Card with an 80486 processor is used in the system external cache memory can be enabled by pressing Ctrl Alt Shift or disabled by pressing Ctrl Alt Shift Setup The AMI EZ Flex EISA BIOS Setup utility has two screen options that configure options The two Setup options are Standard CMO...

Page 65: ...ory configuration peripheral support and power management support Advanced CMOS Setup is discussed in Section 3 Default Settings Every option in AMI BIOS Setup has two default values a power on default and the BIOS Setup default Power On Defaults The power on default settings consist of the safest set of parameters Use them if the system is behaving erratically They should always work but do not p...

Page 66: ...pted The AMI BIOS Setup resides in ROM and can be used to reconfigure the system each time the computer is turned on If for some reason CMOS RAM becomes corrupted the system is configured with the default values stored in the BIOS Setup ROM file There are two sets of BIOS values stored in the ROM file the BIOS Setup default values and the Power On default values described on the previous page Star...

Page 67: ...colors F3 Change foreground colors F5 Restores the values resident when the current Setup session began These values are taken from CMOS RAM if CMOS RAM was uncorrupted at the start of the session Otherwise the BIOS Setup default values are used F6 Loads all features in Advanced CMOS Setup with the BIOS Setup defaults F7 Loads all features in the Advanced CMOS Setup with the Power On defaults F10 ...

Page 68: ...tomatically loaded Type Y and press Enter The following appears Default values loaded Press any key to continue Auto Configuration With Power On Defaults This option configures the default Power On settings Power On defaults are worst case values for system performance but are the most stable values that can be chosen Use this option if the system is behaving erratically Type Y and press Enter The...

Page 69: ...n to CMOS RAM Control is then passed to the ROM BIOS Write to CMOS Exit Screen Press N and Enter to return to the Main Menu Press Y and Enter to save the system parameters and continue the boot process Do Not Write to CMOS RAM and Exit This option passes control to the BIOS without writing configuration changes to CMOS RAM Press N and Enter to return to the Main Menu Press Y and Enter to continue ...

Page 70: ...ter 6 AMI BIOS 64 Section 2 Standard CMOS Setup Overview Standard CMOS Setup is the first option on the Main Menu Press Enter at the highlighted selection to display this option The following screen appears ...

Page 71: ...k types from 1 to 46 are standard Type 47 is user definable and can be used for both drive C and D You must enter the hard disk parameters if Type 47 is used Floppy Drives A and B Supports for 720 KB and 1 44 MB 3 inch drives 360 KB and 1 2 MB 5 inch drives and no drive systems Video Display Support for MDA and CGA video BIOS VGA JEGA and no video is provided Keyboard Can be Enabled or Disabled Da...

Page 72: ...l hold 512 bytes Write precompensation circuitry on the hard disk compensates for the physical difference in sector size by boosting the write current for sectors on inner tracks This parameter is the track number where write precompensation begins Landing Zone This number is the cylinder location where the heads normally park when the system is shut down Sectors The number of sectors per track Ha...

Page 73: ...MB 12 855 7 65535 855 17 50 MB 13 306 8 128 319 17 20 MB 14 733 7 65535 733 17 43 MB 16 612 4 0 663 17 20 MB 17 977 5 300 977 17 41 MB 18 977 7 65535 977 17 57 MB 19 1024 7 512 1023 17 60 MB 20 733 5 300 732 17 30 MB 21 733 7 300 732 17 43 MB 22 733 5 300 733 17 30 MB 23 306 4 0 336 17 10 MB 24 925 7 0 925 17 54 MB 25 925 9 65535 925 17 69 MB 26 754 7 754 754 17 44 MB 27 754 11 65535 754 17 69 MB ...

Page 74: ...0 17 41 MB 41 977 5 977 977 17 41 MB 42 981 5 981 981 17 41 MB 43 830 7 512 830 17 48 MB 44 830 10 65535 830 17 69 MB 45 917 15 65535 918 17 114 MB 46 1224 15 65535 1223 17 152 MB Not Installed can be used for diskless workstations and SCSI hard disks Type 47 can be used for both hard disks C and D The parameters for type 47 for Hard Disk C and Hard Disk D can be different permitting two user defi...

Page 75: ... Monitor The Primary Display Options are Monochrome Color 40x25 VGA PGA EGA Color 80x25 or Not Installed which could be used for monitorless network file servers since this option prevents error messages about missing monitors during BIOS POST Keyboard This option specifies if error checking should occur for a missing keyboard The Keyboard Options are Installed or Not Installed Not Installed could...

Page 76: ... Memory Test Tick Sound Hit DEL Message Display Hard Disk Type 47 RAM Area Wait for F1 If Any Error System Boot Up Num Lock Floppy Drive Seek At Boot System Boot Up Sequence System Boot Up CPU Speed Password Checking Option C000 16K DC00 16K Cache and Shadow 80486 systems only or Video ROM Shadow C000 and C400 16K 80386 systems only and Adaptor ROM Shadow C800 EC00 16K 80386 systems only External ...

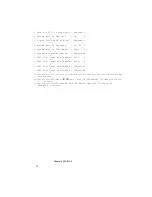
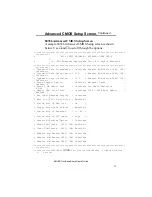
Page 77: ... Setup screen is shown below Use and to scroll through the options BIOS SETUP PROGRAM ADVANCED CMOS SETUP C 1991 American Megatrends Inc All Rights Reserved Typematic Rate Programming Disabled D000 16K Cache and Shadow Disabled Typematic Rate Delay msec 250 D400 16K Cache and Shadow Both Typematic Rate Chars Sec 30 0 D800 16K Cache and Shadow Disabled Mouse Support Option Enabled DC00 16K Cache an...

Page 78: ... Boot Up Sequence C A System Boot Up CPU Speed High Password Checking Option Disabled C000 16K Cache and Shadow Both C400 16K Cache and Shadow Both C800 16K Cache and Shadow Disabled CC00 16K Cache and Shadow Disabled ESC Exit Sel Ctrl Pu Pd Modify F1 Help F2 Color F5 Old Values F6 BIOS Setup Defaults F7 Power On Defaults ...

Page 79: ... 30 0 Adaptor ROM shadow DC00 16K Disabled Mouse Support Option Enabled External Cache Enabled Above 1 MB Memory Test Disabled Low Speed Emulation 8 MHz Memory Test Tick Sound Disabled 512K 640K Base Memory Enabled Hit DEL Message Display Disabled Wait for F1 If Any Error Enabled System Boot Up Num Lock On Floppy Drive Seek At Boot Enabled System Boot Up Sequence C A System Boot Up CPU Speed High ...

Page 80: ...Programming enables or disables the following two options Typematic Rate Delay 250 500 750 or 1 000 milliseconds and Typematic Rate 6 8 10 12 14 16 24 or 30 characters per second control the speed at which a keystroke is repeated A character is displayed when a key is pressed and held down After a delay the Typematic Rate Delay it repeats at the Typematic Rate ...

Page 81: ...en enabled executes the POST memory routines on the RAM above 1 MB if present If disabled the BIOS only tests the first 1 MB of RAM and clears all other memory The settings are Enabled or Disabled Memory Test Tick Sound This option enables or disables the ticking sound during the memory test The settings are Enabled or Disabled Hit DEL Message Display The settings are Enabled or Disabled Disabling...

Page 82: ...st be entered in Standard CMOS Setup see page Error Bookmark not defined This option specifies the type 47 data storage area 0 300h in lower system RAM or in the top 1 KB of applications memory starting at address 639K or 511K depending on how much base memory the system has Type 47 data is stored in shadow RAM if shadowing is enabled The following graphic illustrates type 47 data storage ...

Page 83: ...Lock option to use the arrow keys on both the numeric keypad and the keyboard The BIOS default is On Floppy Drive Seek At Boot This option enables or disable a floppy drive Seek command at system boot time The settings are Enabled or Disabled The default is Disabled to allow a fast boot and to decrease the possibility of damage to the heads System Boot Up Sequence This option sets the boot drive o...

Page 84: ...from RAM Cache is a technique where frequently used data is stored in fast SRAM instead of slower DRAM for speedier access If Shadow is selected the 16K memory segment that begins at the address specified in this option is shadowed from ROM to RAM and is write protected but not cached internally If Both is selected the 16K memory segment that begins at the address specified in this option is both ...

Page 85: ...owed Adaptor ROM Shadow C800 16K through Adaptor ROM Shadow EC00 16K These options only appear in the Advanced CMOS Setup for 80386 based EZ Flex systems The settings are Enabled and Disabled ROM shadow is a technique in which ROM code is copied from slower ROM to faster RAM The code is then executed from RAM If enabled the 16K segment at C8000h CC000h D0000h D4000h D8000h DC000h E0000h E4000h E80...

Page 86: ...when EZ Flex CPU Cards using either 80386 or 80486 processor are used It enables or disables cache memory on the EZ Flex CPU Cards EZ Flex CPU Cards can have 64 KB 128 KB 256 KB or 512 KB of cache memory For speedier operation cache memory should always be enabled The settings are Enabled or Disabled Low Speed Emulation This option sets the low processor speed The settings are 6 MHz 8 MHz 10 MHz 1...

Page 87: ...AMI EZ Flex Base Board User s Guide 81 ...

Page 88: ...6 characters is stored in CMOS RAM To change a password the end user selects Change Password from the main Setup screen and presses Enter The user then types a password The typed characters do not display After the new password has been correctly entered it must be retyped If the password confirmation is incorrect an error message appears If the new password confirmation is entered without error t...

Page 89: ... If Setup was set in Advanced CMOS Setup the prompt appears when Setup is run Using a Password The end user must enter the new password when the password prompt appears and then press Enter The end user may be able to enter the default password if CMOS RAM is corrupted The end user should keep a record of the new password when the password is changed If the end user forgets the password and passwo...

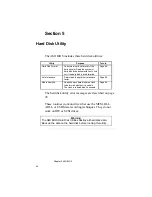
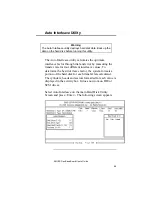
Page 90: ...ave Determines the optimum interleave factor Page 89 Media Analysis Analyzes each hard disk drive track to determine whether it is usable The track is labeled bad if unusable Page 92 The hard disk utility error messages are described on page 94 These routines work on drives that use the MFM RLL ARLL or ESDI data recording techniques They do not work on IDE or SCSI drives Warning The AMI BIOS Hard ...

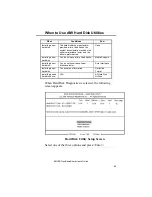
Page 91: ... preformatted None Installing a new hard disk You do not have a list of bad tracks Media Analysis Installing a new hard disk You do not know the optimum interleave factor Auto Interleave Installing a new hard disk The drive is not formatted Hard Disk Format Installing a used hard disk drive N A All Hard Disk Utilities When Hard Disk Diagnostics is selected the following screen appears Hard Disk Ut...

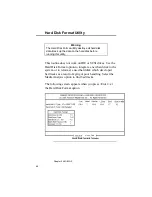
Page 92: ...is utility This routine does not work on IDE or SCSI drives Use the Hard Disk Format option to integrate a new hard disk to the system or to reformat a used hard disk which developed bad tracks as a result of aging or poor handling Select the Media Analysis option to find bad tracks The following screen appears when you press Enter at the Hard Disk Format option ...

Page 93: ...S Setup the cursor is on Interleave The Disk Drive Type is read from CMOS RAM The Interleave factor can be selected manually or determined by Auto Interleave The hard disk drive manufacturer usually provides a list of bad tracks Enter these tracks They are labeled as bad to prevent data from being stored on them The following screen is displayed after entering Y in Mark Bad Tracks pressing Enter a...

Page 94: ...Chapter 6 AMI BIOS 88 Hard Disk Format Utility Continued Type Y and press Enter The warning screen appears Warning The data on the hard drive will be irrevocably lost ...

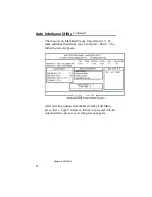
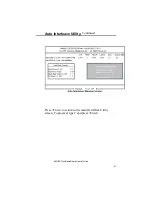
Page 95: ...ctor through trial and error by measuring the transfer rate for four different interleave values To determine the best interleave factor the system formats a portion of the hard disk for each transfer rate calculated The cylinders heads and sectors formatted for each value is displayed in the activity box It does not work on IDE or SCSI drives Select Auto Interleave on the main Hard Disk Utility S...

Page 96: ...n Mark Bad Tracks The default is N To mark additional bad tracks type Y and press Enter The following screen appears After selecting options from the Bad Tracks Edit Menu press Esc Type Y and press Enter to proceed with the Auto Interleave process A warning screen appears ...

Page 97: ...AMI EZ Flex Base Board User s Guide 91 Auto Interleave Utility Continued Press Enter to return to the main Hard Disk Utility screen To proceed type Y and press Enter ...

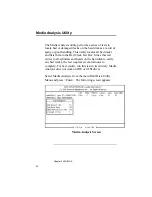
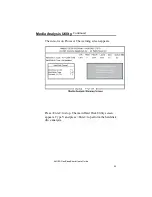
Page 98: ...bad tracks and lists them in the Bad Track List Box Since this test writes to all cylinders and heads on the hard disk to verify any bad tracks the test requires several minutes to complete For best results run this test in its entirety Media Analysis does not work on IDE or SCSI drives Select Media Analysis from the main Hard Disk Utility Menu and press Enter The following screen appears Media An...

Page 99: ...User s Guide 93 Media Analysis Utility Continued The cursor is on Proceed The warning screen appears Press Enter to stop The main Hard Disk Utility screen appears Type Y and press Enter to perform the hard disk drive analysis ...

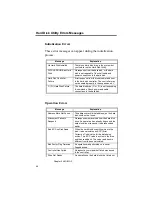
Page 100: ...o commands Check power and cable connections to the hard disk Operation Errors Message Explanation Address Mark Not Found The address mark initial address on the hard disk could not be found Attachment Failed to Respond No response was received from the hard disk drive An operation has already begun and the hard disk did not respond It had responded earlier Bad ECC on Disk Read When the hard disk ...

Page 101: ...ve read from the disk is not the same value which was written to the disk The data is not correct An attempt was made to correct the data but the ECC value is not corrected Requested Sector Not Found The requested sector could not be found Reset Failed The reset command did not properly reset the hard disk Seek Operation Failed A seek command failed A seek operation is the act of finding a particu...

Page 102: ...apter card worksheets Serial Number __________________________ Revision Number ________________________ ECN Number _____________________________ Memory Type for Bank1 and Bank2 ___ 1 MB x 9 SIMM check the type used ___ 4 MB x 9 SIMM Memory Type for Bank3 Bank4 ___ 1 MB x 9 SIMM Bank5 and Bank6 ___ 4 MB x 9 SIMM Memory Installed ___ Bank1 check the banks installed ___ Bank2 ___ Bank3 ___ Bank4 ___ ...

Page 103: ...AMI EZ Flex Base Board User s Guide 97 ...

Page 104: ...is sheet if there are more than two memory banks Amount of Memory __________________________ Starting Address hex ___________________________ Cacheable ___ Yes ___ No Type ___ RAM ___ ROM Use ___ System ___ Expanded ___ Virtual ___ Other Amount of Memory ___________________________ Starting Address hex ___________________________ Cacheable ___ Yes ___ No Type ___ RAM ___ ROM Use ___ System ___ Exp...

Page 105: ...2 ___ IRQ14 ___ IRQ15 Share ___ Yes ___ No Level Triggered Interrupts Interrupt line used ___ IRQ3 ___ IRQ4 ___ IRQ5 ___ IRQ6 ___ IRQ7 ___ IRQ9 ___ IRQ10 ___ IRQ11 ___ IRQ12 ___ IRQ14 ___ IRQ15 Switch and Jumper Settings ______________________________________________________________ ______________________________________________________________ _____________________________________________________...

Page 106: ...is sheet if there are more than two memory banks Amount of Memory ___________________________ Starting Address hex ___________________________ Cacheable ___ Yes ___ No Type ___ RAM ___ ROM Use ___ System ___ Expanded ___ Virtual ___ Other Amount of Memory ___________________________ Starting Address hex ___________________________ Cacheable ___ Yes ___ No Type ___ RAM ___ ROM Use ___ System ___ Ex...

Page 107: ...12 ___ IRQ14 ___ IRQ15 Share ___ Yes ___ No Level Triggered Interrupts Interrupt line used ___ IRQ3 ___ IRQ4 ___ IRQ5 ___ IRQ6 ___ IRQ7 ___ IRQ9 ___ IRQ10 ___ IRQ11 ___ IRQ12 ___ IRQ14 ___ IRQ15 Switch and Jumper Settings ______________________________________________________________ ______________________________________________________________ ____________________________________________________...

Page 108: ...is sheet if there are more than two memory banks Amount of Memory ___________________________ Starting Address hex ___________________________ Cacheable ___ Yes ___ No Type ___ RAM ___ ROM Use ___ System ___ Expanded ___ Virtual ___ Other Amount of Memory ___________________________ Starting Address hex ___________________________ Cacheable ___ Yes ___ No Type ___ RAM ___ ROM Use ___ System ___ Ex...

Page 109: ...12 ___ IRQ14 ___ IRQ15 Share ___ Yes ___ No Level Triggered Interrupts Interrupt line used ___ IRQ3 ___ IRQ4 ___ IRQ5 ___ IRQ6 ___ IRQ7 ___ IRQ9 ___ IRQ10 ___ IRQ11 ___ IRQ12 ___ IRQ14 ___ IRQ15 Switch and Jumper Settings ______________________________________________________________ ______________________________________________________________ ____________________________________________________...

Page 110: ...is sheet if there are more than two memory banks Amount of Memory ___________________________ Starting Address hex ___________________________ Cacheable ___ Yes ___ No Type ___ RAM ___ ROM Use ___ System ___ Expanded ___ Virtual ___ Other Amount of Memory ___________________________ Starting Address hex ___________________________ Cacheable ___ Yes ___ No Type ___ RAM ___ ROM Use ___ System ___ Ex...

Page 111: ...12 ___ IRQ14 ___ IRQ15 Share ___ Yes ___ No Level Triggered Interrupts Interrupt line used ___ IRQ3 ___ IRQ4 ___ IRQ5 ___ IRQ6 ___ IRQ7 ___ IRQ9 ___ IRQ10 ___ IRQ11 ___ IRQ12 ___ IRQ14 ___ IRQ15 Switch and Jumper Settings ______________________________________________________________ ______________________________________________________________ ____________________________________________________...

Page 112: ...is sheet if there are more than two memory banks Amount of Memory ___________________________ Starting Address hex ___________________________ Cacheable ___ Yes ___ No Type ___ RAM ___ ROM Use ___ System ___ Expanded ___ Virtual ___ Other Amount of Memory ___________________________ Starting Address hex ___________________________ Cacheable ___ Yes ___ No Type ___ RAM ___ ROM Use ___ System ___ Ex...

Page 113: ...12 ___ IRQ14 ___ IRQ15 Share ___ Yes ___ No Level Triggered Interrupts Interrupt line used ___ IRQ3 ___ IRQ4 ___ IRQ5 ___ IRQ6 ___ IRQ7 ___ IRQ9 ___ IRQ10 ___ IRQ11 ___ IRQ12 ___ IRQ14 ___ IRQ15 Switch and Jumper Settings ______________________________________________________________ ______________________________________________________________ ____________________________________________________...

Page 114: ...is sheet if there are more than two memory banks Amount of Memory ___________________________ Starting Address hex ___________________________ Cacheable ___ Yes ___ No Type ___ RAM ___ ROM Use ___ System ___ Expanded ___ Virtual ___ Other Amount of Memory ___________________________ Starting Address hex ___________________________ Cacheable ___ Yes ___ No Type ___ RAM ___ ROM Use ___ System ___ Ex...

Page 115: ...12 ___ IRQ14 ___ IRQ15 Share ___ Yes ___ No Level Triggered Interrupts Interrupt line used ___ IRQ3 ___ IRQ4 ___ IRQ5 ___ IRQ6 ___ IRQ7 ___ IRQ9 ___ IRQ10 ___ IRQ11 ___ IRQ12 ___ IRQ14 ___ IRQ15 Switch and Jumper Settings ______________________________________________________________ ______________________________________________________________ ____________________________________________________...

Page 116: ... this sheet if there are more than two memory banks Amount of Memory ___________________________ Starting Address hex ___________________________ Cacheable ___ Yes ___ No Type ___ RAM ___ ROM Use ___ System ___ Expanded ___ Virtual ___ Other Amount of Memory ___________________________ Starting Address hex ___________________________ Cacheable ___ Yes ___ No Type ___ RAM ___ ROM Use ___ System ___...

Page 117: ...12 ___ IRQ14 ___ IRQ15 Share ___ Yes ___ No Level Triggered Interrupts Interrupt line used ___ IRQ3 ___ IRQ4 ___ IRQ5 ___ IRQ6 ___ IRQ7 ___ IRQ9 ___ IRQ10 ___ IRQ11 ___ IRQ12 ___ IRQ14 ___ IRQ15 Switch and Jumper Settings ______________________________________________________________ ______________________________________________________________ ____________________________________________________...

Page 118: ...Appendix A EISA Configuration Worksheets 112 ...

Page 119: ...it is necessary to remove the heat generated by this power consumption For this reason we have supplied a heat sink with all AMI motherboards and CPU Cards that have a 50 MHz 80486DX CPU This incudes the AMI Series 16 Enterprise II EISA motherboard the AMI Series 50 Super Voyager motherboard and the AMI Series 37 EZ Flex 80486 CPU Card Since AMI manufactures only the motherboard and CPU Card syste...

Page 120: ...hour Expected Results If the temperature on the surface of the heat sink is 75 degrees centigrade or below there will be no problem with the operation of the computer Identifying a Problem If the temperature exceeds 75 degrees centigrade the system integrator must take the necessary measures to ensure that the 80486DX CPU does not overheat Potential Solutions 1 Install a fan to increase the air fl...

Page 121: ...rd Slots 39 Adapter Cards Connecting 37 Installation 35 Add in Cards 35 Address Line Short 51 Advanced CMOS Setup 69 Assembly 13 Audio connector 29 Auto Interleave 81 Auto Interleave Utility 86 Base 64 KB Memory Failure 50 Base Board 7 Installation 20 Beep Codes 50 BIOS Beep Codes 50 Errors 49 Fatal error messages 50 Features 3 Hard Disk Utilities 81 Password support 79 BIOS Setup 57 Board size 9 ...

Page 122: ...31 32 COM2 31 32 Configuration 46 System 3 CPU Card 7 D Drive Error 52 D drive failure 52 Default values loaded Press any key to continue 61 DIN 6 pin 26 Diskette Boot Failure 52 Diskette Drives 44 Display Memory Read Write Error 50 Display Switch Not Proper 52 DMA 1 Error 52 DMA 2 Error 52 DMA Error 52 ECU vi 4 32 37 47 54 EISA 2 EISA Adapter Card Pinout 41 EISA Adapter Cards 35 EISA Bus Connecto...

Page 123: ...nstallation 44 Floppy Drive 68 Floppy Drive Seek At Boot 74 Footprint 9 Format Utility 83 Hard Disk Configuration 65 Hard Disk Format 81 83 Hard Disk Parameter Table 66 Hard Disk utilities Error messages 91 When to use 82 Hard Disk Utility 81 HDD Controller Failure 52 Hit DEL if you want to run Setup 72 Hit DEL Message Display 72 I O Cards 35 I O Features 4 I O Port 80h 49 I O Slots 39 Installatio...

Page 124: ...ry cache 7 Memory Interleave 6 Memory Test Tick Sound 72 Monitor 68 Monochrome switch 17 Mouse 27 Mouse Support Option 72 NMI 55 No ROM BASIC 52 Numeric Weitek Processor s 74 Off Board Parity Error 53 On Board Parity Error 53 P001 25 P001 Keyboard Connector 25 P002 45 P003 27 P003 PS 2 Type Mouse Connector 27 P004 33 P005 25 P005 PS 2 Keyboard Connector 26 P006 31 32 P007 31 32 P008 39 P009 39 P01...

Page 125: ... Interrupt Error 50 Processors Configurations supported in EZ Flex 8 PS 2 Keyboard 26 PS 2 compatible mouse 26 PS001 21 PS001 Pinout 23 PS002 21 PS002 Pinout 23 PS003 21 22 PS003 Pinout 23 RAM 5 17 Page Mode 6 Refresh Failure 50 Reset button connector 28 ROM Checksum Error 50 SCSI 83 Serial Connector 31 Serial Port IRQ Conflicts 32 Serial Port Pinouts 32 Setup 57 Above 1 MB Memory Test 72 Advanced...

Page 126: ...If Any Error 74 warning screen 70 Shadowing 3 SIMM Sockets 19 SIMMs Installing 17 Part numbers 19 Selecting 18 Speed required 5 Speaker Cable connector 29 Speaker Connector 29 Specifications 9 10 Standard CMOS Setup 63 SW01 17 Switch settings 17 System Boot Up Num Lock 74 System Boot Up Sequence 74 System Configuration 3 System ROM Shadow 76 Technical Support 14 Testing 46 Timer Not Operational 50...

Reviews: