


1
1
7
7
5
5
6
6
-
-
Q
Q
S
S
1
1
0
0
4
4
A
A
-
-
E
E
N
N
-
-
P
P
C
C
o
o
n
n
t
t
r
r
o
o
l
l
L
L
o
o
g
g
i
i
x
x
Q
Q
u
u
i
i
c
c
k
k
S
S
t
t
a
a
r
r
t
t
Page 31
2. From the
Available Driver Types
pull-down menu, choose
RS-232 DF1 Devices
then click on the
Add
New
button.
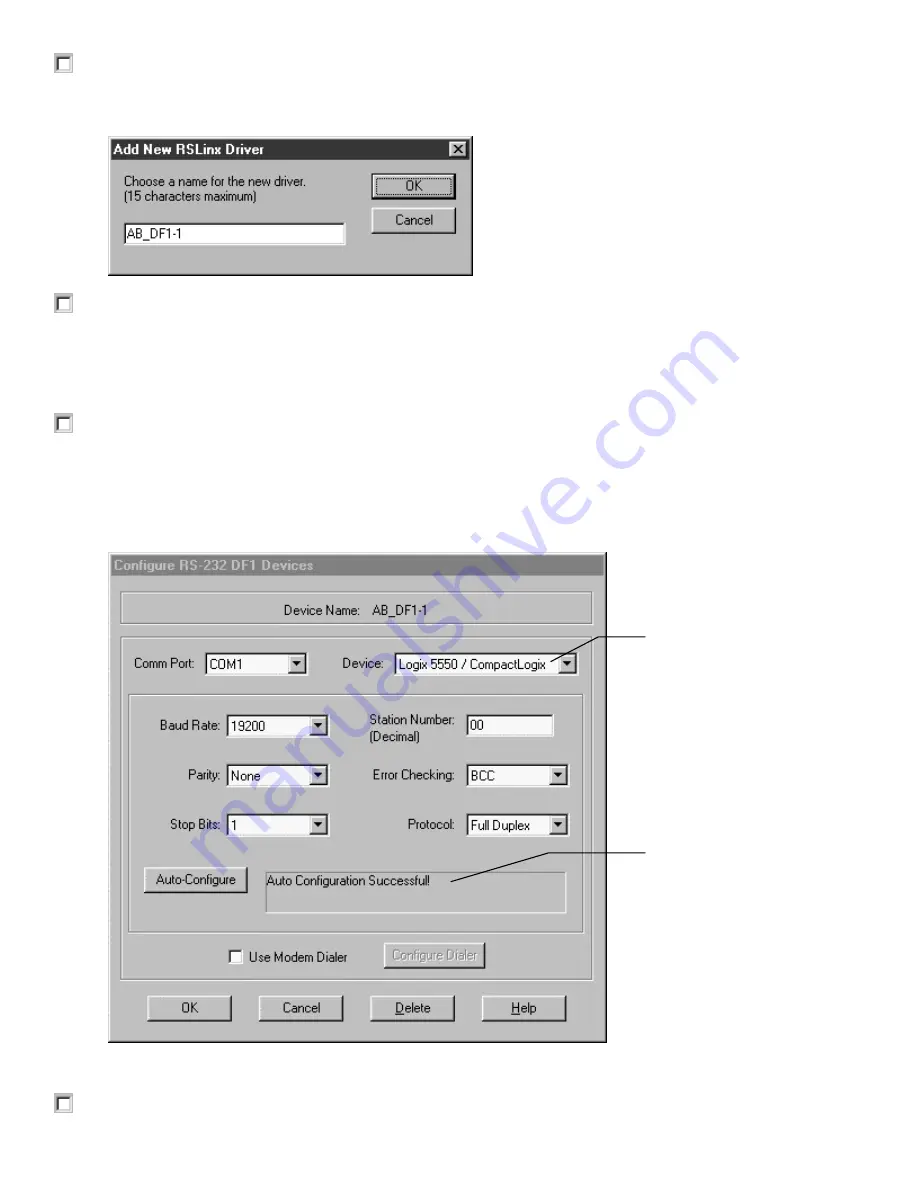
The Add New RSLinx Driver dialog box appears. You are prompted to enter a name for the driver.
3. Click on
OK
to accept the default name (AB_DF1).
The Configure Allen-Bradley DF1 Communications Device dialog box appears.
Important: Before you proceed, make sure that the serial cable (1756-CP3) is connected from the serial
port on the front of the controller to the serial port on your PC.
4. Click on the
Auto-Configure
button.
If the serial cable is attached correctly, RSLinx automatically sets the proper DF1 parameters for you
when you click this button.
The Configure Allen-Bradley DF1 Communications Device dialog refreshes, and the parameters appear
as follows:
Note:
The device field contains "Logix 5550/CompactLogix" regardless of the platform you are using.
5. If the parameters on your screen match the dialog as shown above, click on
OK
.
Note that the
controller serial
port is identified.
RSLinx displays a
message to indicate that
the Auto Configuration
process was successful.
Allen-Bradley Parts


