background image

Alienware Sentia 3450 Technical Reference

4

Preface

Instructions for Care and Operation 

The notebook computer is quite rugged, but it can be damaged. To prevent this, follow 
these suggestions: 

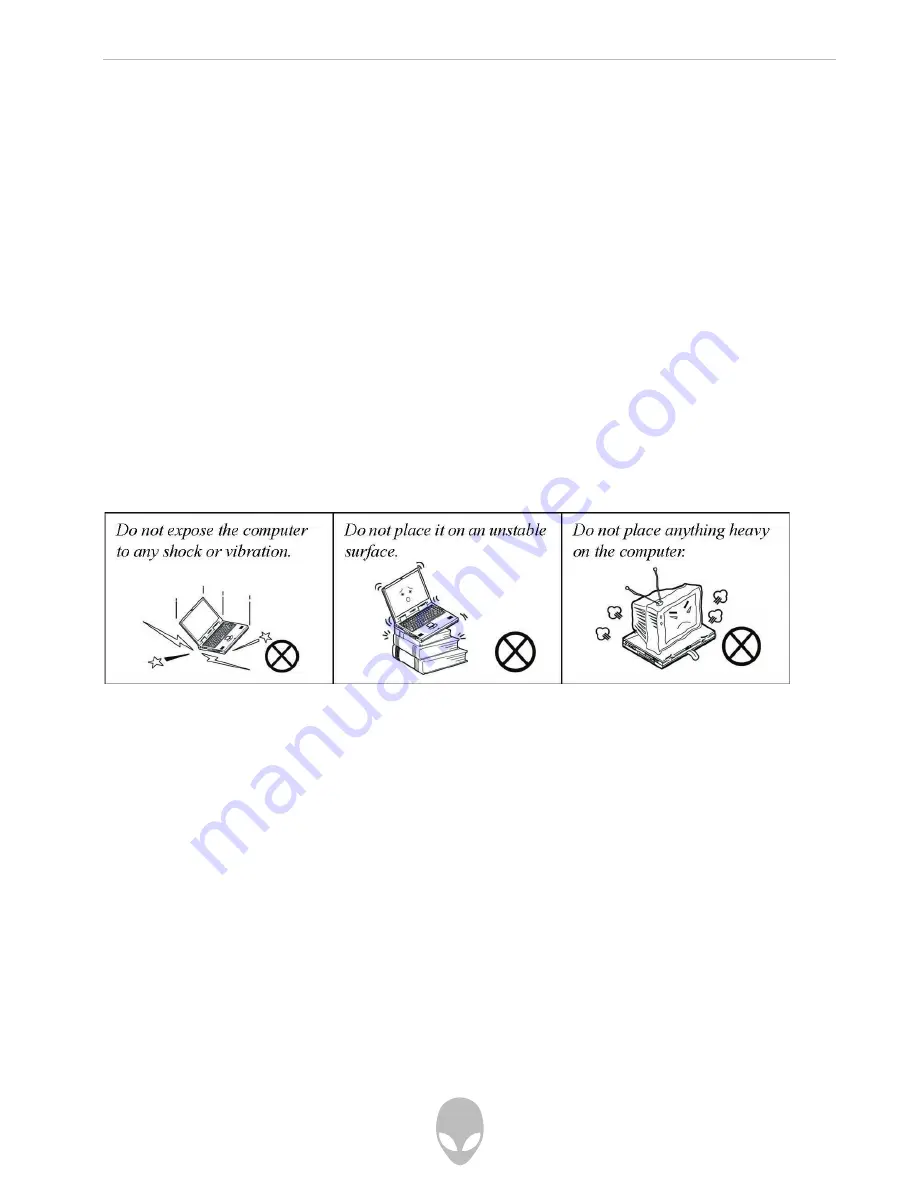
1. Don’t drop it, or expose it to shock. If the computer falls, the case and the    
  components could be damaged. 
2. Keep it dry, and don’t overheat it. Keep the computer and power supply away  
  from any kind of heating ele¬ment. This is an electrical appliance. If water or  
  any other liquid gets into it, the computer could be badly damaged. 
3. Avoid interference. Keep the computer away from high capacity transformers,  
  electric motors, and other strong magnetic fields. These can hinder proper    
  performance and damage your data. 
4. Follow the proper working procedures for the computer. Shut the computer    
  down properly and don’t forget to save your work. Remember to periodically   
  save your data as data may be lost if the battery is depleted. 

•  Do not expose it to excessive heat or direct sunlight. 
•  Do not leave it in a place where foreign matter or moisture may affect the  


  system. 
•  Don’t use or store the computer in a humid environment. 
•  Do not place the computer on any surface that will block the vents. 
•  Do not turn off the power until you properly shut down all programs. 
•  Do not turn off any peripheral devices when the computer is on. 
•  Do not disassemble the computer by yourself. 
•  Perform routine maintenance on your computer. 

5. Take care when using peripheral devices.
•  Use only approved brands of peripherals. 
•  Unplug the power cord before attaching peripheral devices. 
 

Summary of Contents for Sentia m3450

Page 1: ...t for copies kept by the user for backup purposes Brand and product names mentioned in this publication may or may not be copyrights and or registered trade marks of their respective companies They ar...

Page 2: ...n a particular installation If this equipment does cause harmful interference to radio or television reception which can be determined by turning the equipment off and on the user is encouraged to try...

Page 3: ...storm There may be a remote risk of electrical shock from lightning 3 Do not use the telephone to report a gas leak in the vicinity of the leak 4 Use only the power cord and batteries indicated in thi...

Page 4: ...performance and damage your data 4 Follow the proper working procedures for the computer Shut the computer down properly and don t forget to save your work Remember to periodically save your data as d...

Page 5: ...e a quali ed electrician install one When you want to unplug the power cord be sure to disconnect it by the plug head not by its wire Make sure the socket and any extension cord s you use can support...

Page 6: ...dispose of a damaged battery Always dispose of batteries carefully Batteries may explode or leak if exposed to re or improperly handled or discarded Keep the battery away from metal appliances Af x t...

Page 7: ...e power supply Then refer servicing to quali ed service personnel under any of the following conditions When the power cord or AC DC adapter is damaged or frayed If the computer has been exposed to ra...

Page 8: ...ny socket adapters 6 Put the notebook in its carrying bag and secure it with the bag s straps 7 If you re taking any peripherals e g a printer mouse or digital camera pack them and those devices adapt...

Page 9: ...oy any stored data Pass your computer and disks around the devices Ask security of cials to hand inspect them you may be asked to turn it on Note Some airports also scan luggage with these devices Fly...

Page 10: ...rtably Sit straight so that your knees hips and elbows form approximately 90 degree angles when you are working Take periodic breaks if you are using the computer for long periods of time Remember to...

Page 11: ...tartup 1 4 Top View with LCD Panel Open 1 5 LED Indicators 1 6 Hot Key Buttons Keyboard 1 7 Function Keys 1 8 System Map Front Rear Views 1 9 System Map Left View 1 10 System Map Right View 1 11 Syste...

Page 12: ...6 Hibernate Mode vs Shutdown 3 6 Stand by Mode vs Hibernate Mode 3 6 Stand by 3 7 Hibernate 3 7 Con guring the Power Button 3 8 Battery Information 3 9 New Battery 3 9 Battery Life 3 9 Recharging the...

Page 13: ...0 Master SATA Port 1 Main Menu 5 7 System Extended Memory Main Menu 5 7 Advanced Menu 5 8 Installed O S Advanced Menu 5 8 Reset Con guration Data Advanced Menu 5 9 Legacy USB Support Advanced Menu 5 9...

Page 14: ...13 Port Replicator Network LAN Driver WinXP 7 14 Troubleshooting Overview 8 1 Basic Hints and Tips 8 2 Backup and General Maintenance 8 3 Viruses 8 4 Upgrading and Adding New Hardware Software 8 5 Pow...

Page 15: ...o Driver Installation B 1 Dynamic Video Memory Technology B 2 Intel Graphics Properties B 3 Display Devices B 5 Attaching Other Displays B 6 Display Modes B 7 TV Settings B 11 Speci cations Processor...

Page 16: ...Alienware Sentia 3450 Technical Reference 16...

Page 17: ...ower saving options Chapter 4 The installation of the drivers and utilities essential to the operation or improvement of some of the computer s subsystems Chapter 5 An outline of the computer s built...

Page 18: ...to refer to the notes marked with a marker symbol as indicated in the margin For a more detailed description of any of the interface ports and jacks see Interface Ports Jacks on page A 1 Warning Boxes...

Page 19: ...tebook Ports and Jacks on page A 2 for a description of the interface ports jacks which allow your computer to communicate with external devices connect to the internet etc System Software Your comput...

Page 20: ...t the AC power cord to the AC DC adapter Note If you have included the Port Replicator in your purchase option see page 7 12 5 Raise the lid LCD to a comfortable viewing angle and press the power butt...

Page 21: ...Panel Open Figure 1 2 Top View with LCD Panel Open 1 Optional Built In PC Camera 2 LCD 3 Speakers 4 LED Status Indicators 5 Hot Key Buttons 6 Power Button 7 Keyboard 8 TouchPad and Buttons 9 LED Powe...

Page 22: ...th modules and check the status indicator icon to see if the modules are powered on or not see Table 1 2 on page 1 6 Table 1 4 on page 1 8 LED Indicators The two sets of LED indicators LED Status Indi...

Page 23: ...uter is Powered Off Amber The AC DC Adapter is Plugged In the Battery is Charging Blinking Amber The Battery Has Reached Critically Low Power Status Blue The Battery is Fully Charged Table 1 2 LED Pow...

Page 24: ...tivate the user speci ed application e g Microsoft Word or Excel Activate the Default E Mail Program Activate the Default Internet Browser See Application Hot Key on page 2 10 for con guration instruc...

Page 25: ...see Figure 1 3 Table 1 4 Function Keys Keys Description Fn Function Key Fn 1 Touchpad Toggle Fn F3 Mute Toggle Fn F4 Sleep Toggle Fn F5 Decrease Audio Volume Fn F6 Increase Audio Volume Fn F7 Display...

Page 26: ...ome software applications allow the number keys to be used with Alt to produce special characters These special characters can only be produced by using the numeric keypad Regular number keys in the u...

Page 27: ...Reference 27 System Map Front Rear Views Figure 1 4 Front Rear Views Front Rear Views 1 LED Power Communication Indicators 2 4 in 1 Card Reader 3 External Monitor Port 4 S Video Out Jack 5 Security L...

Page 28: ...r digital storage card formats MMC MultiMedia Card SD Secure Digital MS Memory Stick MS Pro Memory Stick Pro System Map Left View Figure 1 4 Left View 1 RJ 45 LAN Jack 2 Vent Fan Intake 3 2 USB 2 0 Po...

Page 29: ...MultiMedia Card SD Secure Digital MS Memory Stick MS Pro Memory Stick Pro CD Emergency Eject If you need to manually eject a CD DVD e g due to an unexpected power interruption you may push the end of...

Page 30: ...the next to DVD CD ROM drives Double click on the DVD ROM device to bring up the Properties dialogue box and select the DVD Region tab to bring up the control panel to allow you to adjust the regiona...

Page 31: ...U in any way may violate your warranty Overheating To prevent your computer from overheating make sure nothing blocks the Vent Fan Intake while the computer is in use Battery Information Always comple...

Page 32: ...enu and selecting Properties from the menu In many instances throughout this manual you will see an instruction to open the Control Panel The Control Panel is accessed from the Start menu The Control...

Page 33: ...preferred setting in Colors Color Quality 2 6 You can also access Display Properties by right clicking the desktop and scrolling down and clicking Properties Click Settings tab and adjust as above 7...

Page 34: ...splays with the same content and resolutions color quality etc Intel R Dual Display Clone Mode Both connected displays output the same view and may be con gured independently Extended Desktop Mode Bot...

Page 35: ...Stand by or Hibernate mode to conserve power throughout the system enable Hibernate support from the control panel as pictured in Figure 1 10 Pay attention to the instructions on battery care in Batte...

Page 36: ...Card Reader Express Card Slot Auto Mail Checker Application Hot Key TouchPad and Buttons Mouse Audio Features Adding a Printer Hard Disk Drive The hard disk drive is used to store your data in the com...

Page 37: ...r the disc to click onto the tray s spindle Gently push the CD DVD tray in until its lock clicks and you are ready to start The busy indicator 2 will light up while data is being accessed or while an...

Page 38: ...er materials to the surface of the disc Do not store or place the CD or DVD in high temperature areas Do not use benzene thinner or other cleaners to clean the CD or DVD Do not bend the CD or DVD Do n...

Page 39: ...ional Coding Region Geographical Location 1 USA Canada 2 Western Europe Japan South Africa Middle East Egypt 3 South East Asia Taiwan South Korea The Philippines Indonesia Hong Kong 4 South Central Am...

Page 40: ...are usually supplied with these cards Figure 2 4 Left View 1 Card Reader ExpressCard Slot The computer is equipped with an ExpressCard 34 54 slot that reads Express Card 34 and ExpressCard 54 formats...

Page 41: ...Technical Reference 41 Inserting and Removing ExpressCards Align the ExpressCard with the slot and push it in until it locks into place To remove an ExpressCard simply press the card to eject it Figur...

Page 42: ...bar if you do not see the icon in the taskbar go to Start Programs All Programs Auto Mail Checker Auto Mail Checker Right clicking on the icon will bring up the following options menu If you have not...

Page 43: ...e application hot key is pressed Windows Media Player is the default program follow the instructions below 1 Right click the Hot Key driver icon in the taskbar 2 Select Setup from the menu scroll to A...

Page 44: ...have installed the TouchPad driver you can con gure the functions by double clicking the TouchPad driver icon in the taskbar or by going to the Mouse control panel in Windows Start menu and point to...

Page 45: ...means of the Fn F5 F6 key combination Figure 2 10 Realtek Audio Con guration Menus Sound Volume Adjust8 Channel Sound Support If you wish to con gure your system for 8 channel sound support then the f...

Page 46: ...up the printer according to its instructions unpacking paper tray toner ink cartridge etc 2 Turn ON the computer 3 Turn ON the printer 4 Connect the printer s USB cable to one of the USB ports on the...

Page 47: ...Alienware Sentia 3450 Technical Reference 47...

Page 48: ...system OS direct control over the power and thermal states of devices and processors For example it enables the OS to set devices into low power states based on user settings and information from app...

Page 49: ...ear of the computer 2 Plug the AC power cord into an outlet and then connect the AC power cord to the AC DC adapter 3 Raise the lid LCD to a comfortable viewing angle 4 Press the power button to turn...

Page 50: ...n this will shut the computer down Use Power Options in the Windows control panel to con gure this feature Forced Off If the system hangs and the Ctrl Alt Del key combination doesn t work press the po...

Page 51: ...set a speci ed time for the system to enter Stand by or Hibernate modes Figure 3 1 Power Schemes Each Windows Power Scheme will also adjust the processor performance of your machine in order to save p...

Page 52: ...while you can put the system on Stand by instead of in hibernation It takes a longer time to wake up the system from Hibernate mode than from Stand by mode Stand by Stand by saves the least amount of...

Page 53: ...le Hibernation System Resume The system can resume from Stand by mode by Pressing the power button Pressing the Fn F4 key combination An alarm resume that is enabled and expires An incoming call recei...

Page 54: ...ll blink green In Hibernate mode the LED will be off If you are in a power saving mode set to save power through individual components e g hard disk monitor the LED will remain green Power Button Lid...

Page 55: ...Options you may set low battery Alarms and actions and check the Power Meter from the Power Options control panel and settings in the OS will help prolong the battery life if con gured appropriately B...

Page 56: ...tery to re or high temperatures it may explode DO NOT connect the metal terminals to each other Low Battery Warning When the battery is low immediately connect the AC DC adapter to the computer or sav...

Page 57: ...charge the battery Use the computer with battery power until it shuts down due to a low battery Don t turn off the computer by yourself even when you see a message that indicates the battery is critic...

Page 58: ...ities The following operating system is covered Windows XP Professional and Home Editions with Service Pack 2 What to Install The Device Drivers Utilities User s Manual CDROM contains the drivers and...

Page 59: ...computers are setup the same way and some computers have the CD listed under a different drive letter e g if you have two hard drives or hard disk partitions one may be designated as Drive C and the o...

Page 60: ...n is listed then no Service Pack is installed Windows XP Service Pack 2 Make sure you install Windows XP Service Pack 2 or make a Windows XP version which includes Service Pack 2 before installing any...

Page 61: ...update reinstall individual drivers it may be necessary to uninstall the original driver To do this go to the Control Panel in the Windows OS and double click the Add Remove Programs item If you see t...

Page 62: ...ion screen menu 2 Double click to select the name of the driver you wish to install 3 Follow the instructions as listed in this chapter 4 Make a note of the drivers you have installed 5 If a restart i...

Page 63: ...ion and then follow the manual installation procedure for each driver The manual installation procedure be gins with instructions on how to browse to the executable le Click Start menu Run Windows XP...

Page 64: ...ed in the driver install procedure click Cancel to close the window and follow the installation procedure Chipset 1 Double click Chipset 2 Give the driver time to install and the com puter will restar...

Page 65: ...to D Drivers 01VGA setup exe and click OK 2 Click Next click Continue Anyway if asked if you want to continue at any time 3 Click Finish to restart the computer Audio 1 Double click Audio 2 The instal...

Page 66: ...t 3 The modem is now ready for con guration 4 Click Install Finish LAN 1 Double click Lan 2 Give the driver time to install and a Local Area Connection bubble will appear in the bottom right of the sc...

Page 67: ...t your computer TouchPad 1 Double click Touchpad 2 Give the driver time to install and then restart the computer to complete the installation the TouchPad driver icon will appear in the task bar OR 1...

Page 68: ...e program from the Auto Mail Checker in the Start menu Start Programs All Programs Auto Mail Checker 4 Click the X icon in the taskbar to input the e mail account details 5 For further details see Aut...

Page 69: ...stallation on page 7 9 or MSI 6833B WLAN Driver Installation on page 7 10 Bluetooth See the install procedure in Bluetooth Driver Installation on page 7 12 TV Tuner See the install procedure for your...

Page 70: ...settings found in Setup Even if you are a beginner keep a record of the set tings you nd and any changes you make This information could be useful if your system ever needs servicing There is one gen...

Page 71: ...anything wrong If there is a problem that prevents the system from booting it will display a system summary and prompt you to run Setup If there are no problems the Setup prompt will disappear and the...

Page 72: ...authorized service center as soon as possible Non Fatal Errors This kind of error still allows you to boot You will get a message identifying the problem make a note of this message followed by the p...

Page 73: ...portions of the Setup Along the top of the screen is a menu bar with ve 5 menu headings When you select a heading a new screen appears Scroll through the features listed on each screen to make change...

Page 74: ...ect these changes Primary Master SATA Port 3 4 Main Menu Pressing Enter here opens the sub menu to show the con guration of hard disks and CD DVD device s on the computer s SATA Channels Use the Auto...

Page 75: ...ced Menu The sub menus under this item allow you to enable disable the Serial port A Serial Mouse and FIR Infrared transceiver Reset Con guration Data Advanced Menu This item is set to No as default Y...

Page 76: ...ter If Enabled is selected only users who enter a correct password can boot the system see the warning in the sidebar The default setting is Disabled Note To clear existing passwords press Enter and t...

Page 77: ...ning If you set a boot password Password on boot is Enabled NEVER forget your password The consequences of this could be serious If you cannot remember your boot password you must contact your vendor...

Page 78: ...erating system e g WindowsXP from the devices listed in this menu and in this priority order If it cannot nd the operating system on that device it will try to load it from the next device in the orde...

Page 79: ...osing to Discard Changes or Exit Discarding Changes will wipe out any changes you have made to the Setup You can also choose to restore the original Setup defaults that will return the Setup to its or...

Page 80: ...ground yourself because static electricity may damage the components The chapter includes Removing the Battery Upgrading the Hard Disk Drive s Upgrading the System Memory RAM Upgrading the Optical CD...

Page 81: ...der any of these conditions contact your service representative to purchase or replace the component s Removal Warning When removing any cover s and screw s for the purposesof device upgrade remember...

Page 82: ...the latch in the direction of the arrow and hold it in place 3 Slide the battery in the direction of the arrow 4 Lift the battery up and out in the direction of the arrow 5 Insert the battery by push...

Page 83: ...l necessary drivers and utilities when setting up a new hard disk 1 Turn off the computer and turn it over and remove the battery 2 Locate the hard disk bay cover and remove screws 3 Pull the tab to s...

Page 84: ...200 pin Small Outline Dual In line SO DIMM DDR type memory modules The total mem ory size is automatically detected by the POST routine once you turn on your com puter 1 Turn off the computer and turn...

Page 85: ...t about a 30 angle and t the connectors rmly into the memory slot 8 The module s pin alignment will allow it to only t one way Make sure the module is seated as far into the slot as it will go DO NOT...

Page 86: ...evice s 1 Turn off the computer and turn it over and remove the battery 2 Locate the module bay cover and remove screws and remove the bay cover 3 Use a screwdriver to carefully push out the optical d...

Page 87: ...need to contact your customer service representative We recommend that you do not do this yourself since if it is done incorrectly you may damage the processor or mainboard Warranty The CPU is not a...

Page 88: ...Alienware Sentia 3450 Technical Reference 88...

Page 89: ...ra Module If your purchase includes the optional PC Camera you will need to install the device driver for it as indicated on the following pages PC Camera Driver Installation 1 Insert the PC Camera CD...

Page 90: ...nds Audio Devices icon Sounds Speech and Audio Devices in Category View 2 Click Advanced in Device volume Volume tab 3 Click Options and scroll down and click Properties 4 Select Realtek AC97 Audio fr...

Page 91: ...0 Technical Reference 91 Latest PC Camera Driver Information Check the PC Camera CD and any accompanying insert pages for the latest updated information on the PC Camera driver which may override the...

Page 92: ...Space for the captured le Click Start Capture again 4 Click OK to start capturing the video and press Esc to stop the capture 5 If you wish to you may go to the File menu and select Save Captured Vide...

Page 93: ...EMAMCAP program is ickering you can try to adjust the setting in the Lighting Selection options 1 Run the EMAMCAP program 2 Go to Options and scroll down to select Video Capture Filter 3 Click Video...

Page 94: ...Wireless Device Operation Aboard Aircraft The use of any portable electronic transmission devices aboard aircraft is usally prohibited Make sure the module s are OFF if you are using the computer aboa...

Page 95: ...Instructions for con guration information 1 4 USB Ports 2 RJ 45 LAN Jack 3 Parallel printer Port 4 Serial Port 5 External Monitor Port 6 Port Replicator DC In 7 Port Replicator Power Cable to computer...

Page 96: ...Serial COM Port Driver WinXP 1 Insert the provided Port Replicator CD into the computer s CD DVD drive 2 Click Start menu Run and navigate Browse to D PL 2303 Driver Installer PL 2303 Driver Installer...

Page 97: ...then click Next 10 When the Hardware Update Wizard appears click Install from a list or speci c location Advanced and then click Next 11 Select Search for the best driver in these driver in these loc...

Page 98: ...s powered on and then insert the Bluetooth CDROM into the CD DVD drive 2 The program will run automatically 3 Choose the language you prefer and click OK 4 Click Next 5 Click the button to accept the...

Page 99: ...Many of the following may seem obvious but they are often the solution to a problem when your computer ap pears not to be working Power Is the computer actually plugged into a working electrical outle...

Page 100: ...Anti Virus program and keep the de nitions le the le which tells your program which viruses to look for up to date New computer viruses are discovered daily and some of them may seriously harm your co...

Page 101: ...in many cases you will need to restart the computer Always check that all the cables are correctly connected Make sure you have installed the drivers for any new hardware you have installed latest dri...

Page 102: ...feels too hot Make sure the computer is properly ventilated and the vents fan intakes are not blocked If this doesn t cool it down put the system into Hibernate mode or turn if off for an hour Make s...

Page 103: ...have timed out Use the AC DCadapter press a key on the keyboard or press the sleep Fn F4 key combination or press the power button if no LEDs are lit The system never goes into a power saving mode Pow...

Page 104: ...GA Port This port allows you to connect an external monitor or Flat Panel Display to get dual video or simultaneous display on the LCD and external monitor FPD Headphone Out Jack Headphones or speaker...

Page 105: ...d Security Lock Slot To prevent possible theft a Kensington type lock can be attached to this slot Locks can be purchased at any computer store Serial Port Connect a serial type mouse to this port S V...

Page 106: ...the computer s speakers Note that audio input through Line in will default to the mute setting To set up your audio sources to play through the Line in jack go to the Sounds and Audio Devices Windows...

Page 107: ...OR Click Start menu Run and navigate Browse to D Drivers Video setup exe and click OK 2 ClickNext clickContinue Anyway if asked ifyou want to continue at any time 3 Click Finish to restart the comput...

Page 108: ...tton 3 You can also access Graphics Properties from the Windows Intel R GMA Driver for Mobile control panel or from the taskbar icon Taskbar Icon You can also access the controller properties from the...

Page 109: ...the computer and see the Support tab in Information to get weblinks to the latest information on the Intel Website Help Menus Right click on many of the items in the tabs to bring up the What s This b...

Page 110: ...refresh Switching Modes When Using the Power DVD Application Switch display modes before playing any DVD in the Power DVD Application it is not be possible to switch display modes while a DVD is play...

Page 111: ...Clone This mode will drive multiple displays with the same content Each device may be con gured independently for different resolutions refresh rates color quality etc Use this feature to display the...

Page 112: ...or port or TV to the S Video Out jack and turn it on 2 Go to the Graphics Properties control panel see Intel Graphics Properties and click Display Devices 3 Click to choose Intel R Dual Display Clone...

Page 113: ...3 Click to choose Extended Desktop 4 Click Apply and OK to con rm the settings change 5 Click Display Settings to adjust the settings for the attached devices Click the appropriate monitor icon and dr...

Page 114: ...5 Click the monitor icon e g and make sure you have checked Extend my Windows desktop onto this monitor and click Apply Click the appropriate monitor icon e g to be able to select the option to extend...

Page 115: ...Logic Intel 945GM ICH7 M LCD 14 0 WXGA 1280 768 Flat Panel TFT Security Security Kensington Type Lock Slot BIOS Password Memory Two 200 Pin SO DIMM Sockets Supporting DDRII DDR2 533 667 MHz 128 bit W...

Page 116: ...by Mode Supports Battery Low Suspend Supports Resume from Modem Ring Supports Wake on LAN Feature Speci cations Power Full Range AC DC Adapter 20V 3 25A 65 Watts 100 240V 47 63Hz Full Range AC DC Adap...

Page 117: ...Alienware Sentia 3450 Technical Reference 117...

Reviews: