OG-X-FR openGear Frame v1.0r1 25 www.aja.com
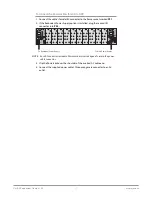
3. Power on the openGear frame that the Network Controller card is installed
in.
4. Wait approximately 30 seconds while the frame establishes network
communications.
5. Verify that the Network Controller Card displays in the Tree View of
DashBoard.
6. Should the card fail to display after two minutes:
• Verify the Ethernet cables are properly connected.
• Check the link/activity LEDs found on the Ethernet RJ-45 connectors.
• Ensure the network settings for the Network Controller card are set to the
factory default values.
• If all cables are connected and the LEDs do not indicate an error, then
automatic configuration is not possible. Proceed to the section
"Preset
Configuration using DIP Switches" on page 25
.
Preset Configuration using DIP Switches
This method is used to established initial communications when no DHCP server
is available, or to override a custom user configuration and is intended to be used
temporarily in order to establish communication. Once initial communications are
established, the Network Controller card should be configured for either DHCP or
Static operation.
NOTE: Use of this method for normal operation is not recommended, as there is a high
chance of IP Address conflicts.
To use a preset network configuration using the DIP Switch(es)
1. Power down the openGear frame that houses the Network Controller card.
2. Quit DashBoard on your computer.
3. Set the DIP Switch to specify the preset IP Address as outlined in the
applicable Setup chapter of this manual for your Network Controller card
model.
4. Ensure the network settings of your computer are compatible with those
chosen for the Network Controller card.
NOTE: The IP Addresses of the Network Controller Card and your computer must be
similar, but not identical, and the Subnet Mask must match exactly the same.
For example, if the Network Controller card has an IP Address of 192.168.2.1, then
your computer should be configured for an IP Address with 192.168.2.X where X is
a number other than 1.
5. Before you begin, and to prevent IP Address conflicts, isolate the Network
Controller Card and your DashBoard computer from the rest of your
network.
• If you are using a hub or switch, unplug all devices except the Network
Controller Card and your DashBoard computer; or
• Connect the openGear frame directly to the DashBoard computer.
NOTE: The MFC-8322-S supports Auto-MDIX, enabling you to use any Ethernet cable
when connecting the frame to the DashBoard computer.
6. Launch DashBoard on your computer.
7. Power up the openGear frame.
8. Wait approximately 30 seconds while the frame establishes network
communications.
9. Verify that the Network Controller Card displays in the Tree View of
DashBoard.


